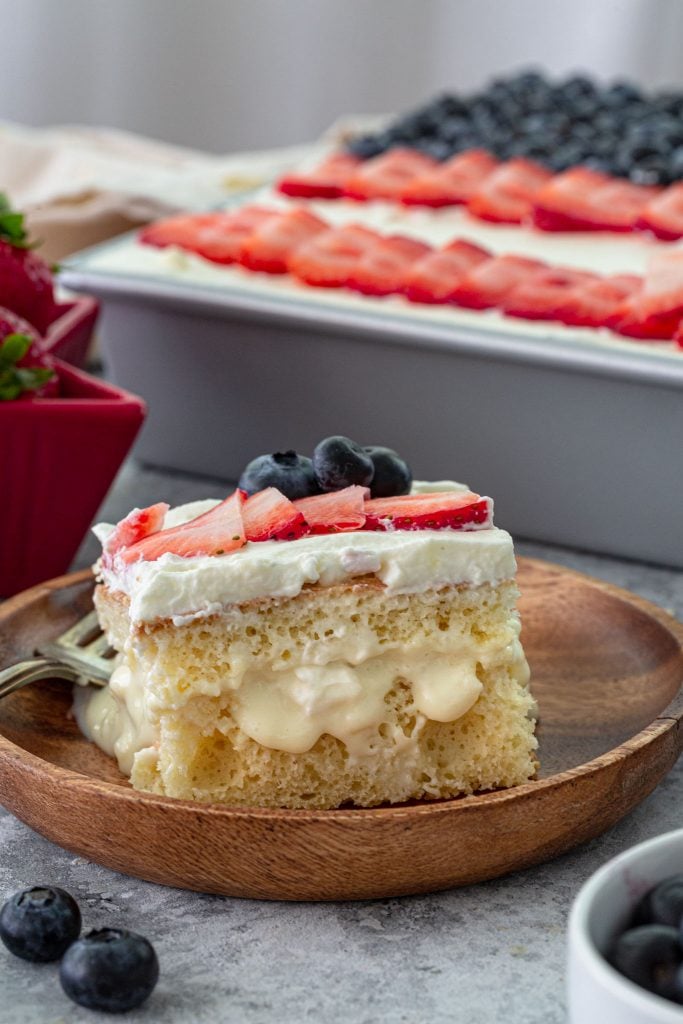
American Flag Cake

An American Flag Cake that not only looks pretty and patriotic but also tastes amazing? Yes, it exists! And it makes an eye-catching centerpiece for your Memorial Day or Fourth of July celebrations.
Consisting of a classic Bolo de Leite Ninho, but decorated Red, White and Blue, this cake is just like me: a little Brazilian, a little American and a whole lot of delicious!
Earlier this year, I decided that I wanted to bring a Flag Cake to our neighborhood Memorial Day cookout. As I was browsing through some recipes, I noticed they were all kinda boring. Usually some sort of white cake (sometimes from a box) topped with frosting or Cool Whip and decorated with berries.
Well, I don’t know about you, but if I’m going to cheat on my diet and eat cake, it had better be a cake to remember!
So I combined a favorite from my childhood with the typical berry flag design and this American Flag Cake was born. Creamy, luscious and oh so moist!
What is Leite Ninho?
Leite Ninho is powdered milk.
Powdered or dried milk is a manufactured dairy product made by removing all of the moisture from milk. The main purpose of doing this is to preserve it, as dried milk has a far longer shelf life than liquid milk and doesn’t need to be refrigerated.
However, in Brazil, it is used in several recipes. Pretty much whenever you need to add richness, thickness and/or creaminess! So you will find it in cakes, mousses, trifles, flan, ice cream, bread, cookies and even as a topping for popcorn.
As for buying it, you will find it in the baking aisle of your grocery store, in big zip-top bags or canisters. If it’s not there, try the coffee/tea aisle, as it can sometimes be next to the powdered coffee creamers. Don’t confuse them though, as they are not the same!
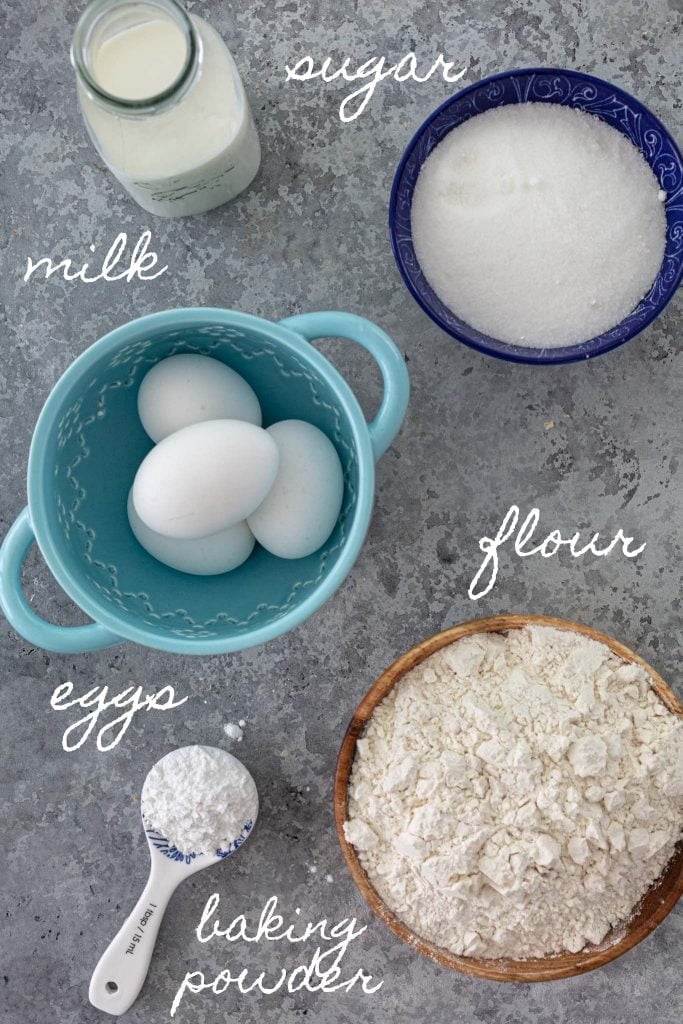
Ingredients for Sponge Cake
- Eggs
- Sugar
- Milk
- Flour
- Baking Powder
You will notice that there’s no butter or oil in this cake. The cake gets its spongy structure, lightness and open texture from whipping the eggs until fluffy and aerated.
As for flavor, that will come from soaking all the frosting goodness. Yes, this cake, by itself, is not something you would enjoying eating. But once you give it the chance to soak the other flavors, it becomes moist, slightly sweet and unbelievably creamy!
How to Make Sponge Cake
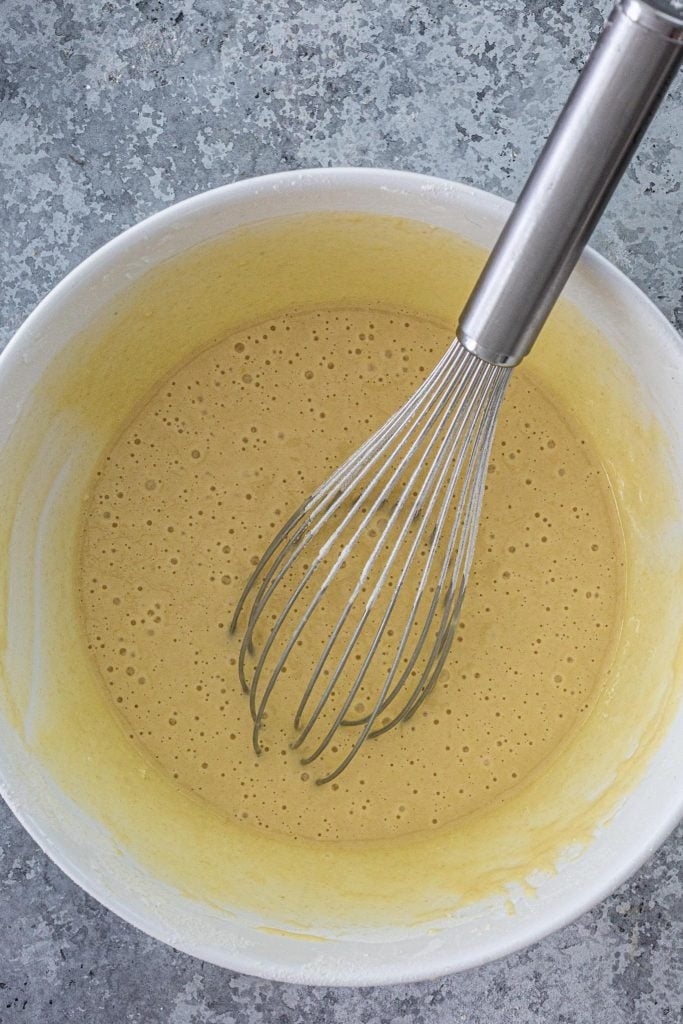
- Start by beating the eggs and sugar with a hand mixer. We want a voluminous and light mixture, so don’t be afraid to spend some time in this step!
- Next, ditch the hand mixer and get a whisk or wooden spoon. Add the flour, sifting with a fine sieve, a little at a time, alternating with the milk. Getting air into the batter and keeping it in it are key to lightness in this cake, so be gentle!
- Fold in the baking powder.
- Transfer the batter to a prepared cake pan (I line mine with parchment paper) and bake in a preheated to 350 degrees F oven until a cake tester inserted in the middle comes out clean.
Tips and tricks for the best sponge cake:
- Eggs aerate more rapidly when they are slightly warm. So, if you can plan ahead, let them sit at room temperature for a little while before preparing the cake!
- While you want to be gentle when folding in the flour and milk, make sure that no streaks of flour remain in the batter.
- The success of this cake requires skillful folding. If you’re not confident in your folding abilities, you can separate the eggs. Mix the egg yolks with the sugar and proceed with the recipe as it is. Then, right before baking, fold in the whipped egg whites. That should help with aeration!
- Once the batter is done, bake immediately! It shouldn’t sit out too long.
- Always preheat your oven when baking cakes (or anything, really)!
- Resist the urge to open the oven door to check on the cake. Wait for it to look golden brown on the top to start checking, or it might deflate!
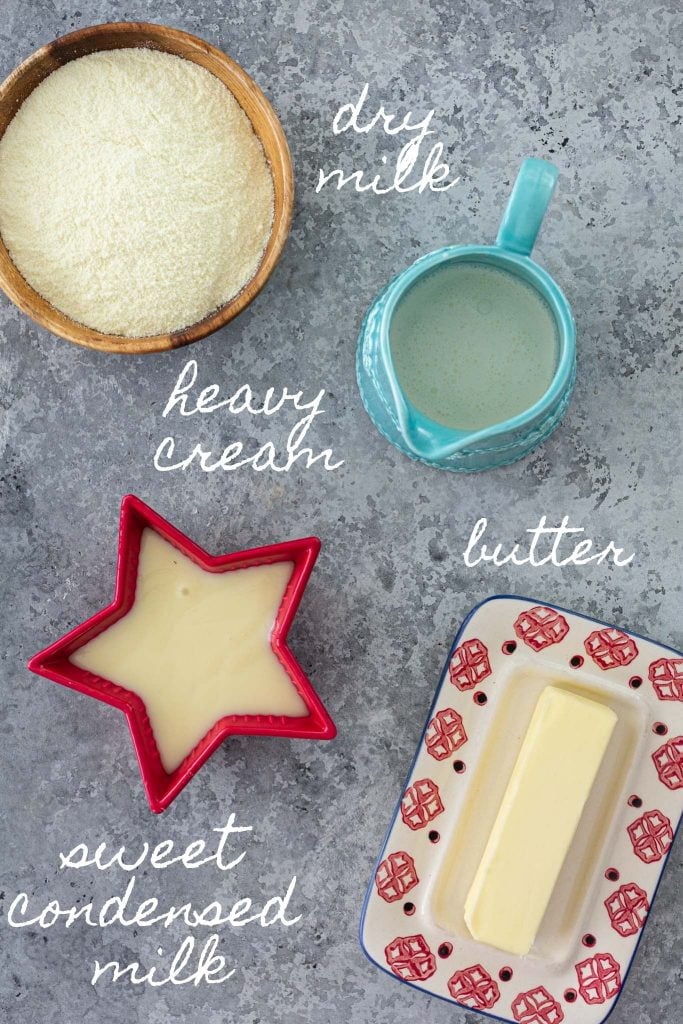
Ingredients for Powdered Milk Frosting
Now it’s time for flavor! Here’s what you’ll need:
- Powdered milk
- Sweet condensed milk
- Butter, room temperature
- Heavy cream
How to make Leite Ninho Frosting
To make the frosting, all you gotta do is beat all the ingredients with a hand mixer until smooth and fluffy. Unless you have muscles of steel, don’t attempt doing it by hand or you might not get the same results!
Then, refrigerate for one hour or, if you’re in a hurry, pop it in the freezer for 15 minutes.
When ready to assemble, whisk or beat with a hand mixer, to bring back to a creamy consistency, as it can get a bit dense when cold.
This frosting can be made ahead and refrigerated for up to 3 days!

Assembling a Flag Cake
- Once the cake has cooled, unmold it and transfer to a large cutting board.
- Cut the cake in half, horizontally, with the aid of a serrated knife. No need to worry about the domed top, as that will go underneath everything else.
- Place the top layer, domed top down and cut side up, back in the cake pan. We are going to serve the cake straight from the pan!
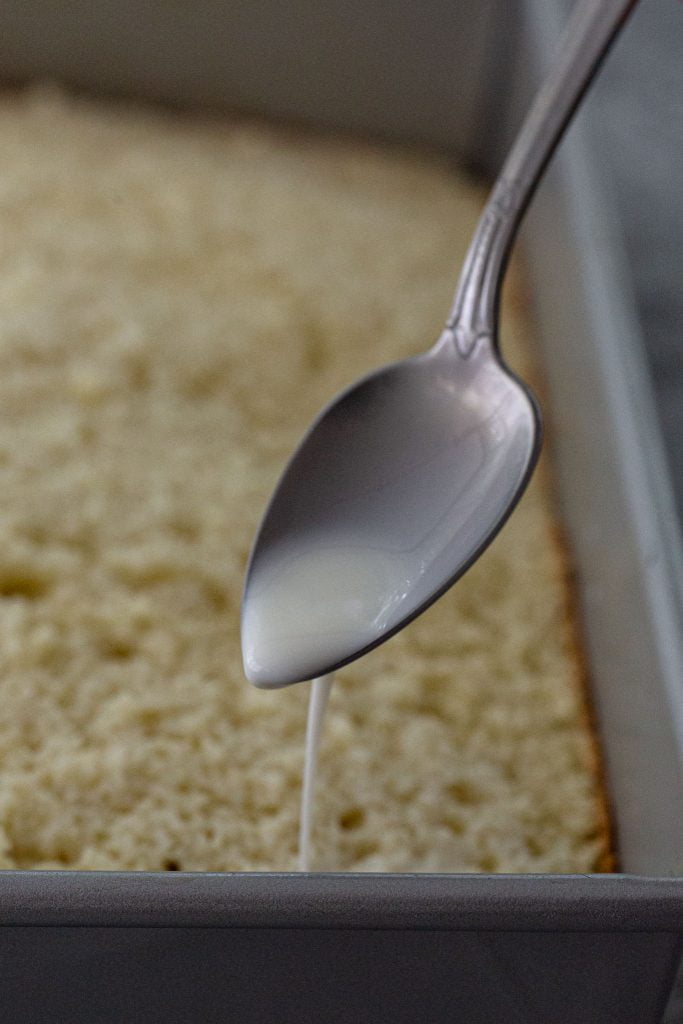
- Pour half of the milk soak (a combination of milk and sweet condensed milk) all over the surface of that first layer of cake.
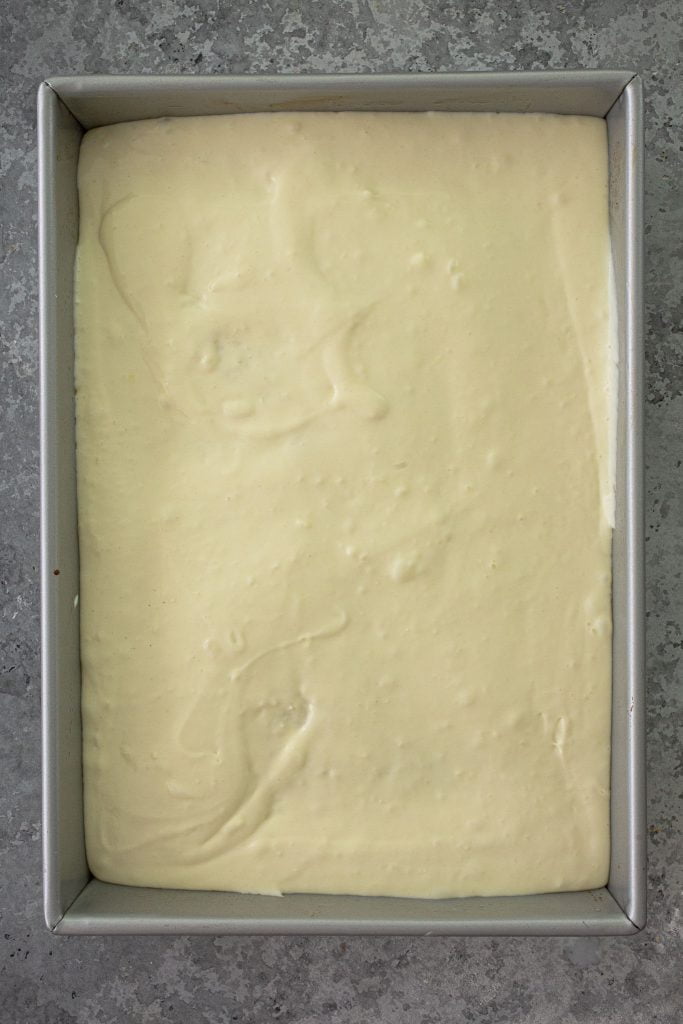
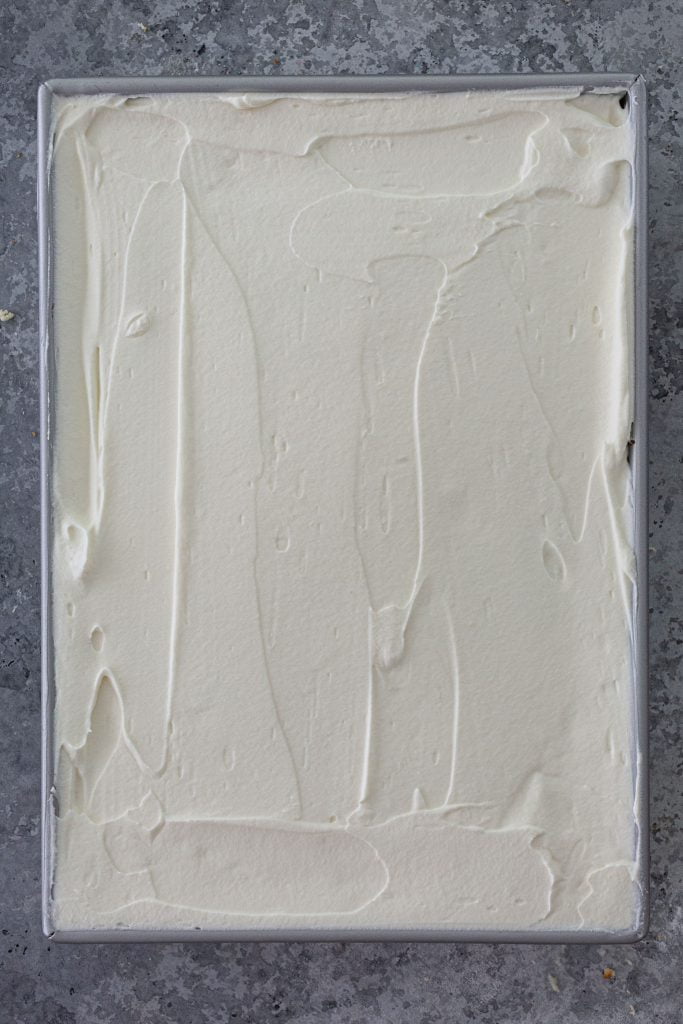
- Using a rubber or offset spatula, spread the frosting evenly on top of the bottom layer.
- Top with the second layer of cake, cut side down.
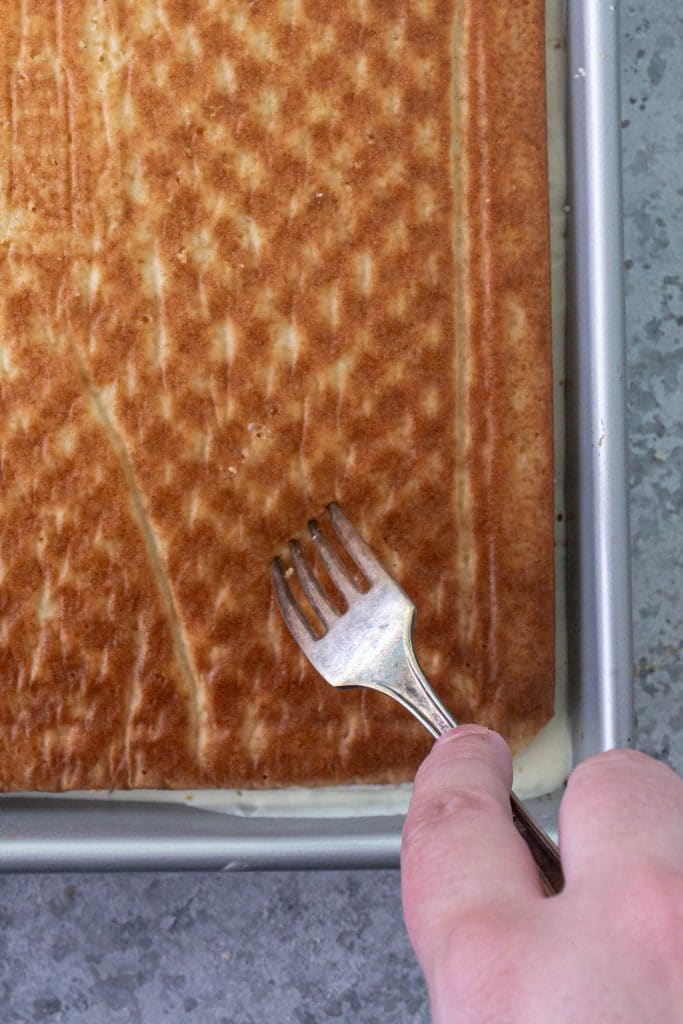
- Using a fork, poke holes all over the top of the cake. Then, evenly pour the remaining milk soak, making sure the whole cake is moist.
- Refrigerate until ready to serve. The longer this cake stays in the fridge, the creamiest and moistest it will be! So I like to keep it in there for at least 3 hours!
- When ready to serve, top with whipped cream and decorate with the flag design.
NOTES:
- Don’t skip the milk soak! It not only helps moisten the cake but also the flavors to penetrate all around, ensuring that every bite is creamy and full of flavor.
- I like to finish my American flag cake with fresh whipped cream and the berry decoration right before serving. If you are strapped for time and want to assemble the whole thing ahead, you will need to use stabilized whipped cream or Cool Whip. Fresh – non stabilized – whipped cream usually weeps and wilts as it sits in the fridge. So, even though it is safe to eat (and I do, once I have leftovers), it won’t look its best!
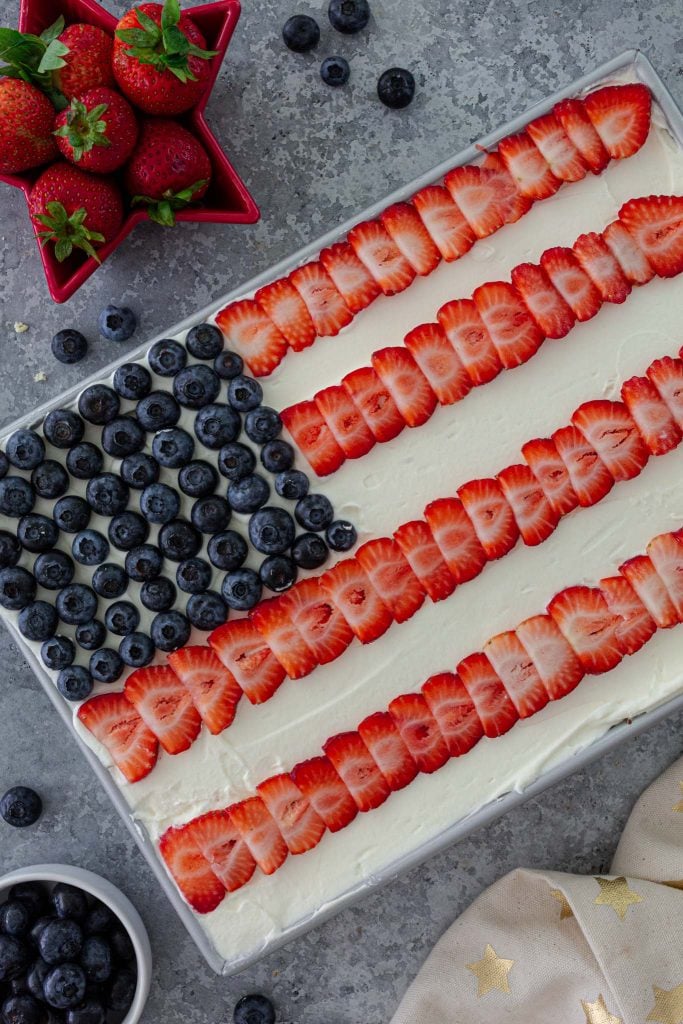
Decorating an American Flag Cake
You probably already noticed, but I’m not a skilled cake decorator!
So I skipped all the piping bags and decorating tools and opted for a simple berry decoration instead! They make the American flag cake more delicious, anyway!
I was a little intimidated at first, thinking I had to get the flag shape just right. I even searched high and low in my house for a ruler, just to realized I had none. “Okay, I’m gonna wing it!”
It turns out that arranging the berries to look like an American flag is easier than I thought. Things don’t have to be perfect and you don’t need to replicate the flag exactly to end up with a darn good American Flag Cake!
Here’s how I did it:
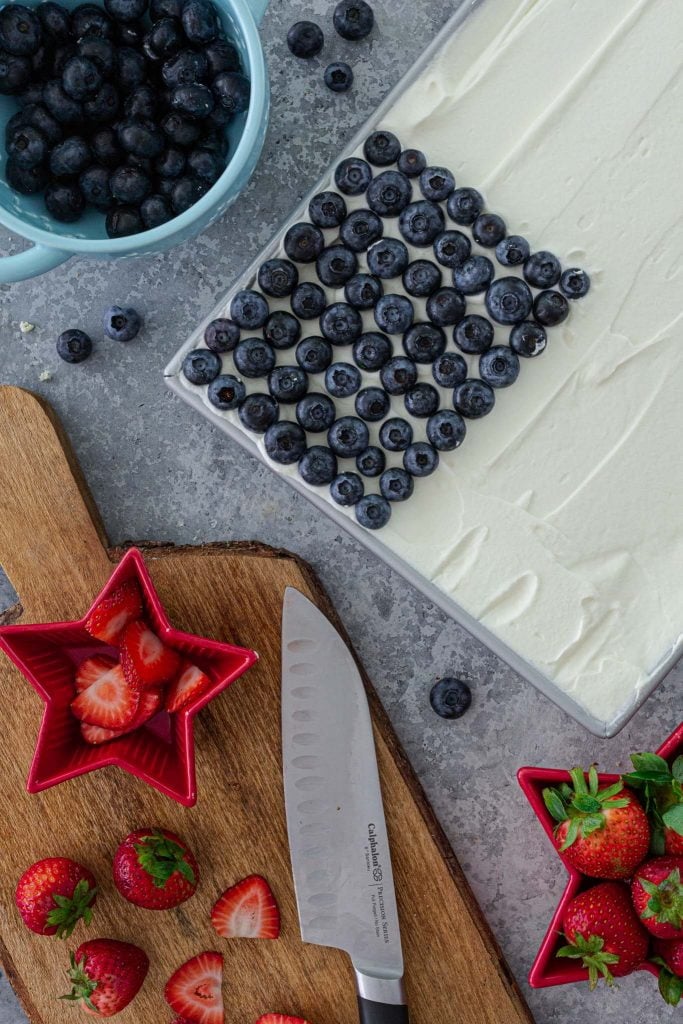
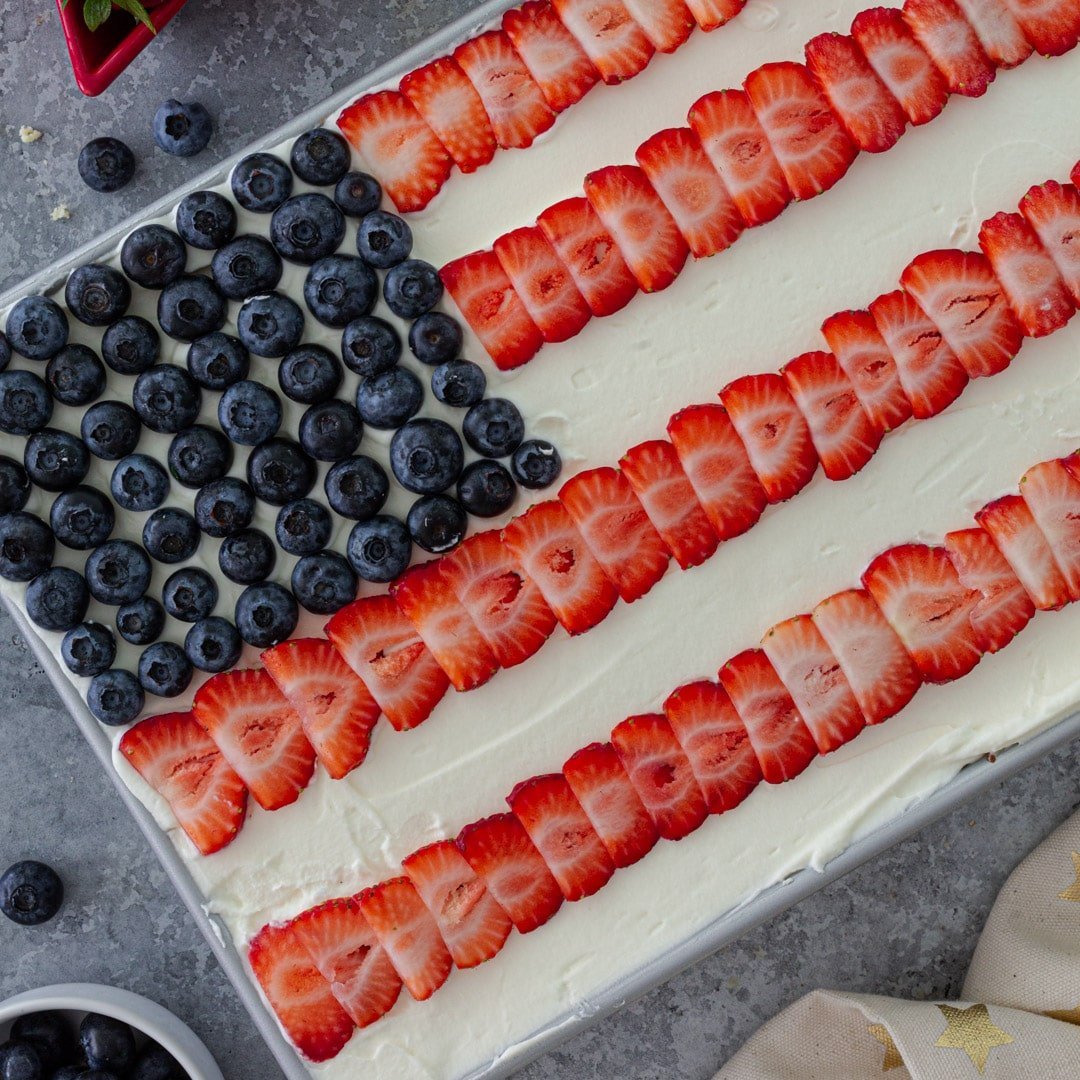
- After spreading the whipped cream over the top of the cake, use your finger to mark a rectangle in the upper left-hand corner for the stars part.
- Use blueberries (rinsed and pat dry) to line the rectangle and then fill the whole thing with more blueberries. I like to place them with the stem end up, cause I think they look cuter that way!
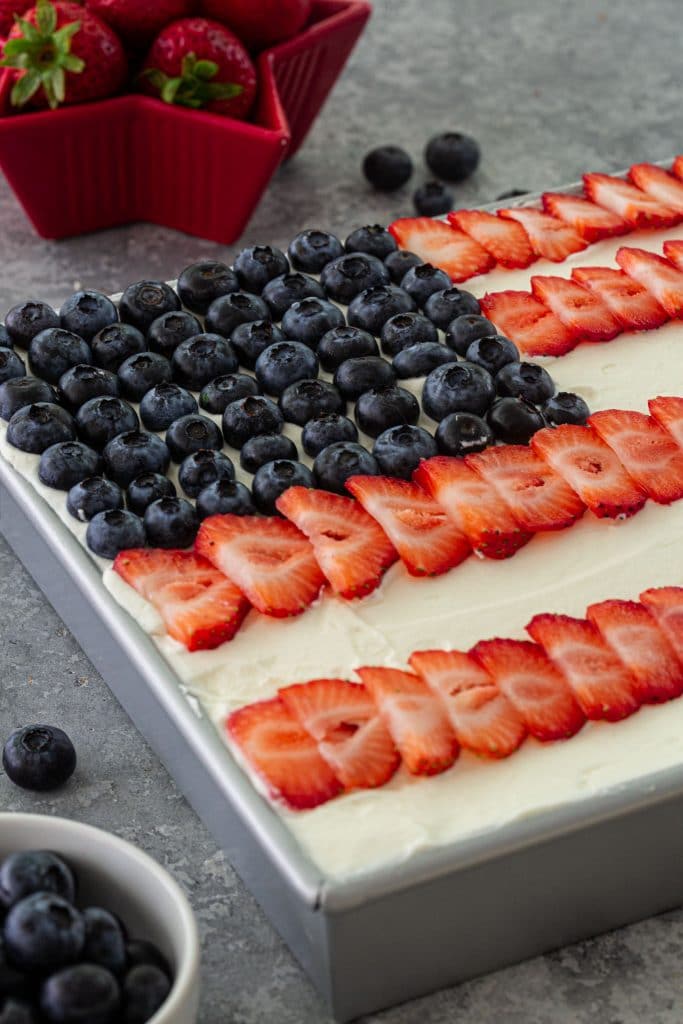
- Use sliced strawberries to create the horizontal red stripes across the cake. Starting from the top, I was able to make 4. The white stripes will be the empty part, showing the white whipped cream!
And voila: you have a beautiful American flag cake, no special tools necessary!
American Flag Cake
An American Flag Cake that not only looks pretty and patriotic but also tastes amazing? Yes, it exists! And it makes an eye-catching centerpiece for your Memorial Day or Fourth of July celebrations.
Ingredients
For the Powdered Milk Frosting
- 1 (14-ounces) can sweet condensed milk, divided
- 1 1/2 cups powdered milk
- 1 stick (4 ounces) butter, softened
- 1 cup heavy cream
For the Sponge Cake
- 4 eggs
- 1 cup sugar
- 2 cups all purpose flour, sifted
- 1 cup whole milk
- 1 tablespoon baking powder
Milk Soak:
- 1 cup whole milk
- 2 tablespoons sweet condensed milk
Whipped Cream:
- 2 cups heavy cream, cold
- 1/4 cup sugar
- 1 teaspoon vanilla extract
To decorate:
- 1 pint blueberries
- 2 pints fresh strawberries, sliced
Instructions
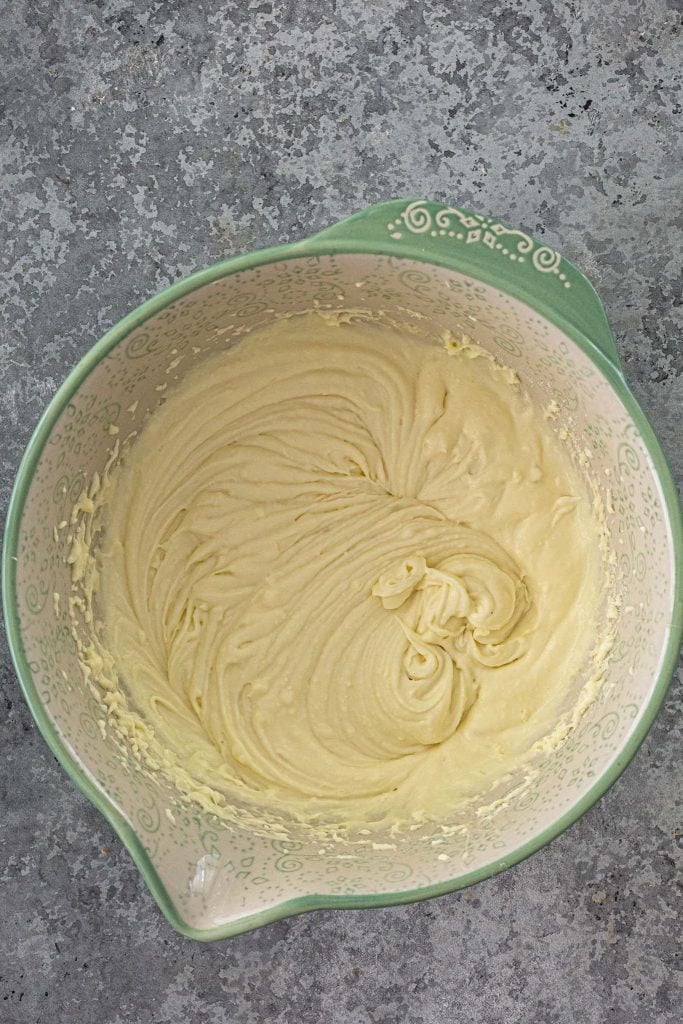
Making the Powdered Milk Frosting:
- Combine all the frosting ingredients in a large bowl. Using a hand mixer, beat until smooth.
- Refrigerate for at least 1 hour.
- When ready to use, beat again so it gets creamy.
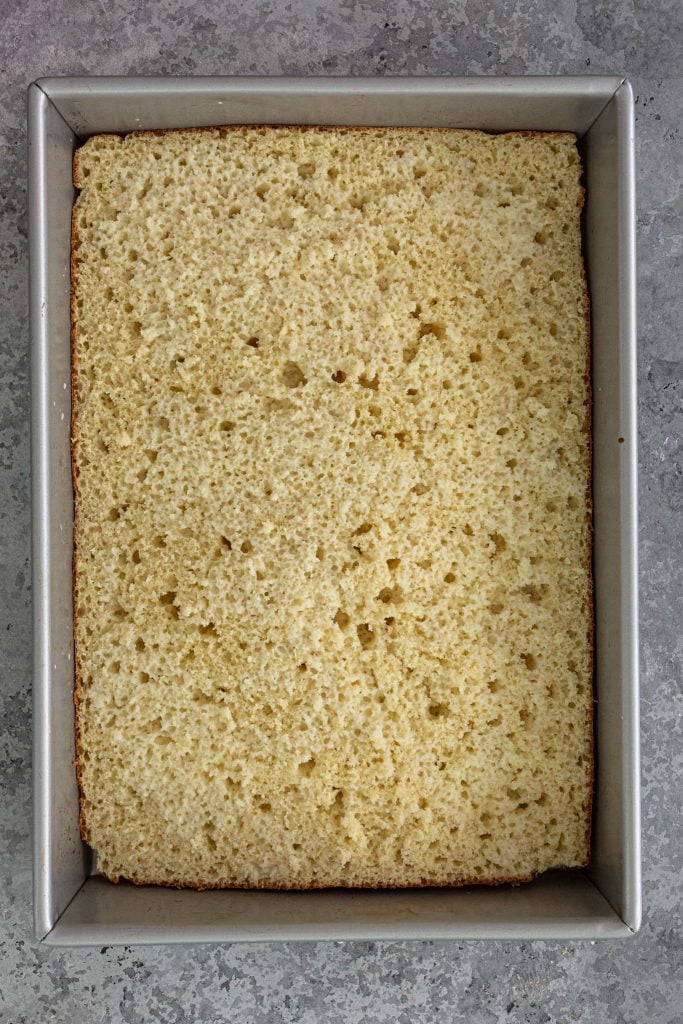
Make the Sponge Cake:
- Preheat oven to 350 degrees F.
- Line a 9X13-inch cake pan with parchment paper or generously grease and flour. Reserve.
- Combine the eggs and sugar in a large bowl. Using a hand mixer, beat until the mixture is pale and fluffy.
- Add the flour and milk, alternating while whisking with a hand whisk. Finally, gently whisk in the baking powder, being careful not to lose aeration.
- Transfer the batter to the prepared pan and bake for about 30 minutes, or until a cake tester inserted in the center comes out clean.
- Remove from oven and reserve to cool completely.
Making the Milk Soak:
- Combine the milk and 2 tablespoons of sweet condensed milk in a bowl. Whisk until combined and reserve in the fridge.
Assembling the cake:
- When the cake has cooled to room temperature, unmold and cut horizontally in half.
- Place the top side, cut side up, back in the pan and pour half of the milk soak over it.
- Spread the powdered milk frosting on top, smoothing it into an even layer with a rubber or offset spatula.
- Place the second cake half over the frosting, cut side down. Using a fork, poke holes all over it and then pour the remaining milk soak.
- Refrigerate until ready to serve or for at least 3 hours.
Making whipped cream:
- Combine the sugar, heavy cream and vanilla extract in a mixing bowl. Beat just until the cream reaches stiff peaks. Reserve.
Decorating the flag cake:
- Right before serving, top the cake with the whipped cream. spreading it into an even layer with a spatula.
- Use the blueberries to outline a square in the top left corner. Fill in with remaining blueberries to complete the stars on your flag cake.
- Make several lines of sliced strawberries next to and below the blueberry square area. These will be the stripes.
- Serve immediately. This American flag cake is supposed to be served cold!
Notes
If you want to make the whole cake ahead, including the decorations, you will need to use stabilized whipped cream or Cool Whip.
Recommended Products
As an Amazon Associate and member of other affiliate programs, I earn from qualifying purchases.