
Apple Crumble Bars
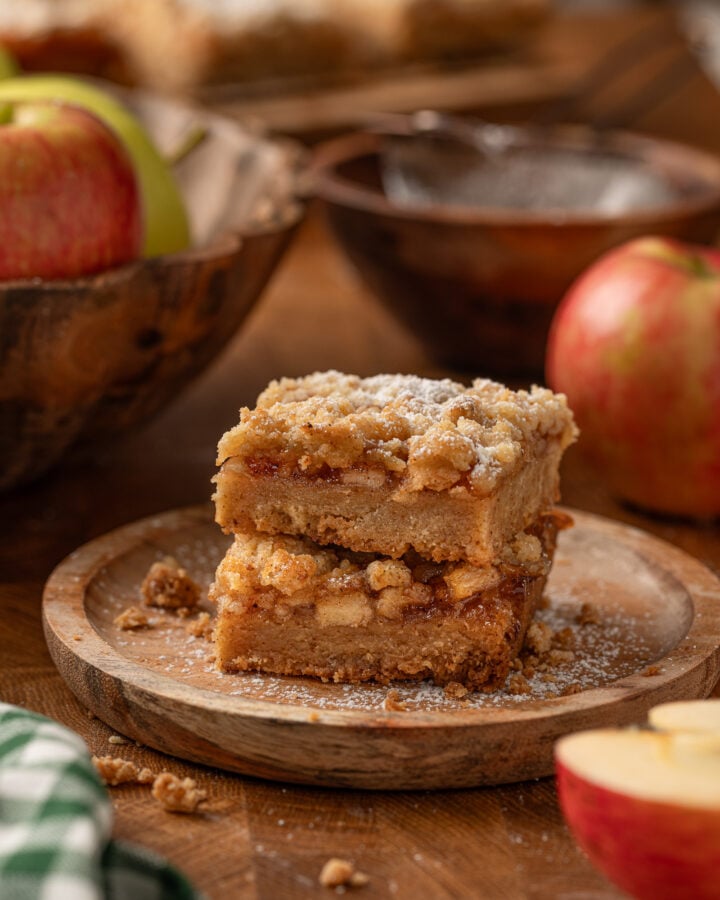
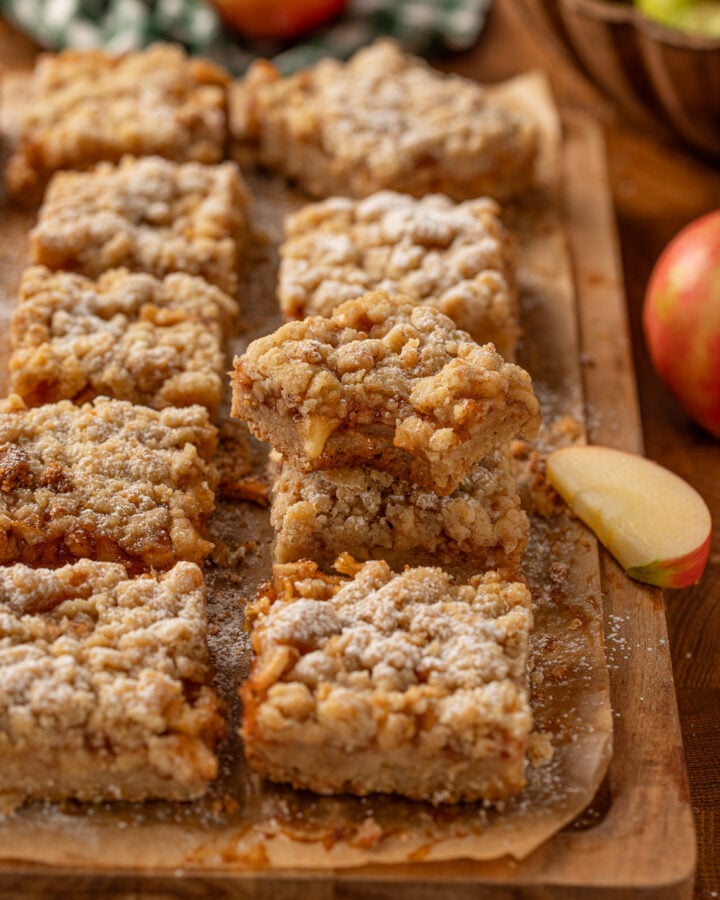
These Apple Crumble Bars are everything I want in a fall dessert: a buttery, melt-in-your-mouth crust, a gooey cinnamon-spiced apple filling sweetened with a touch of honey, and plenty of golden crumble on top. The same easy dough doubles as the crust and topping, making these bars simple enough for an afternoon baking project but delicious enough to serve for any fall gathering. And if you warm one up and add a scoop of vanilla ice cream? Absolute heaven!
At a Glance
- Taste: Buttery, warmly spiced and perfectly sweet, with a subtle touch of honey.
- Texture: Tender shortbread-style crust, soft and jammy apples, and a golden, crumbly topping.
- Difficulty: Easy! The crust and crumble are made from the same dough.
- Perfect for: Fall baking, Rosh Hashanah, Thanksgiving, potlucks, bake sales, or an afternoon treat with coffee.
- Best served: At room temperature or slightly warm, especially with a scoop of vanilla ice cream.
Why I love this recipe
What I love most about these bars is how effortlessly they fit into real life. You can bake a batch ahead of time, cut them into neat little squares, and have a dessert that’s just as happy sitting on a holiday table as it is being packed up for a potluck or enjoyed with your afternoon coffee. They’re unfussy, easy to share, and somehow even better the next day – which is always a win in my book!
Ingredients
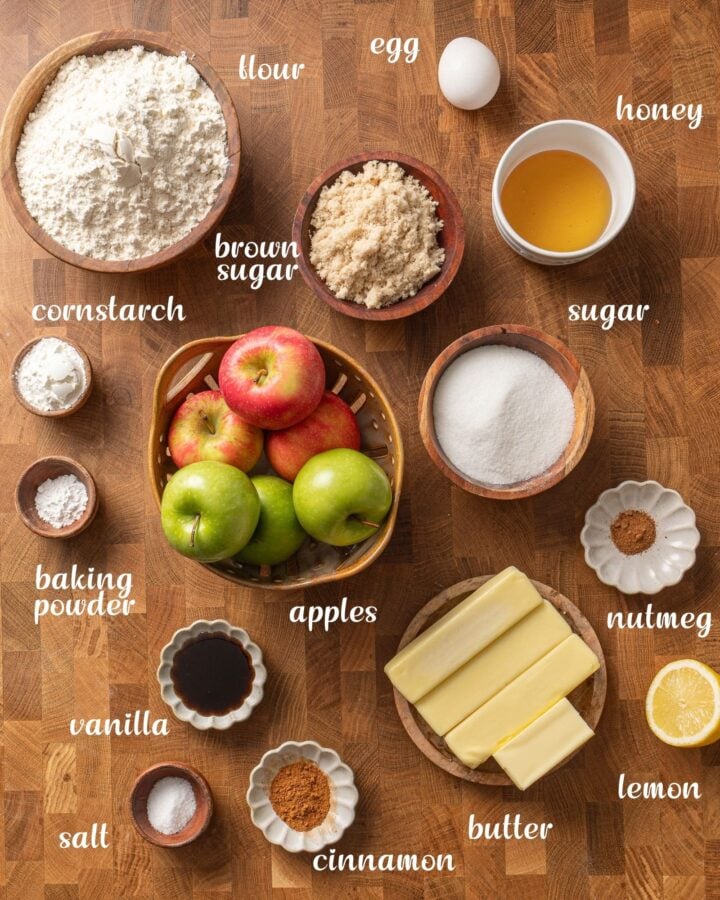
To make Apple Crumble Bars, you will need:
- Apples: Choose firm apples that hold their shape well when cooked. I love a mix of sweet and tart varieties for a more interesting flavor – Honeycrisp, Pink Lady, Braeburn and Granny Smith are all great options. Avoid softer, mealier apples, which can turn mushy in the filling.
- Honey: Adds sweetness and a subtle floral note that pairs beautifully with the apples. Use your favorite mild honey so it doesn’t overpower the other flavors. Maple syrup can work in a pinch, but it will change the flavor of the bars.
- Brown sugar: Adds sweetness and a deeper caramel-like flavor to the apple filling. Light or dark brown sugar will both work.
- Spices: Cinnamon is he main warm spice here, used both in the crust and filling. You can add a pinch of nutmeg or allspice if you’d like an even spicier filling.
- Lemon juice: Brightens the filling and balances the sweetness. Fresh lemon juice is best.
- Cornstarch: Thickens the juices released by the apples so you get a jammy filling that stays put when the bars are sliced.
- All-purpose flour: The base of the crust and crumble topping. For best results, measure by weight or use the spoon-and-level method.
- Baking powder: Gives the crust and crumble just a little lift, keeping them tender and crumbly rather than overly dense.
- Browned butter: Browning the butter before making the dough gives these bars a rich, nutty, almost caramel-like flavor that regular melted butter just can’t match. It takes a few extra minutes, but I promise it’s worth it! Keep an eye on it as it browns – the milk solids can go from beautifully golden to burnt pretty quickly. If you’re short on time, you can use regular melted butter, but you’ll miss some of that deeper flavor.
- Granulated sugar: Sweetens the crust and crumble while helping them bake up golden.
- Egg: Helps bind the dough together and gives the crust a tender texture.
- Vanilla extract: Adds warmth and rounds out the buttery flavor. Pure vanilla extract or vanilla paste is my preference.
- Salt: A small amount makes all the other flavors pop and keeps the bars from tasting overly sweet.
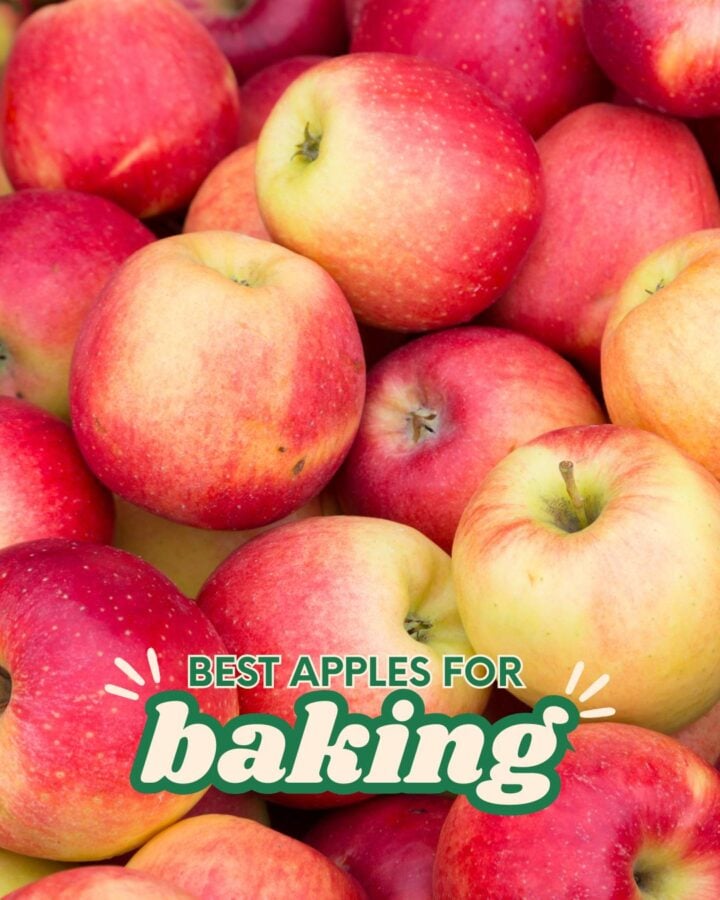
The Best Apples for Apple Crumble Bars
The best apples for these bars are firm varieties that hold their shape as they cook, rather than turning into applesauce. I also love mixing sweet and tart apples as it gives the filling so much more depth and keeps the honey and brown sugar from making it overly sweet. Honeycrisp, Pink Lady, Braeburn and Granny Smith are all great choices.
My favorite combination is Honeycrisp or Pink Lady with Granny Smith. You get plenty of natural sweetness and apple flavor, with just enough tartness to balance everything out. I’d avoid softer, mealier apples, since we’re cooking the filling on the stovetop before it goes into the oven and we still want those little pieces of apple to hold their shape.
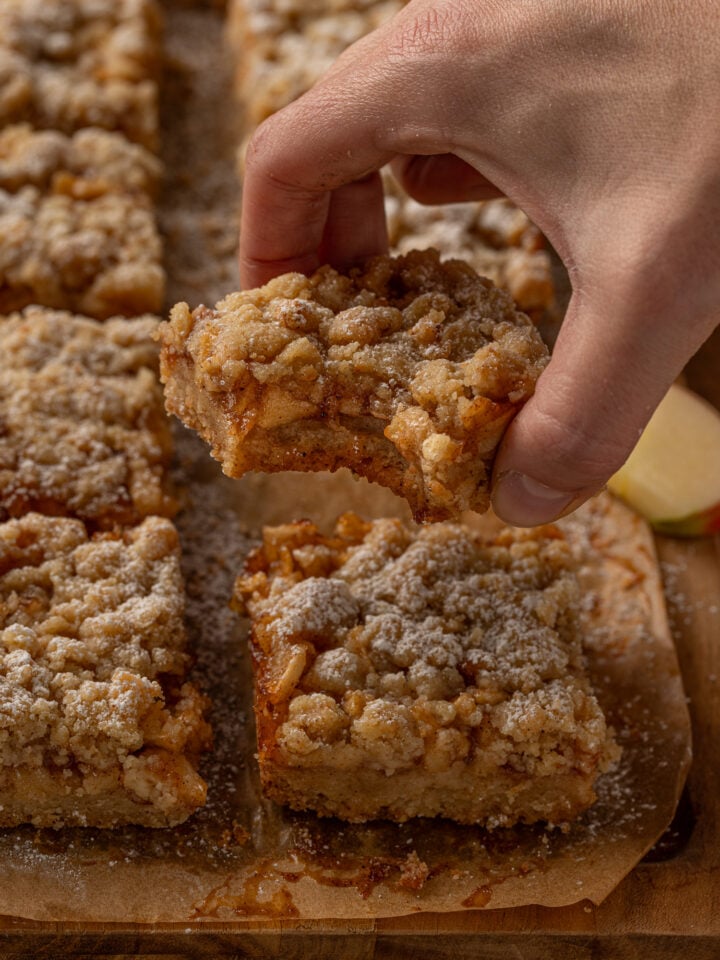
How to Make Apple Crumble Bars
These Apple Crumble Bars come together in three simple parts: the brown butter dough, the apple filling, and the final assembly. Nothing is particularly complicated, but there are a couple of little details that make a big difference in the finished bars.
You’ll start by browning the butter, which gives the crust and crumble their delicious nutty flavor. Part of the dough gets pressed into the pan and par-baked before adding the filling, which helps create a sturdy crust that won’t get soggy under all those juicy apples. Meanwhile, the apples cook briefly on the stovetop until tender and glossy. Then all that’s left to do is layer everything together, crumble the remaining dough over the top, and bake until beautifully golden.
I’m walking you through each step below, including the little visual cues that will tell you when everything is ready!
Recommended tools and equipment: 9×13-inch baking pan (metal is best for a crispy crust), parchment paper, medium saucepan, large skillet, mixing bowls, whisk, silicone spatula, sharp knife, cutting board, measuring cups and spoons, kitchen scale, cooling rack.
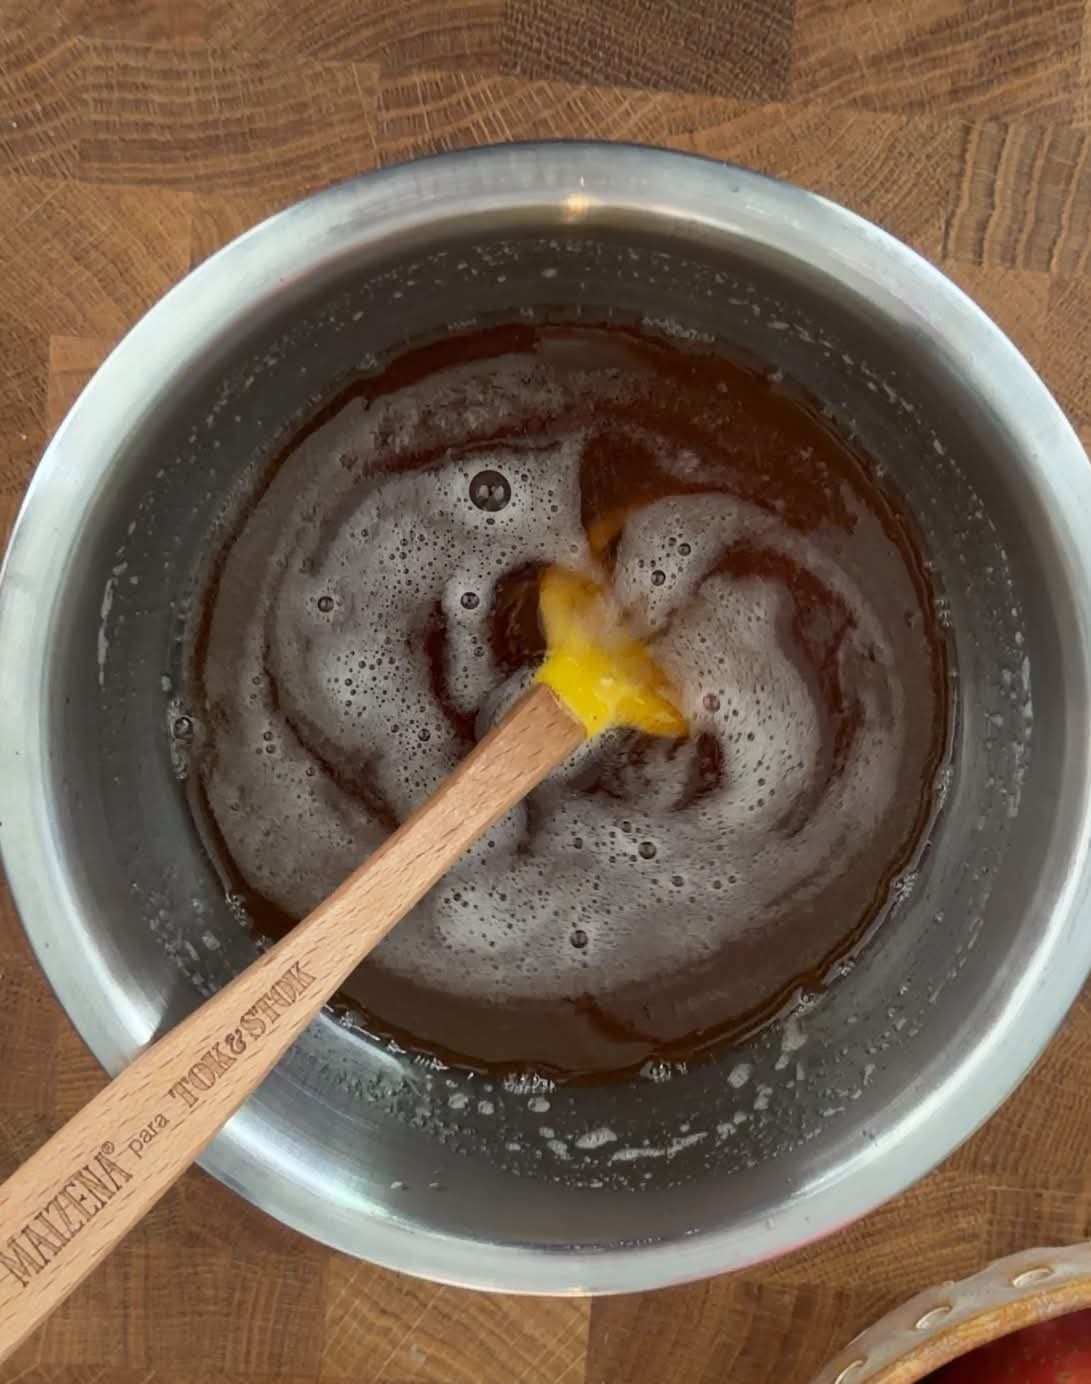
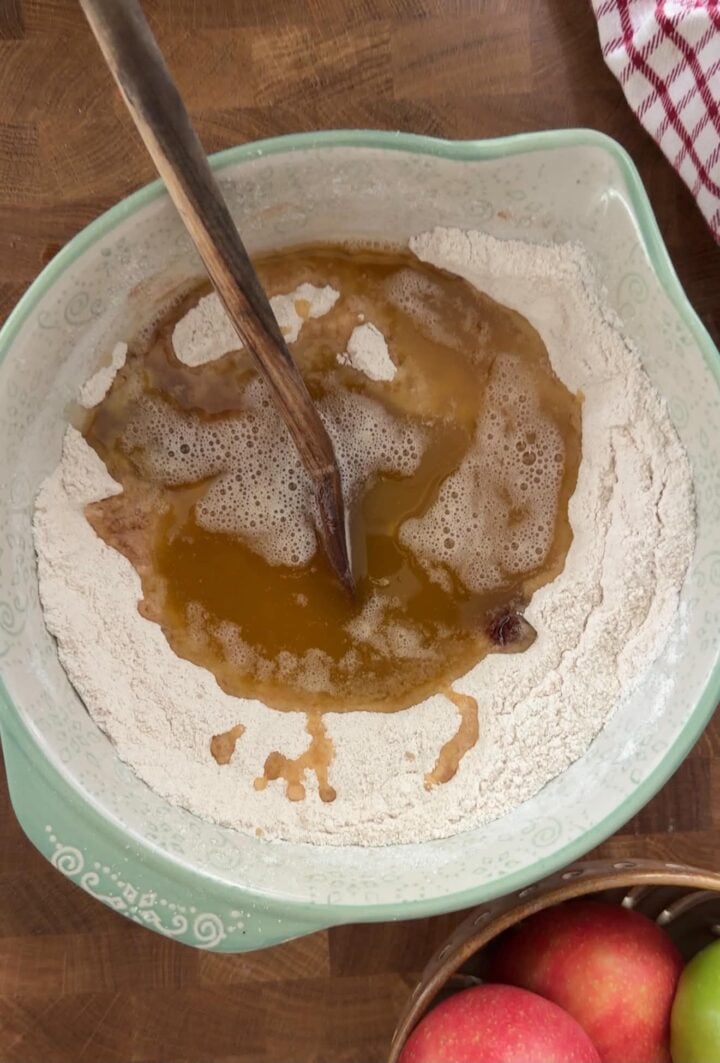
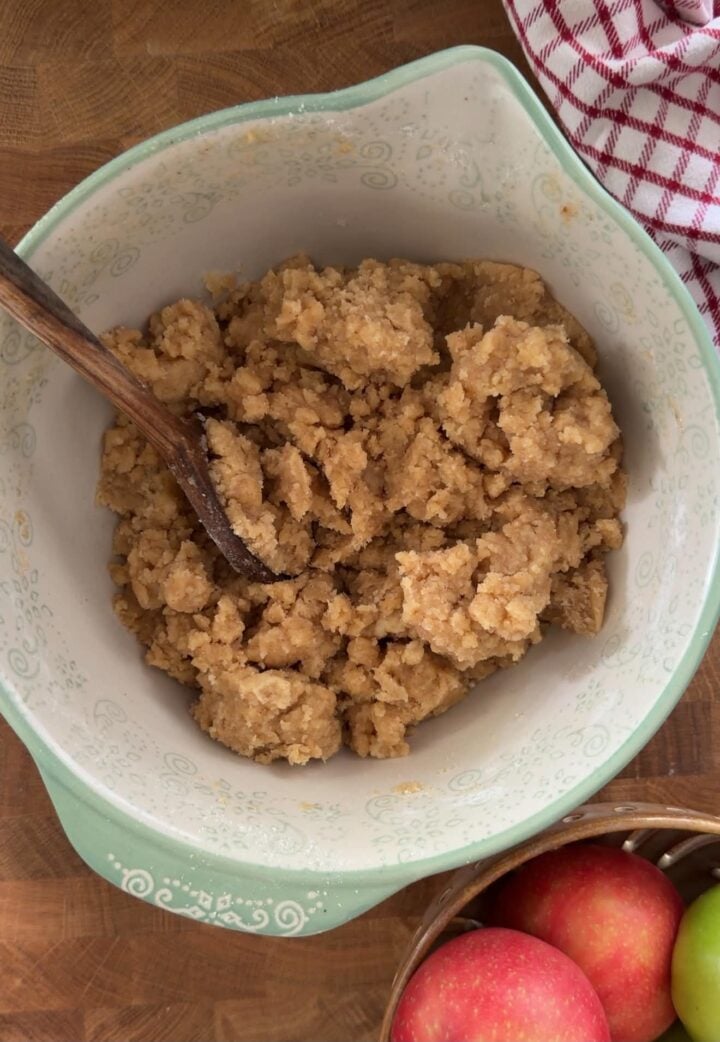
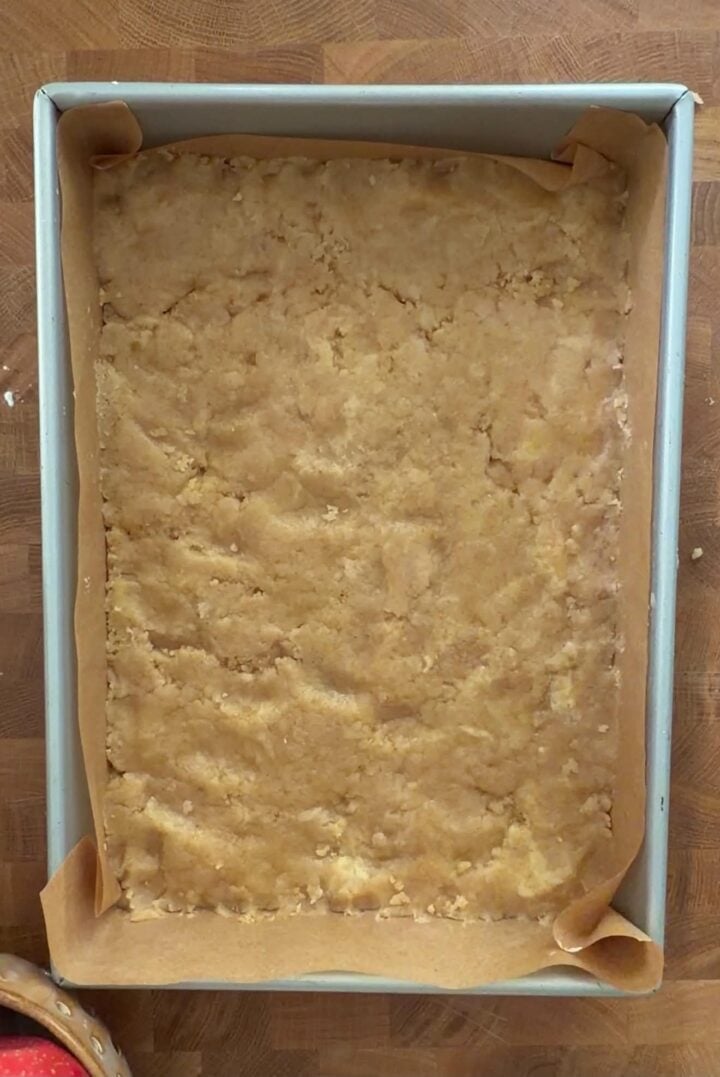
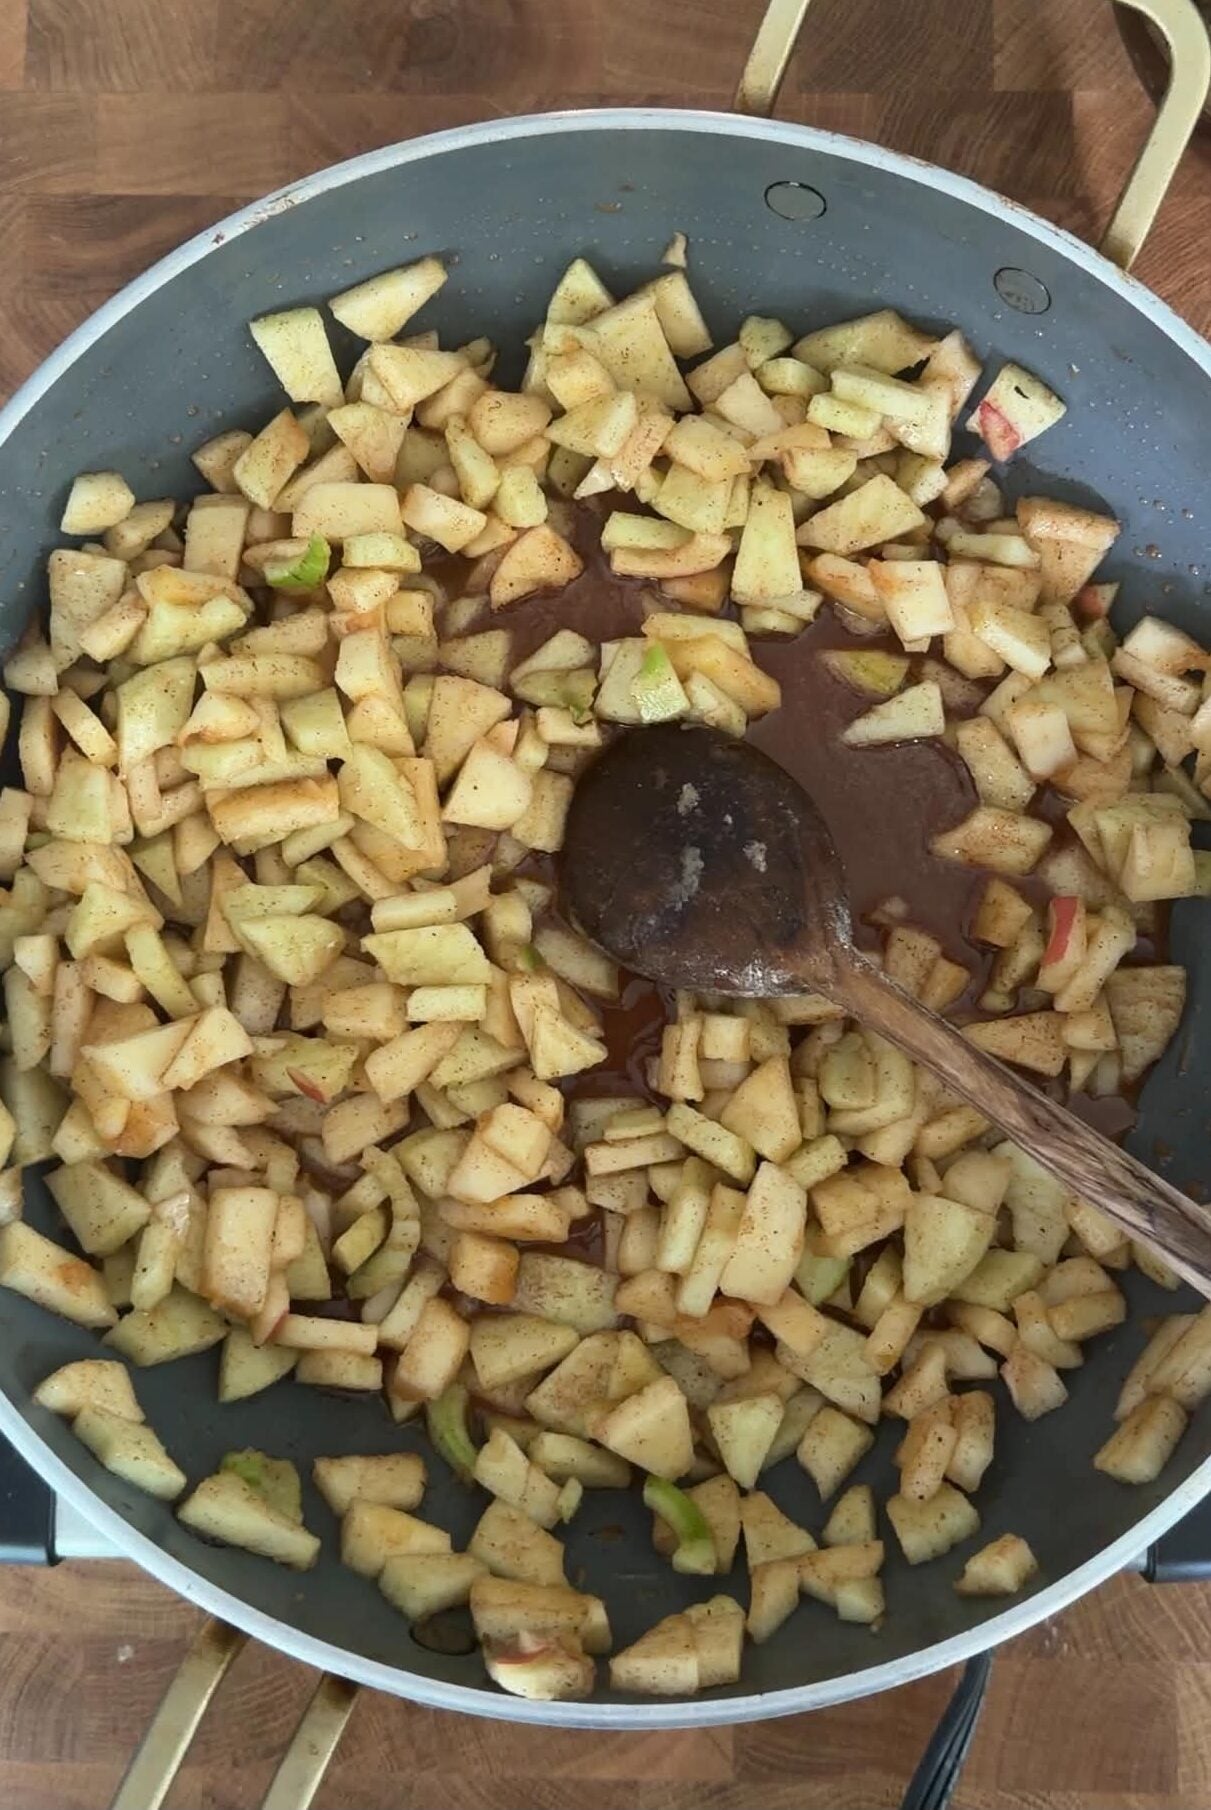
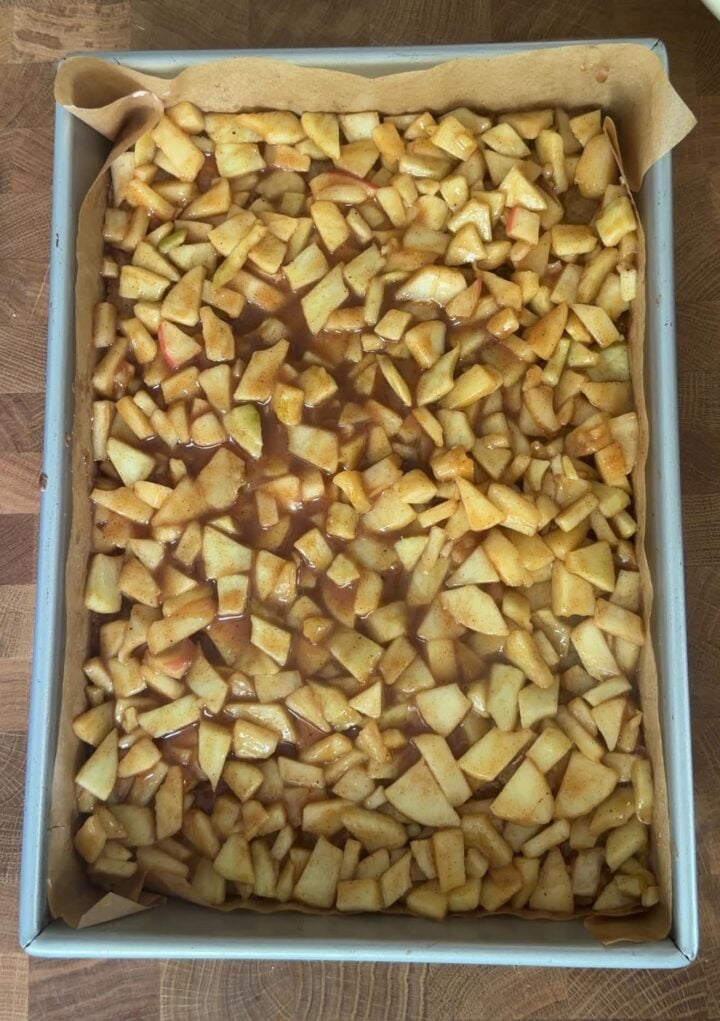
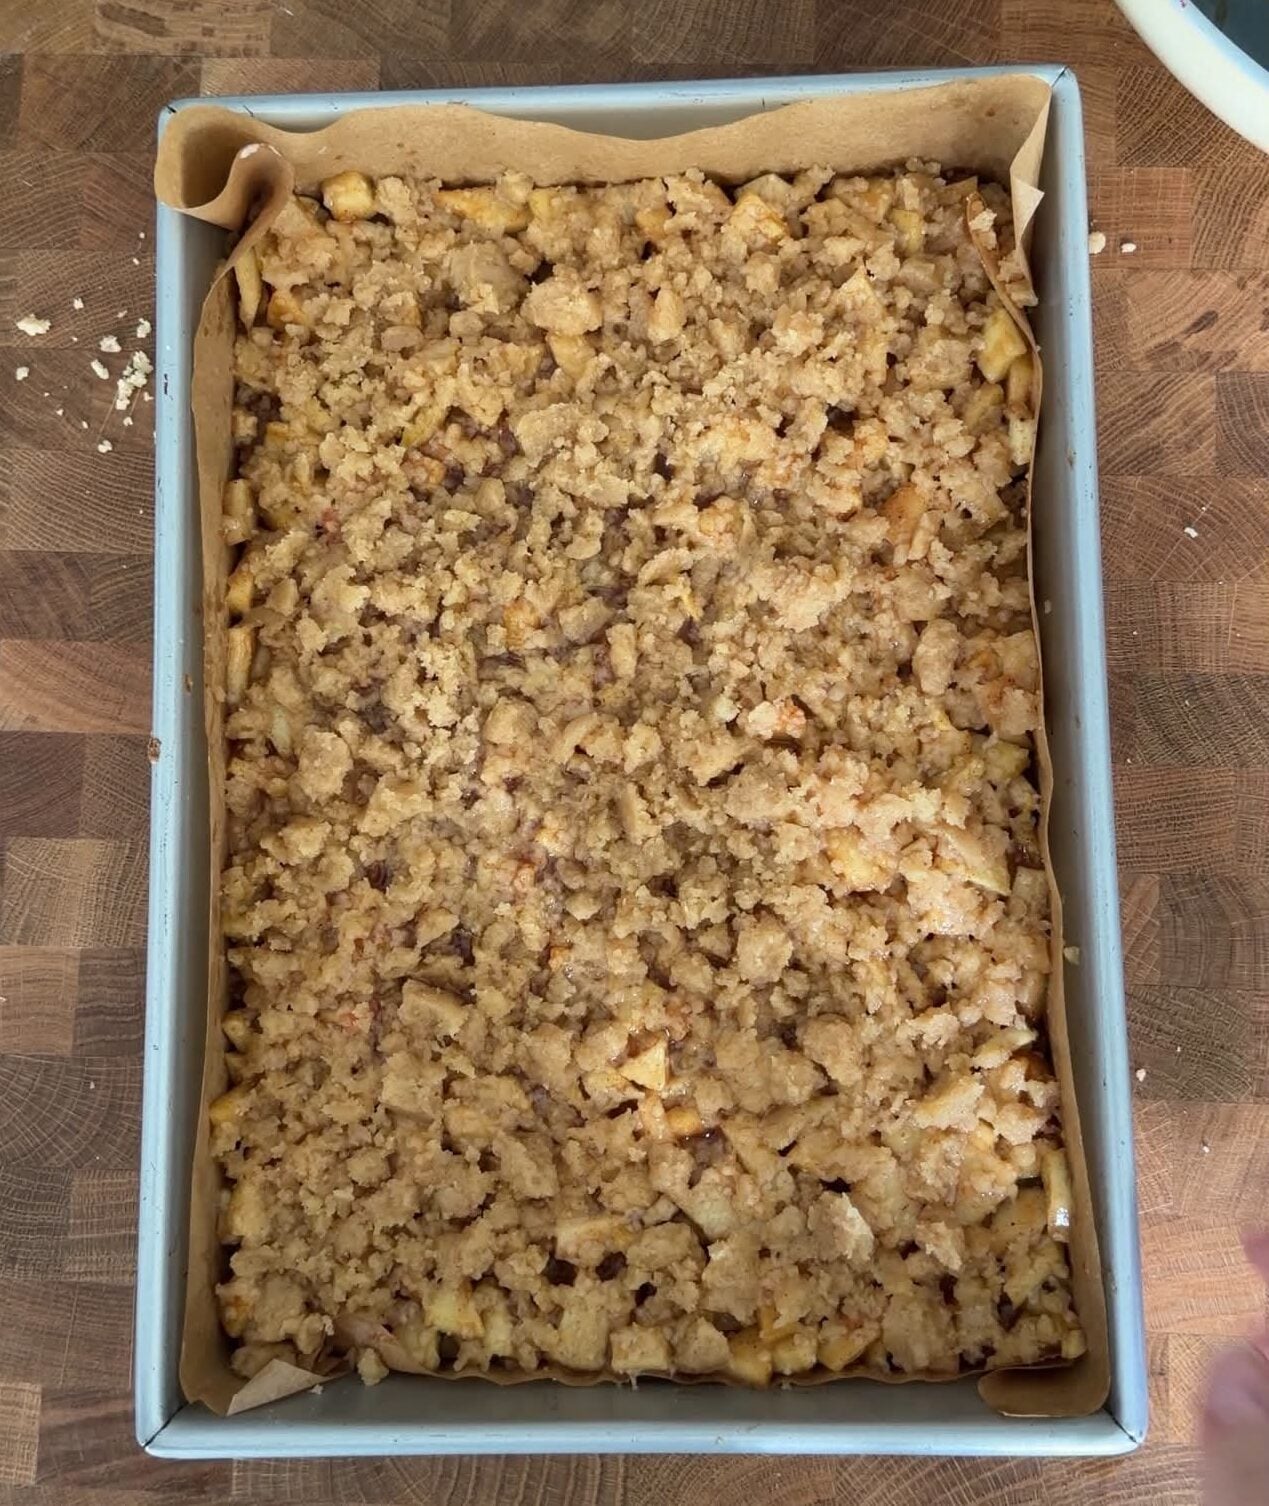
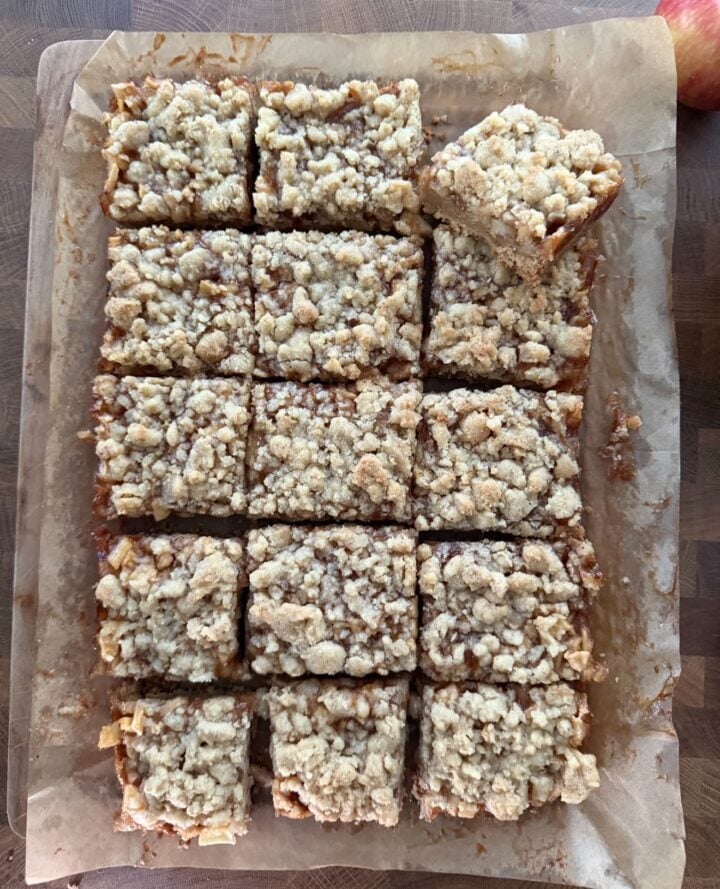
Here’s how I make this Apple Crumble Bars recipe. As always, you will find the printable (and more complete) version of the recipe at the end of this post!
Step 1: Brown the Butter
- Melt the butter in a light-colored saucepan over medium heat. A light interior makes it much easier to see when the milk solids begin to brown.
- Continue cooking, stirring or swirling frequently. The butter will foam and sizzle as the water cooks off. Eventually, you’ll notice little golden-brown specks forming at the bottom and the butter will smell wonderfully nutty.
- Remove it from the heat as soon as it’s golden brown and fragrant. Brown butter can go from perfect to burnt very quickly, so don’t walk away! Immediately pour it into a heatproof bowl, making sure to scrape in all those flavorful browned bits. If you keep it in the saucepan you risk it cooking further with the residual heat of the pan and burning.
- Let it cool slightly before making the dough. You want it warm and fluid, but not piping hot.
Step 2: Make the Crust and Crumble
- Whisk together the flour, sugars, baking powder and salt in a large bowl. Mixing the dry ingredients first ensures the dry ingredients are evenly distributed throughout the dough.
- Make a well in the center of the dry ingredients, then add the browned butter, egg and vanilla. Mix everything together just until a soft, crumbly dough forms. Making a well helps contain the wet ingredients while you combine them and makes it easier to incorporate the flour gradually without overmixing the dough.
- Reserve part of the dough for the crumble topping, about 2 cups, then press the remaining dough evenly into a parchment-lined metal 9×13-inch baking pan. Press firmly enough that it holds together, but don’t compact it excessively.
- Par-bake the crust in a preheat oven (350ºF) until it looks set and is just beginning to turn golden around the edges. Giving the bottom crust a head start creates a sturdier base and helps prevent the juicy apple filling from making it soggy.
Step 3: Cook the Apple Filling
- Peel, core and slice the apples into evenly sized pieces so they cook at approximately the same rate.
- Combine the apples with the brown sugar, honey, cinnamon, nutmeg, lemon juice and cornstarch in a large skillet and cook over medium heat. The apples will begin releasing their juices as they soften.
- Cook until the apples are just tender and the juices thicken. You don’t want to cook them until completely soft at this stage because they’ll continue cooking in the oven. Keeping a little structure prevents the filling from turning into applesauce. Thickening the juices is important: it means those delicious apple juices stay inside the bars instead of soaking into the crust.
- Remove from the heat and let the filling cool slightly before assembling the bars.
Step 4: Assemble and Bake
- Spread the apple filling evenly over the par-baked crust, including all of that thickened, syrupy goodness from the skillet.
- Crumble the reserved dough over the apples. I like to leave some larger pieces rather than making all the crumbs tiny – you’ll get a much more interesting, bakery-style crumble texture.
- Bake (at 350ºF) until the crumble is golden brown and you can see the apple filling bubbling around the edges. That bubbling is a good indication that the filling has heated all the way through and will set properly as it cools. The bars will bake for about 30-40 minutes, but I’d start checking at 28 minutes, especially if it’s the first time you’re making them.
- Transfer the pan to a cooling rack and let the bars cool completely before slicing. I know it’s tempting to cut into them immediately, but the filling continues to set as it cools. Cutting while warm can give you messy bars instead of clean, defined layers.
- Lift the cooled bars from the pan using the parchment overhang, then slice into squares. Dust with powdered sugar before serving, if desired.
Olivia’s Tips
- Don’t burn the brown butter. Once you start seeing golden specks and smelling that nutty aroma, you’re almost there. Take it off the heat as soon as the milk solids turn golden brown, as they’ll continue to darken from the residual heat.
- Create a parchment paper sling. Line the pan with parchment paper, leaving a few inches of overhang on the long sides. Once the bars are completely cool, you can use the overhang as handles to lift the whole slab out of the pan before slicing. So much easier – and much cleaner!
- Use a light-colored metal baking pan for these bars. Metal conducts heat more efficiently than glass or ceramic, helping the crust bake up evenly and giving you those beautifully golden, slightly crisp edges. Dark metal pans can brown the bottom and edges too quickly, so I prefer a lighter aluminum pan for this recipe.
- Don’t skip the par-bake. That short head start in the oven helps the crust stand up to the juicy apple filling and gives you a much better bottom layer.
- Cut the apples evenly. Keeping the pieces roughly the same size helps them cook at the same rate, so you don’t end up with some pieces mushy while others are still crunchy.
- Don’t overcook the apples. You’re just giving them a head start on the stove. They should be tender but still have some bite when you assemble the bars, since they’ll continue cooking in the oven.
- Leave some big crumble pieces! When adding the topping, don’t break every piece into tiny crumbs. Those larger buttery clusters are arguably the best part.
- Let the bars cool completely before slicing. This one requires patience, but it’s worth it! The apple filling needs time to set. Cutting the bars while they’re still warm will give you delicious – but messy -squares.
Serving Suggestions
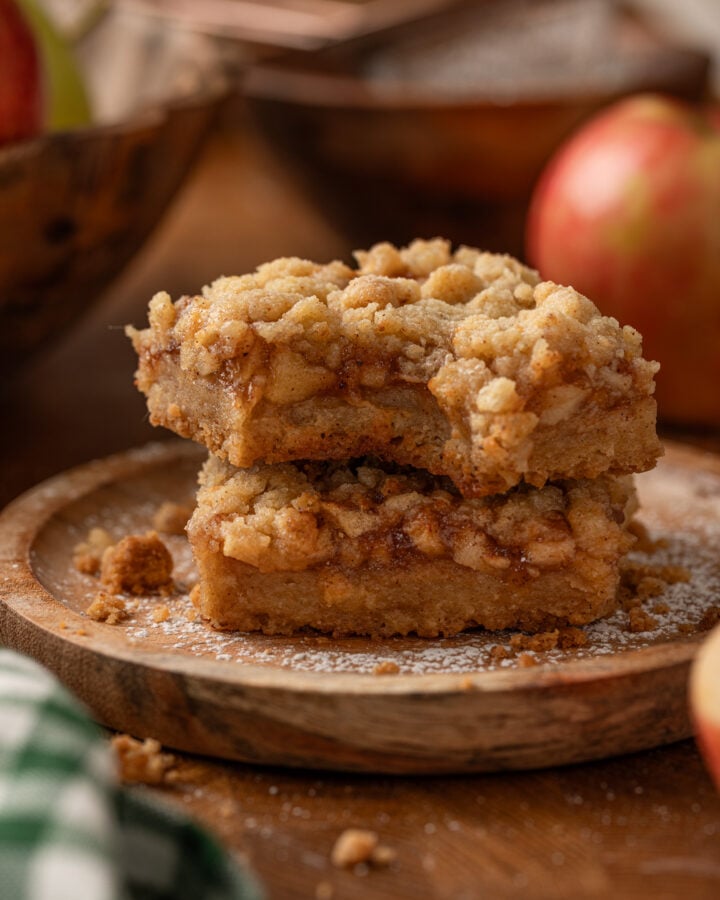
These Apple Crumble Bars are delicious at room temperature, which makes them perfect for parties, potlucks, bake sales, or a holiday dessert table. I like to finish them with a light dusting of powdered sugar just before serving – it makes them look extra pretty without adding too much sweetness. They’re also lovely with a cup of coffee or tea for an afternoon treat.
If you want to turn them into a more decadent dessert, serve the bars slightly warm with a scoop of vanilla ice cream. The cold, creamy ice cream melting into the warm apple filling and buttery crumble is pretty hard to beat! A drizzle of caramel sauce would also be delicious, especially if you’re serving these for Thanksgiving or another fall gathering.
And because of the apples and honey, these bars are a wonderful dessert for Rosh Hashanah. They’re an easy, crowd-friendly way to incorporate the traditional pairing of apples and honey into your holiday table while still serving something a little different from the usual apple cake.
Variations
These Apple Crumble Bars are pretty perfect just as they are, but there’s always room to play! Here are a few easy ways to switch things up and make the recipe your own.
- Add nuts: Mix chopped pecans or walnuts into the crumble topping for extra crunch and a nutty flavor that works beautifully with the apples and brown butter.
- Add caramel: Drizzle salted caramel over the cooled bars for a more decadent fall dessert. You can also serve it on the side if you don’t want the bars to become too sweet.
- Switch up the spices: Add a pinch of ground ginger, cardamom or allspice to the apple filling for a slightly different take. Just don’t go overboard – you still want the apples to shine.
- Try pears: Replace some of the apples with firm, ripe pears for an apple-pear version. I’d keep at least half apples so the filling maintains the right texture.
- Add cranberries: For a holiday version, add a handful of fresh cranberries to the apples. Their tartness is especially nice against the honey and buttery crumble.
- Finish with a glaze: Instead of powdered sugar, drizzle the cooled bars with a simple vanilla glaze for a sweeter, bakery-style finish.
Storage and Freezing
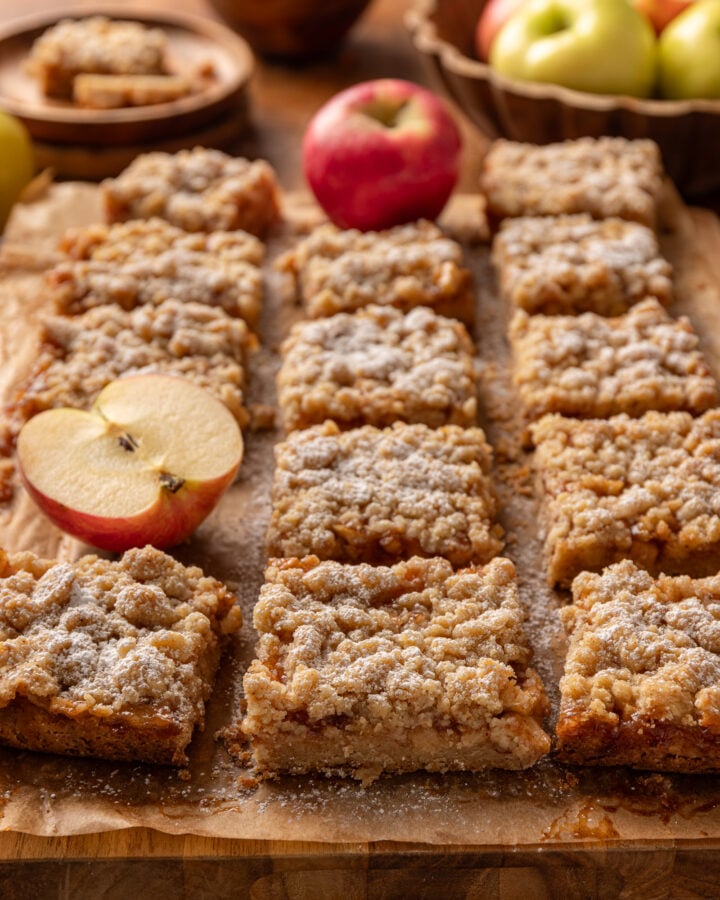
Once completely cooled, store your Apple Crumble Bars in an airtight container at room temperature for up to 2 days. For longer storage, keep them in the refrigerator for up to 5 days. I recommend letting refrigerated bars come to room temperature before serving, or warming them briefly if you prefer that just-baked texture.
To freeze, arrange the cooled, sliced bars in an airtight freezer-safe container, placing parchment paper between layers so they don’t stick together. Freeze for up to 3 months. Thaw overnight in the refrigerator or for a couple of hours at room temperature.
If you want to serve them warm, pop individual bars in the microwave for about 10 to 15 seconds. Add a scoop of vanilla ice cream and suddenly your make-ahead snack is a full-on dessert!
Frequently Asked Questions
I recommend using firm apples that hold their shape well when baked. Honeycrisp, Pink Lady, Braeburn and Granny Smith are all great choices. I especially like combining a sweeter apple with a tart variety for a more balanced filling.
No, but I highly recommend it! You can make the bars with regular melted butter if you’re short on time, but browning it adds a wonderful nutty, toasty flavor that makes these bars extra special.
Absolutely! In fact, they’re a great make-ahead dessert because the filling has plenty of time to set and the flavors are even better the next day. Let the bars cool completely before covering and storing them.
The most common culprit is cutting them while they’re still warm. Let the bars cool completely – at least 2 hours – before lifting them from the pan and slicing. This gives the apple filling and buttery crust time to set.
More Cozy Fall Desserts
Did you make this recipe? I love hearing from you! Please comment and leave a 5-star rating below. You can also take a photo and tag me on Instagram with #oliviascuisine.
Apple Crumble Bars
Ingredients
Brown Butter Crust + Crumble
- 1¾ cups (3½ sticks / 400g) unsalted butter
- 3½ cups + 2 tablespoons (480g) all-purpose flour
- ¾ cup (150g) granulated sugar
- ¾ cup (120g) light brown sugar
- 1¼ teaspoons baking powder
- 1 teaspoon kosher salt
- ⅝ teaspoon ground cinnamon
- 1 large egg
- 2½ teaspoons vanilla extract
Apple-Honey Filling
- 4-5 medium apples (about 850g before peeling and coring, peeled, cored and diced – about 5 cups / 700g prepared)
- ⅓ cup (75g) honey
- ¼ cup (50g) light brown sugar
- Juice of ½ lemon
- 1 teaspoon vanilla extract
- 1½ teaspoons ground cinnamon
- ¼ teaspoon ground nutmeg
- Pinch of kosher salt
- 2 tablespoons (about 16g) cornstarch
For Serving
- Powdered sugar, for dusting (optional)
Instructions
- Preheat the oven to 350°F. Line a 9×13-inch light-colored metal baking pan with parchment paper, leaving enough overhang on the sides to lift the bars out later.
- Brown the butter. Add the butter to a light-colored saucepan and cook over medium heat, stirring or swirling often. The butter will melt, foam, and eventually develop golden-brown milk solids on the bottom and a nutty aroma. As soon as it is deeply golden, remove it from the heat and pour it into a heatproof bowl, scraping in all those browned bits. Let cool slightly.
- Make the crust and crumble: In a large bowl, whisk together the flour, granulated sugar, brown sugar, baking powder, salt, and cinnamon. Make a well in the center and add the browned butter, egg, and vanilla. Mix until a crumbly dough forms.
- Reserve the crumble: Set aside about 2 cups of the dough for the topping. Press the remaining dough evenly into the bottom of the prepared pan.
- Par-bake the crust: Bake for about 15 minutes, or until the crust looks set and is just beginning to turn lightly golden around the edges. Remove from the oven and set aside.
- Make the apple filling: Add the diced apples, honey, brown sugar, lemon juice, vanilla, cinnamon, nutmeg, salt and cornstarch to a large skillet or saucepan. Cook over medium heat, stirring occasionally, until the apples begin to soften and release their juices but still hold their shape and the juices thicken and become glossy. Remove from the heat.
- Assemble the bars: Spoon the apple filling evenly over the par-baked crust. Scatter the reserved crumble over the top, squeezing some of it together with your fingers to create a few larger crumbles.
- Bake again: Return the pan to the oven and bake for 30 to 40 minutes, or until the crumble is golden brown and the apple filling is bubbling around the edges. Start checking at 28 minutes if it’s your first time making these.
- Cool completely: Let the bars cool in the pan for at least 2 hours. Use the parchment overhang to lift them out of the pan, then slice into bars.
- Serve: Dust with powdered sugar, if desired, and serve at room temperature or slightly warm.
Notes
- Apples: Use firm baking apples that will hold their shape, such as Honeycrisp, Pink Lady, Braeburn or Granny Smith. I love combining a sweeter apple with Granny Smith for a nice sweet-tart balance.
- Weighing the apples: You’ll need about 850g whole apples before peeling and coring, which should give you approximately 5 cups (700g) diced apples.
- Brown butter: Keep a close eye on the butter once it begins to foam as it can go from beautifully browned to burnt quickly! Be sure to scrape all those flavorful browned milk solids into the dough.
- Pan: For best results, use a light-colored metal 9×13-inch baking pan. Glass, ceramic and dark metal pans conduct heat differently and may affect baking time and browning.
- Don’t overcook the apples: Cook them just until they begin to soften but still hold their shape. They’ll continue cooking in the oven.
- Cooling: Allow the bars to cool completely – at least 2 hours – before slicing. The filling needs that time to set, or the bars may fall apart when cut.
- Storage: Store in an airtight container at room temperature for up to 2 days or refrigerate for up to 5 days. Bring refrigerated bars to room temperature before serving or warm briefly in the microwave.
- Freezing: Freeze the cooled bars in an airtight container for up to 3 months. Thaw overnight in the refrigerator or at room temperature before serving.


