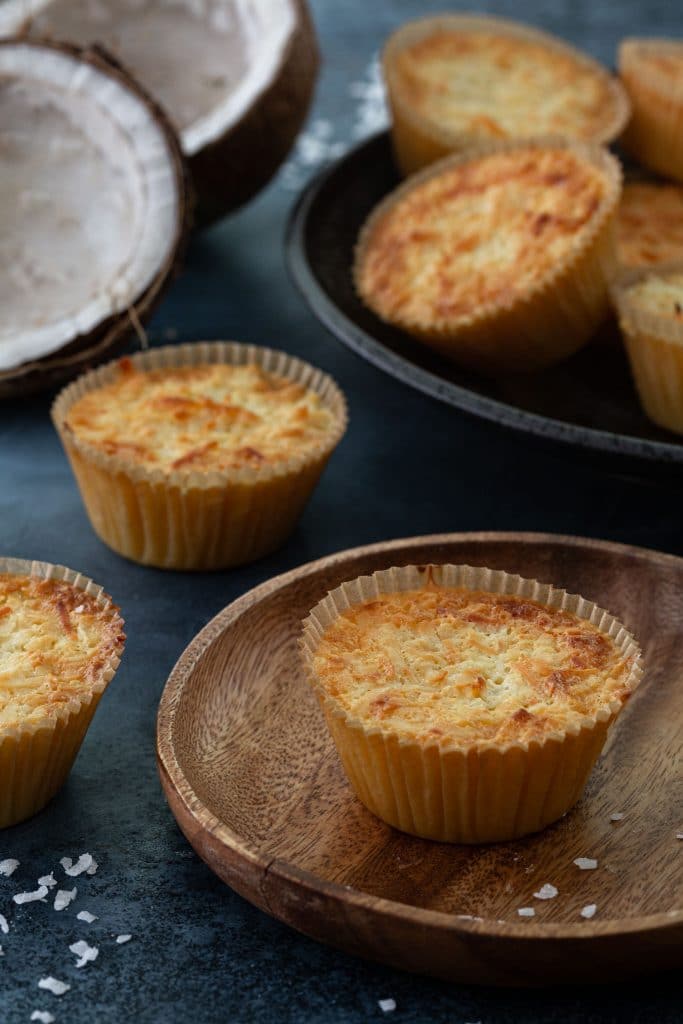
Queijadinha (Brazilian Coconut Tarts)

It is impossible not to fall in love with a Queijadinha. Decadent, creamy and loaded with coconut, it is a sweet tooth’s dream come true!
Coconut lovers, rejoice! Today’s Festa Junina treat is Queijadinha.
Despite its name, the main ingredient is coconut, not cheese. Cheese is in there too, hooray, but is not the predominant flavor!
I am calling them coconut tarts for the lack of a better term in English. They are crustless, custard-y and creamy, almost like the filling of a macaroon pie!
Easy to make and even easier to eat! I bet you won’t be able to eat just one.

What are Queijadinhas?
There are as many queijadinhas as there are grandmothers in Brazil.
Made of coconut and sweet condensed milk, they originated from the Portuguese Queijadas and were influenced by the slaves in Brazil. Legend has it that it was a slave who substituted the cheese from the traditional recipe for coconut, giving it a tropical twist!
Nowadays, most queijadinha recipes will call for both coconut and cheese, making it a decadent delicacy!
The first time you make it, you might think something went wrong or that it didn’t bake long enough. Don’t worry! Queijadinha is meant to be creamy! To me, they are like a hybrid between a custard and a macaroon.
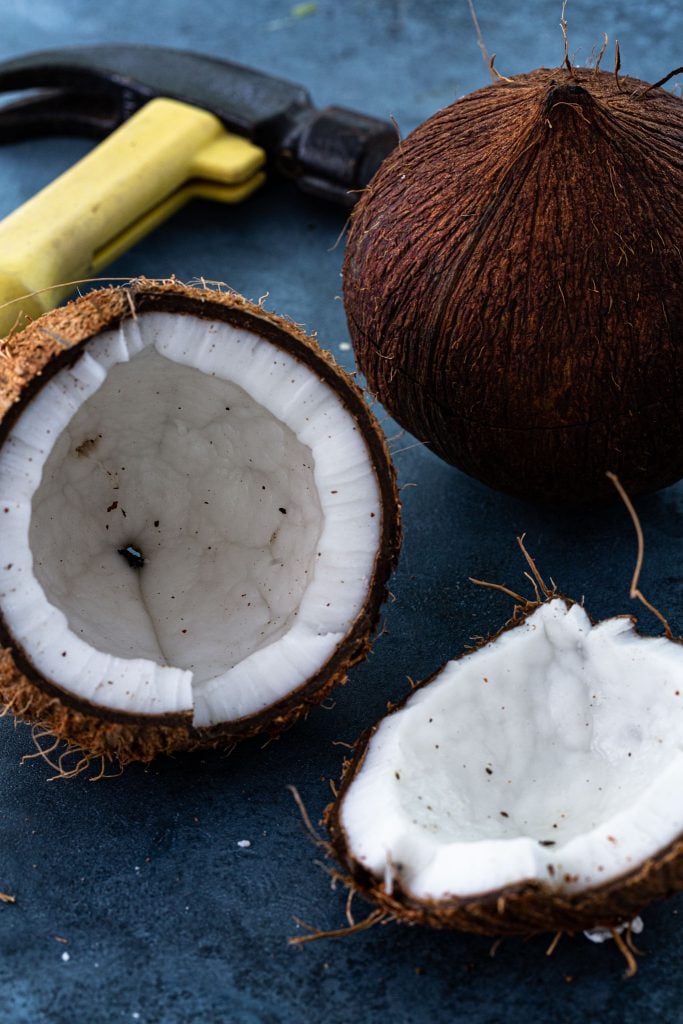
How to Crack Open a Coconut
Packaged shredded coconut really doesn’t compare to the fresh stuff! But cracking them open seems so intimidating. Do we really need to fear it?
And the answer is yes. Opening a coconut is a pain in the butt! Don’t believe me? Try it yourself! I’ve tried a bunch of different techniques, watched people do it on Youtube (with and without special tools) and, while I managed to open it every single time, I was left with a mess, cursing the poor coconut and feeling defeated.
Assuming your store sells fresh coconut flesh in the produce section, I would just buy that. Yes, you might pay a little more for it. But why go through the trouble when someone has done it for you?
I’ll gladly pay for that labor. And if you are reading this post and happen to be someone whose line of work is cracking open coconuts, thank you! Thank you for your service! I see you, and I admire you. And I hope you still have all your fingers left.
Now, jokes aside, if you really want to proceed (at your own risk), here’s what I found works best when I need to crack open a coconut at home:
- See those three “eyes” at the top of the coconut? Get a screwdriver and gently hammer it into them until you create a hole in each. Now turn the coconut into a bowl and pour out all the water. (If you strain it, it is safe to drink).
- Once the coconut is empty, grab it and gently hammer in a line around its circumference, turning and hitting until you see a fracture line start to form. Give it a final tap and it should split into two halves.
- Once opened, use a butter knife (or one of these fancy coconut tools) to pry the coconut from the shell.
Bonus points if you do it without uttering profanities.
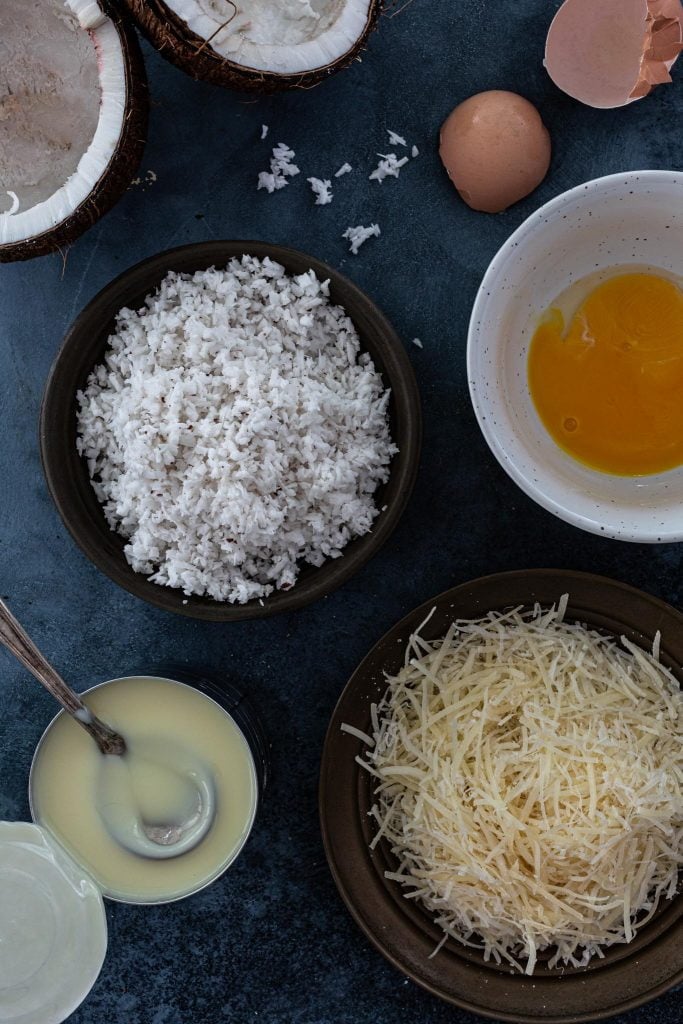
Ingredients for Brazilian Coconut Tarts
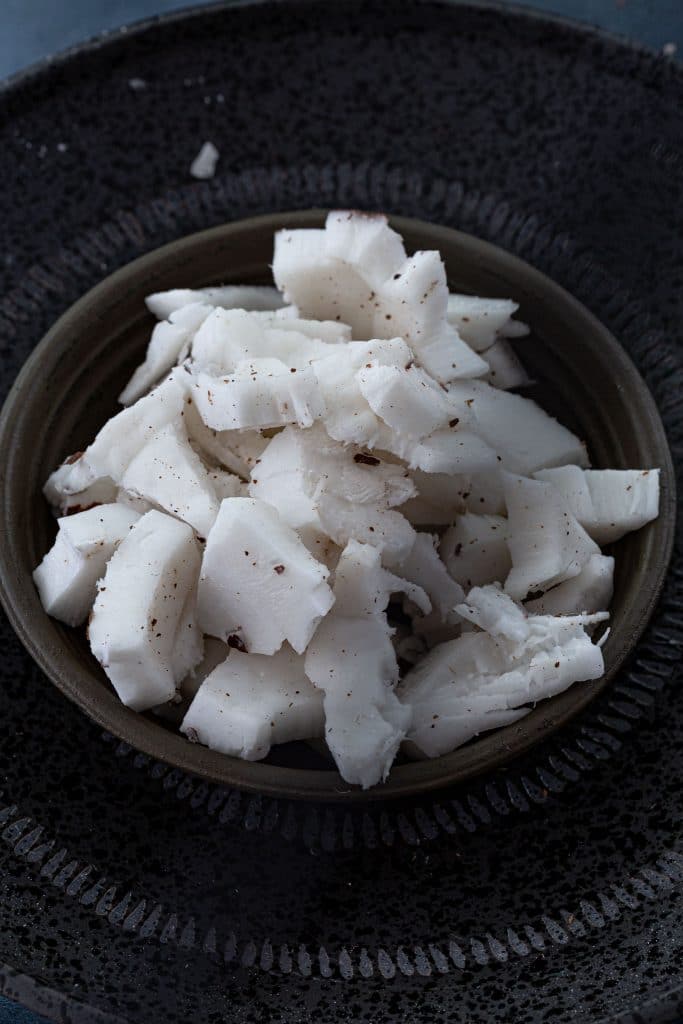
- Shredded coconut – If using fresh, you will have to shred it yourself, using a grater or the food processor. If using the packaged stuff, buy unsweetened.
- Coconut milk
- Parmesan cheese
- Sweet condensed milk – A must have when making Brazilian desserts!
- Egg yolks
- Flour
How to make queijadinha
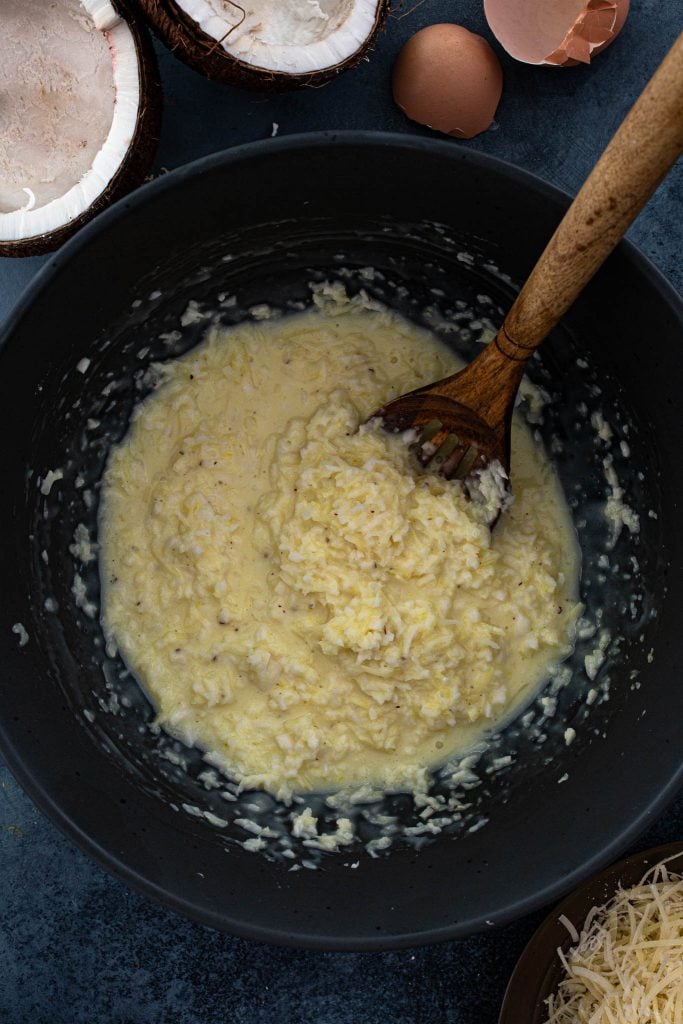
I like to start by soaking the shredded coconut in the coconut milk. That step is especially important if you are using packaged coconut, as sometimes it is quite dry.
After the coconut is soft, you stir in the remaining ingredients, pour the mixture into a muffin tin lined with cupcake cups, and bake in bain-marie until golden brown.
The bain-marie will ensure that the queijadinhas are unbelievably creamy! If you want a sturdier, more cake-like queijadinha, just bake normally.
Why are my queijadinhas sticking to the papers?
These treats are so soft and creamy that it’s inevitable that they will stick to the cupcake cups.
A good trick is to let them cool completely before peeling the paper out. Alternatively, you can use a silicone muffin pan, like this one, or bake them in ramekins and eat with a spoon!
How to bake in a bain-marie
Bain Marie (pronounced ban-mah-ree) is the fancy French term for a water bath. Not the relaxing water bath that you would take after a long day, but a cooking water bath used when you need to cook gently and uniformly.
This technique is often used when making custards, like flans and creme brûlée. The water creates a barrier between the food and the direct heat, and helps to distribute the heat evenly and slowly, ensuring that the eggs won’t curdle and preventing the top from drying out before the inside is fully cooked.
Here’s how it’s usually done:
- Find a baking dish that is a little larger than your muffin pan and that has high sides. You can use a casserole dish, roasting pan or – like I did – a rectangular cake pan.
- Bring water to boil, preferably in a tea kettle. The kettle’s spout will make pouring the water much easier, reducing the chances of splashing and burning yourself.
- Pour the water into the larger dish, around the muffin pan. I like to do it with the dish already in the oven, so I don’t have to risk dropping boiling water all over myself when transferring it to the oven. You want the water to come up only about halfway up the sides of the muffin pan, to prevent it from splashing into the custard tarts. Too little water and they won’t cook properly.
- While the queijadinhas are cooking, make sure to peek in there every now and then, to see if the water is not evaporating too quickly. If it is, just add some hot tap water to complete.
- Once the queijadinhas are done, pull the rack halfway out and carefully remove the muffin pan, leaving the bigger dish in the oven until the water is cool enough that you can safely remove it without risking splashing yourself.
How long will queijadinhas last? Can I freeze them?
You can keep the queijadinhas stored in an airtight container, in the fridge, for up to a week.
And as for freezing, I wouldn’t do it! It won’t harm you health-wise, but the texture is likely to be adversely affected in the freeze/thaw process.

Queijadinha (Brazilian Coconut Tart)
Ingredients
- 2 cups shredded coconut, fresh, if possible
- 1/4 cup full fat coconut milk
- 1 can, 14 ounces sweet condensed milk
- 1/3 cup grated parmesan cheese
- 2 egg yolks, lightly beaten
- 2 tablespoons flour
Equipment
Instructions
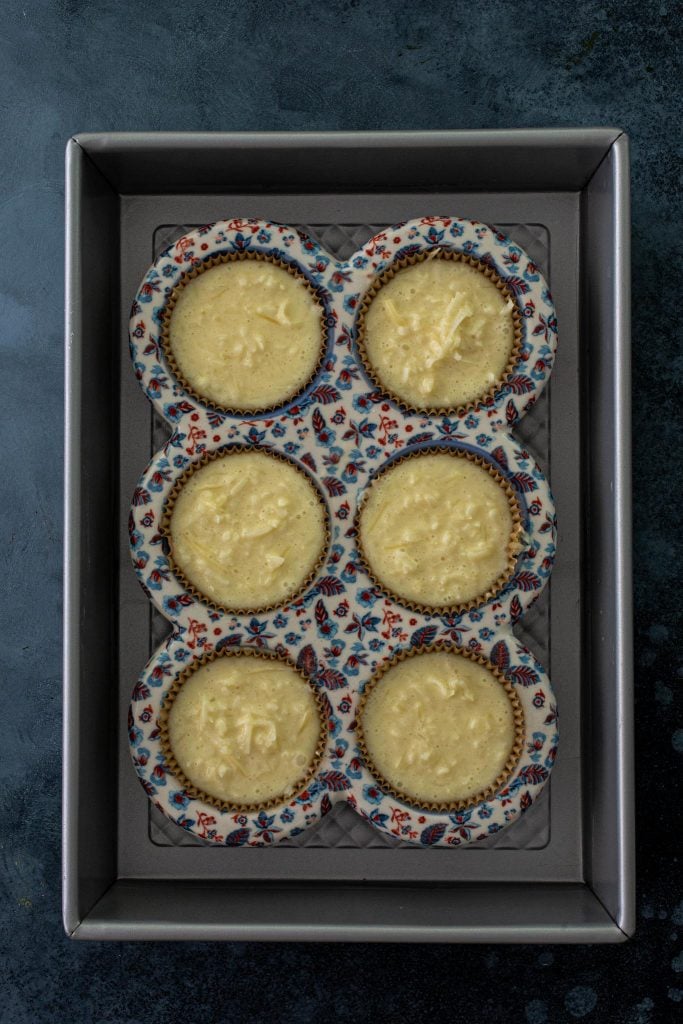
- Preheat oven to 375 degrees F and adjust the oven rack to the middle position. Line a muffin tin with 10 cupcake liners. Reserve.
- In a large bowl, combine the coconut and coconut milk. Let it sit for 5 minutes.
- Add the remaining ingredients and mix well to combine.
- Pour the mixture into the prepared cupcake liners, filling each all the way to the top. The tarts won’t rise, so don’t be afraid to fill them almost completely. Before baking, stir them with a fork, to distribute the coconut and cheese evenly.
- Place the muffin tin into a large baking dish with high sides. You can use a rectangular casserole dish, for example. Bring a kettle full of water to a boil and then pour the boiling water into the larger baking dish, around the muffin tin, being careful to avoid splashing water into the queijadinhas. The water should come about halfway up the sides of the muffin tin.
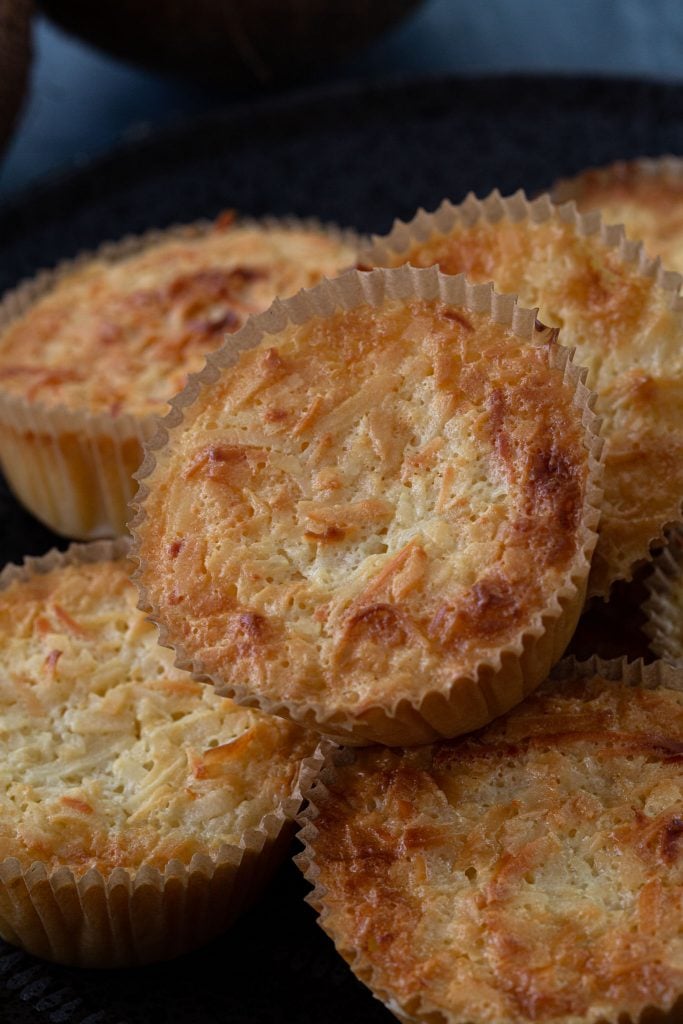
- Bake in the preheated oven for 30 minutes or until golden brown.
- Remove from oven and cool before serving.
- Enjoy!


