Roasted Garlic Aioli

This is a sponsored conversation written by me on behalf of McCain® Foods. The opinions are all mine.
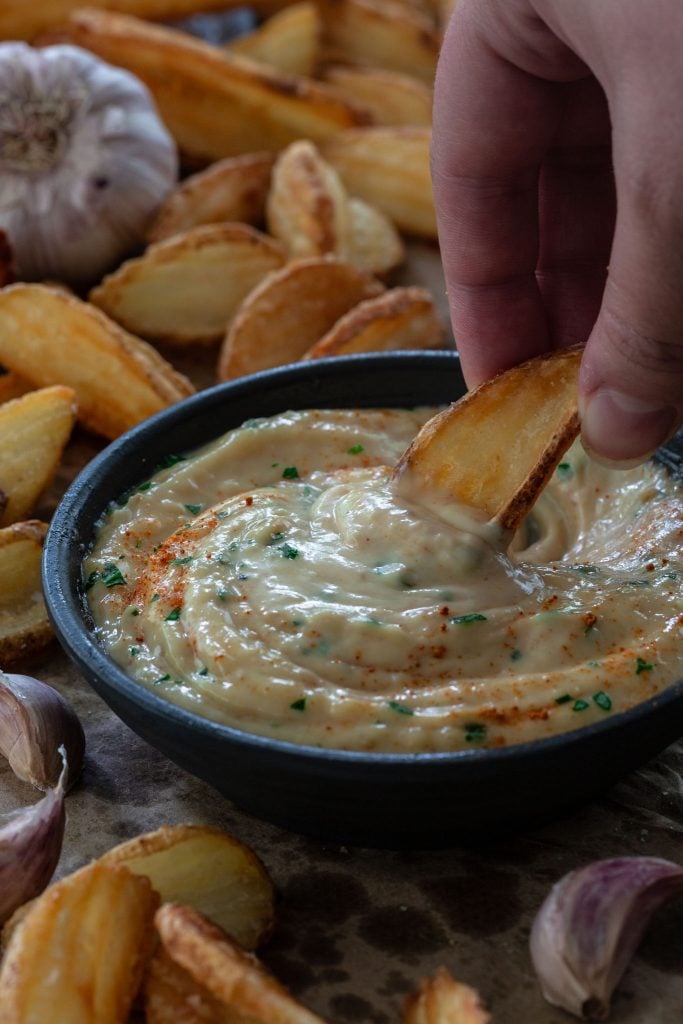
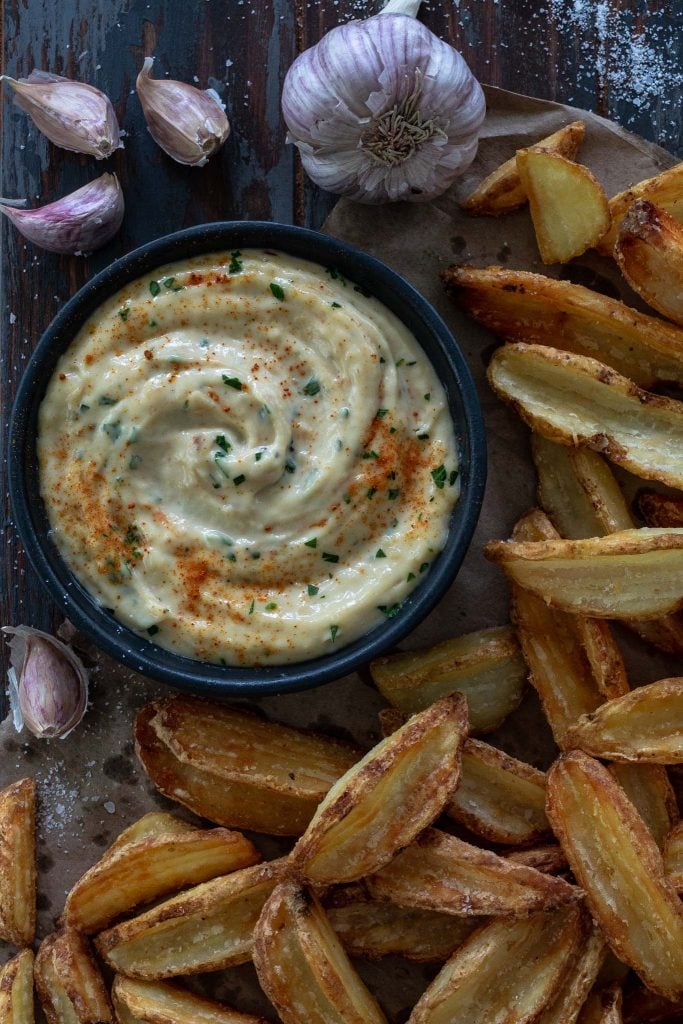
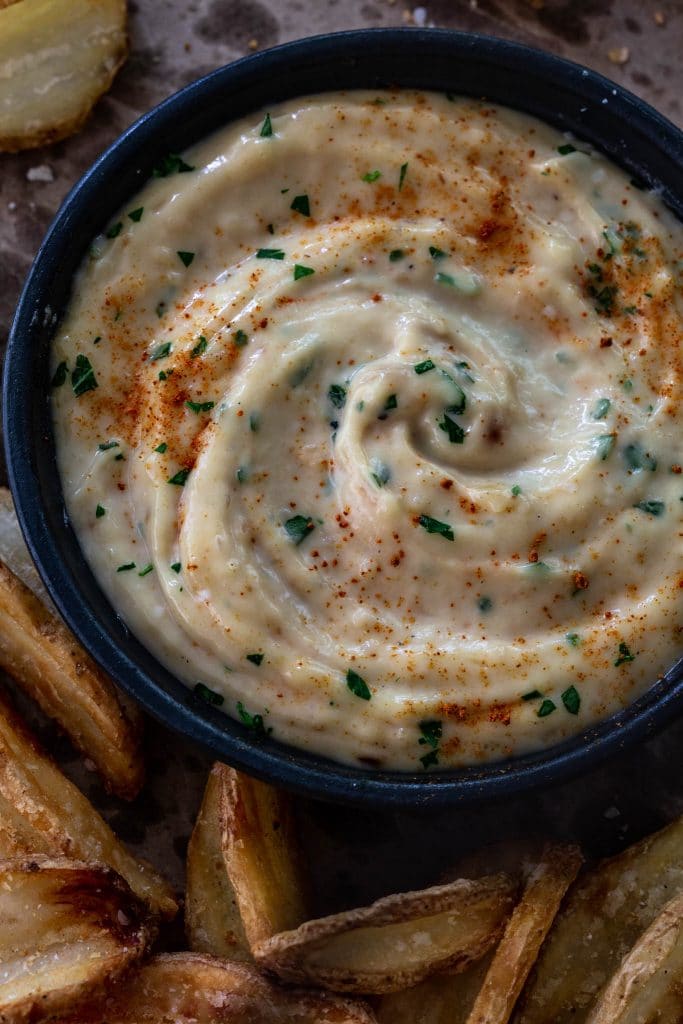
Hello, garlic lovers, this Roasted Garlic Aioli is for you! Creamy, garlicky and packed with umami flavor. Serve it on burgers, veggies or as a dip for McCain® fries!
Happy Memorial Day!
I hope you are kickin’ off the summer season in a backyard full of your favorite people and delicious food.
I’m excited because Tim will be doing most of the cooking on the grill! Think burgers, steaks, hot dogs and grilled corn. ♡♡♡ Oh, I can’t wait!
Not that that means I won’t have to do anything, as a trip to the kitchen will be needed so I can make my always requested Roasted Garlic Aioli.
It’s an easy and versatile sauce! Delicious, spreadable, dippable and very, VERY addicting. I feel almost guilty to share this recipe with you. Because once you try it, there is not going back, and you will want it over and over again!
And if you find yourself eating it by the spoonful, it’s okay! No judgement. Been there, done that!
What is Aioli?
There are a few things we need to know about aioli:
- It’s delicious!
- It means different things to different people.
For some, it is a Mediterranean sauce made of lots of garlic, salt and olive oil. To others, it means a homemade garlic mayo: an emulsion of olive oil, garlic, lemon juice and egg yolks.
And then there are the ones – hello, there! – who think store-bought mayo mixed with “something else” can be called aioli.
Chipotle + Mayo? Chipotle Aioli. Sriracha + Mayo? Sriracha Aioli! Roasted Garlic + Mayo? Roasted Garlic Aioli!!!
Traditional? Not at all. But oh SO GOOD! (Plus, there’s the fact that we are not dealing with raw eggs, which I know scares some of you.)

Ingredients for Roasted Garlic Aioli
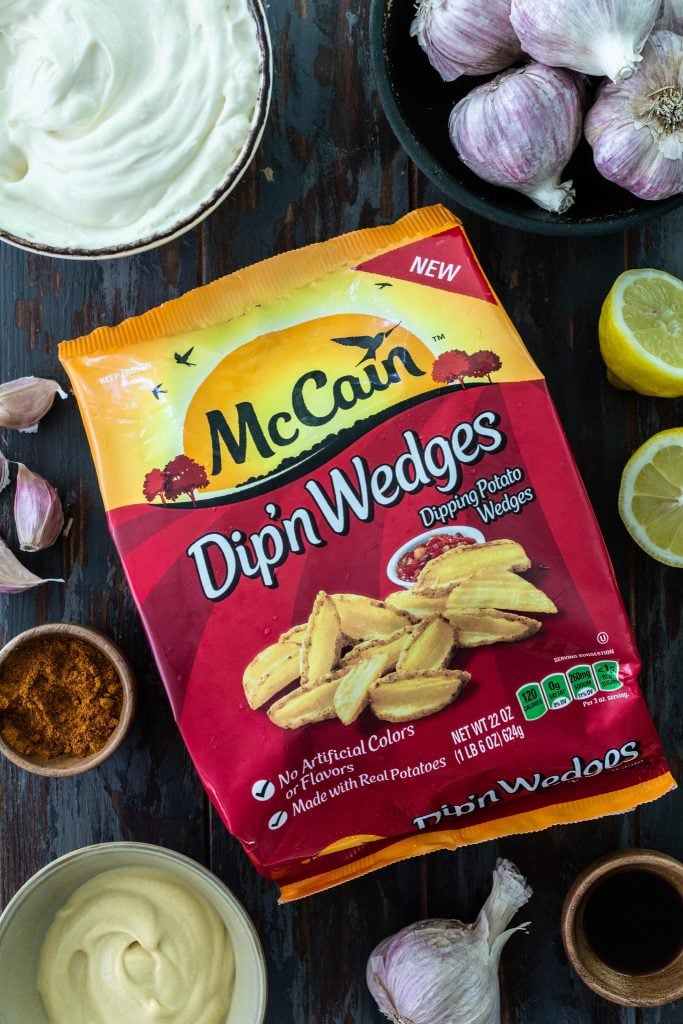
Now that we’ve addressed the fact that I’m an aioli rebel, here’s what you’ll need:
- Mayo – Wanna be fancy and make your own? Be my guest! But the good old store-bought brand will work just fine here.
- Roasted Garlic – The star of the show!
- Lemon Juice
- Dijon mustard
- Worcestershire sauce
- Cayenne pepper – optional, but recommended! A small pinch goes a long way!
Different Ways to Use Aioli
As I mentioned before, there are unlimited uses for this Roasted Garlic Aioli! Here are some of my favorites:
- Dip for steamed artichoke or crudités.
- Spread for burgers and sandwiches.
- Sauce for crab cakes, seafood, roasted asparagus or Brussels sprouts.
- As an ingredient for potato or chicken salad.
But, to be honest, 9 times out of 10 I serve it as a dipping sauce for fries! You just can’t beat freshly made French fries paired with a good aioli sauce.
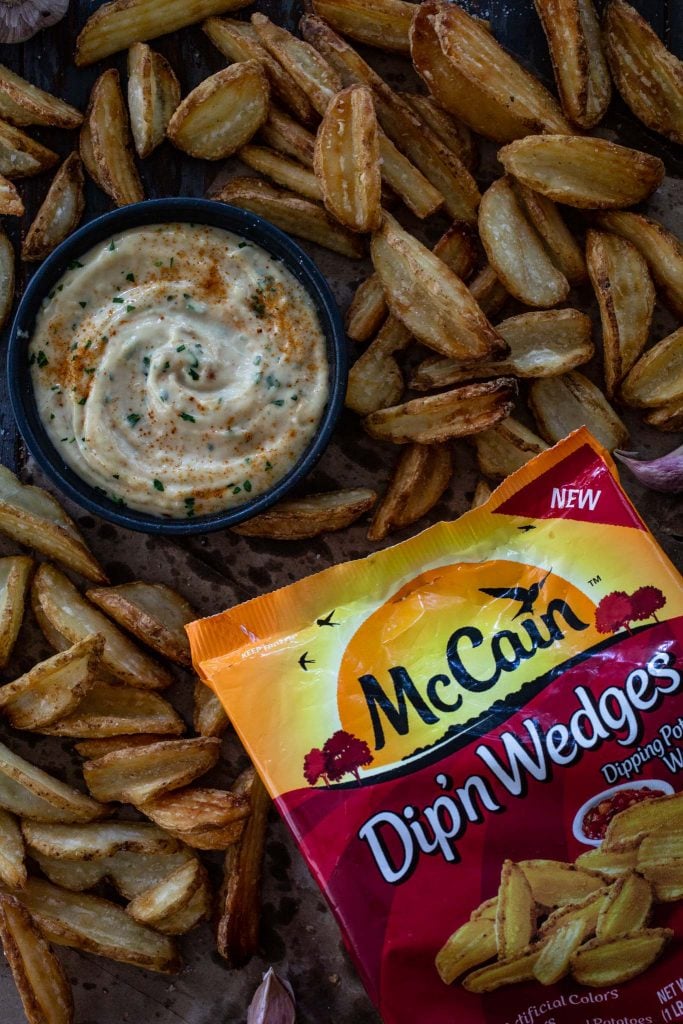
I’ve been a longtime fan of McCain fries, especially their Seasoned Curly Fries. However, they’ve recently invited me to try their new Dip’n Wedges (which I easily found at Walmart) and I’ve been completely obsessed.
Like all their other products, these are made of real potatoes, without any artificial flavors or colors. But they are v-shaped, making them perfect to scoop your favorite dip or to pile up with toppings!
I’m not ashamed to say I have quite a few bags in my freezer right now. If we don’t devour them all today, I am thinking loaded fries next. Just imagine these beauties topped with cheese, bacon and ranch sauce!
Pro tip: Add a garlic clove (or two) to your frying oil for some extra garlic flavor! Yum!

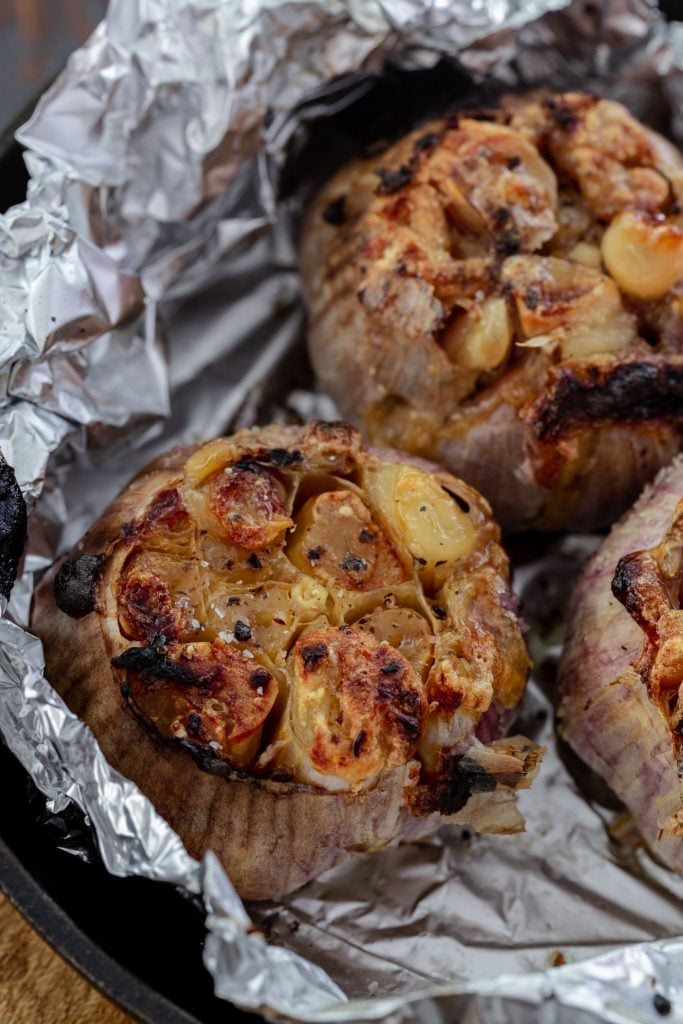
How to Roast Garlic
Roasting garlic is easy, but it does take time! At least 40 minutes if not more. But trust me it is so worth it!
I’ve seen several methods of “roasting” garlic on the internet, including in the microwave. However, I find that the best way to get the garlic to become super creamy, almost like butter, is to roast it in the oven.
This is how I do it:
- Remove the outer layer of white skin that surrounds the garlic cloves. This not only makes it easier to squeeze out the creamy goodness later, but also ensures that the cloves get more exposure to the heat while roasting.
- Trim the top off each garlic head. Just a little bit, to expose the garlic cloves, as you don’t want to lose anything.
- Drizzle with olive oil and season with salt and pepper. The oil will help with that beautiful caramelization!
- Place it in a foil pouch and wrap tightly. If you don’t want to use foil, you can buy a garlic roaster (like this one) or use a muffin tin topped with another (identical) muffin tin.
- Roast until golden brown and tender! The longer you roast, the deeper the color and the flavor.
- Remove each clove with a paring knife. Or, if you can wait until the heads are cool enough, you can use your fingers to squeeze them out.
If you love roasted garlic like I do, I’d roast a bunch of heads at once. That way you will always have it on hand! They keep well in the fridge for a couple weeks or in the freezer for up to 2 months!
How to Make Roasted Garlic Aioli
Once you’ve roasted the garlic, all you gotta do is mash it into a paste and combine all the ingredients until smooth! No special equipment needed!
You can refrigerate it so it can set and thicken slightly, but I usually don’t, since I can’t help but dig in immediately.
Can I make aioli ahead of time?
Yes! You can make it up to 3 days ahead, as it keeps well stored in an airtight container in the fridge!
Can I freeze leftovers?
While safe to eat, mayo that has been frozen and thawed loses its original texture. The ingredients will separate, and you’ll be left with a thinner, watery mess!
The good news is that this aioli is so delicious that you probably won’t have any leftovers.
Roasted Garlic Aioli
Ingredients
- 3 whole heads garlic
- Extra virgin olive oil
- Salt and freshly ground pepper, to taste
- 1 cup mayonnaise
- 1 tablespoon Dijon mustard
- 1 tablespoon lemon juice
- 1 teaspoon Worcestershire sauce
- Pinch of cayenne pepper, optional
Instructions
Roast the garlic:
- Preheat oven to 425 degrees F.
- Peel the white papery skin off the garlic heads and slice off their tops to expose the cloves.
- Place the garlic heads on a piece of foil, drizzle them with olive oil and season generously with salt and pepper. Tightly wrap the foil around the heads and place in a shallow dish or baking pan.
- Roast until tender and browned, 40 to 60 minutes. The cooking time depends on how dark you want them. Remember: the darker the color, the deeper the flavor.
- Once the garlic heads are done, let them cool and then remove each clove by using the tip of a paring knife or by squeezing them out of their skins with your fingers.
Preparing the Roasted Garlic Aioli:
- Using a fork, mash the roasted garlic cloves until a paste forms.
- In a medium size bowl, combine the mayo, roasted garlic paste, Dijon mustard, lemon juice, Worcestershire sauce and cayenne. Whisk until smooth. Season with salt and pepper as needed.
- Serve immediately or refrigerate for up to 2 days. You can garnish with chopped herbs and some cayenne pepper if desired!


