Batata Palha Recipe (Brazilian Crispy Potato Sticks)

If you’ve ever opened a bag of batata palha and started snacking straight from it… same! These crispy potato sticks are a staple in Brazilian kitchens, adding the perfect crunch and flavor to everything from arroz biro-biro to hot dogs. While store-bought is convenient, homemade batata palha is fresher, cheaper, and so worth it, and I’m going to show you exactly how to make it.
If you love Brazilian food as much as I do, this is one of those staples you’ll want to have on hand. It’s the finishing touch that takes dishes like arroz biro-biro, beef stroganoff or chicken stroganoff, fricassê de frango, and even simple rice and beans to the next level. And if you’re building out a Brazilian menu, I’ve got plenty more recipes here on the site to help you bring it all together.
What is Batata Palha?
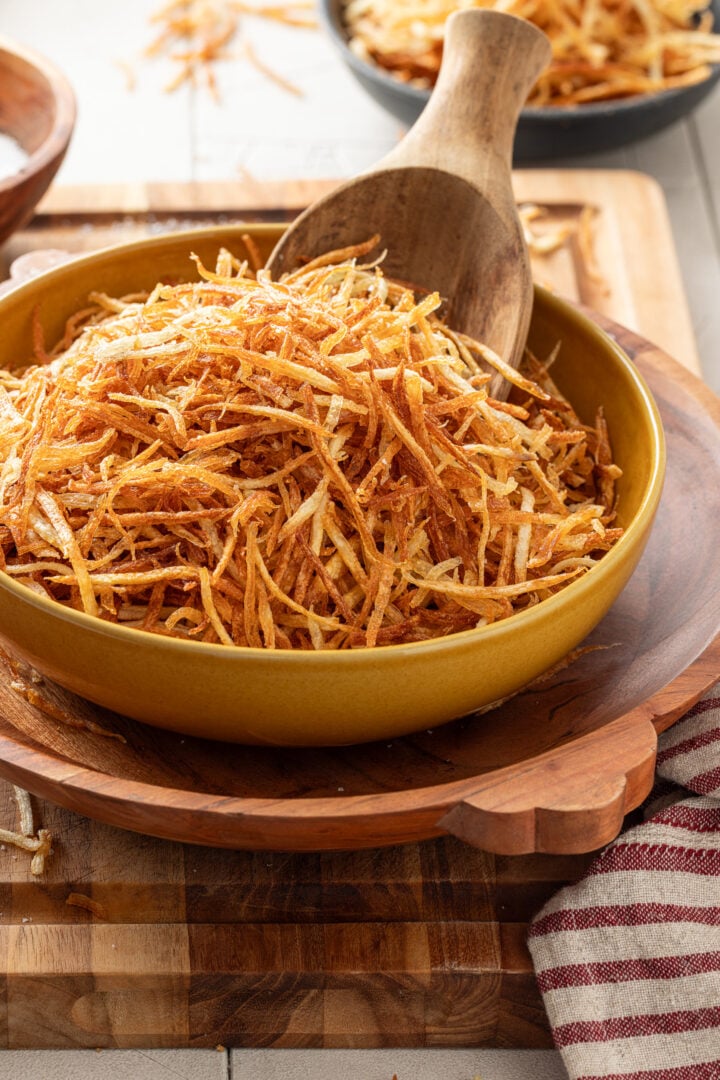
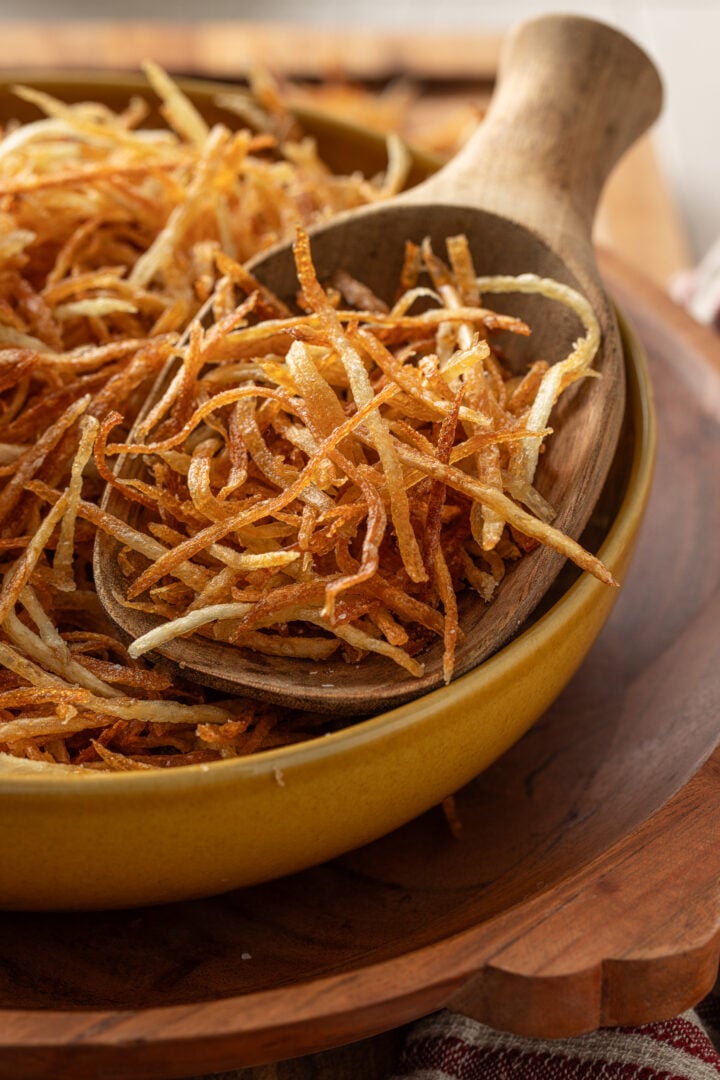
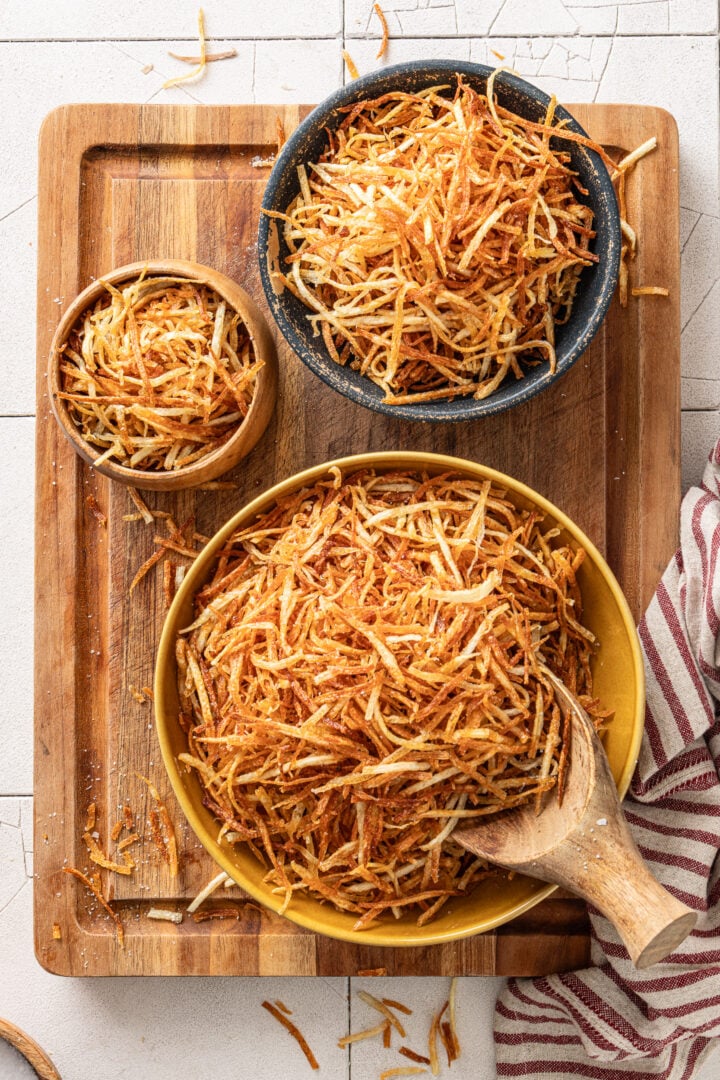
Batata palha is a beloved Brazilian side dish/topping made with very thinly cut potatoes fried until crisp, golden, and ridiculously crunchy. Think of it as Brazil’s answer to shoestring potatoes, only better (yes, I said it! 😉 ).
If you’ve been to a Brazilian market, you may have seen bags of batata palha from brands like Yoki and Elma Chips, and many Brazilian households keep a bag in the pantry. It’s one of those foods many Brazilians grow up eating and, if you ask me, one of those simple things that makes everything more delicious.
And while store-bought is convenient, homemade batata palha is a whole different story. It’s lighter, crispier, fresher, and dangerously snackable. Don’t be surprised if you find yourself eating it straight from the bowl before it ever makes it to the table! 🤭
At a Glance
- Cuisine: Brazilian
- Course: Side dish, topping
- Yield: About 8 cups
- Cooking Method: Deep frying
- Skill Level: Easy
- Texture: Crispy, light, crunchy
- Flavor: Mild, savory, lightly salty
- Make Ahead: Yes!
Why I love this recipe
I love this recipe because it takes something so simple – potatoes! – and turns it into the most irresistible, crunchy topping. There’s just something about batata palha that makes every dish better. Sprinkle it over stroganoff, hot dogs or even rice and beans, and suddenly you’ve got that perfect crispy contrast that makes each bite more exciting.
It’s also very easy to make at home. No fancy ingredients, no complicated steps, just a few good potatoes and a little patience while they fry up golden and crisp. Once you try homemade, it’s hard to go back to the store-bought version!
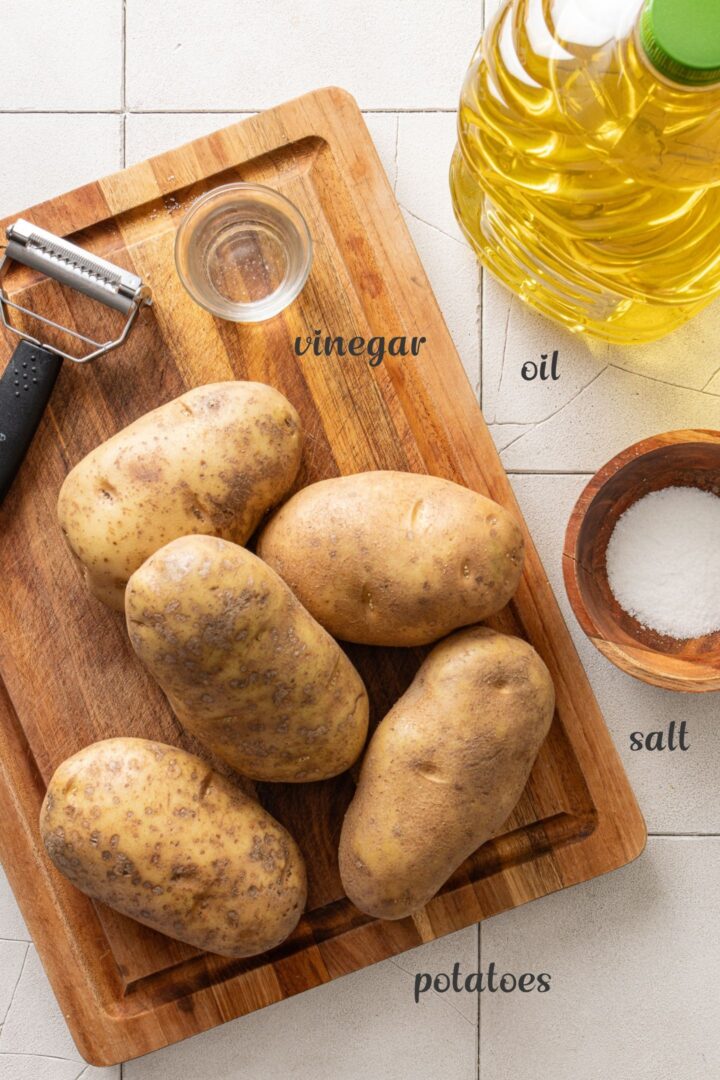
Ingredients
To make Brazilian Batata Palha, you will need:
- Potatoes – Russets are the best choice here because they’re high in starch and low in moisture, which means crispier, lighter potato sticks. Yukon Golds can work in a pinch, but they’ll be slightly less crispy and a bit more buttery in flavor.
- Oil – You want a neutral oil with a high smoke point for frying. Canola is great, but you can also use vegetable oil, sunflower oil, peanut oil, or corn oil. Avoid olive oil here as it has a lower smoke point and a stronger flavor that can overpower the potatoes.
- Vinegar – Added to the soaking water, vinegar helps remove excess starch, prevent browning, and improve crispiness. You won’t taste it in the final result. Use white vinegar or apple cider vinegar – both work well.
- Salt – Essential for bringing out the natural flavor of the potatoes. Be sure to season the batata palha immediately after frying, while they’re still hot, so it sticks evenly and enhances every bite.
How to Make Batata Palha
I finally decided it was time to get this recipe on the blog because, honestly, Brazilian batata palha is not the easiest thing to find in the US, and when you do find it online, it can be surprisingly expensive for what it is. The good news? It’s incredibly simple to make at home, and once you do, you might wonder why you ever bought it!
The biggest game changer here is using a julienne peeler. It gives you those thin, even potato strands that fry up perfectly crisp without much effort (so worth it!). From there, it’s just a matter of soaking, drying, and frying until golden. Simple process, amazing payoff, and that irresistible crunch you want in every bite.
Recommended tools and equipment: potato peeler, julienne peeler (or box grater), large bowl for soaking, clean kitchen towel, paper towels, spider strainer or slotted spoon, oil solidifier (this has been a genius trick for disposing of used oil!).


Here’s how I make this batata palha recipe. As always, you will find the printable (and more complete) version of the recipe at the end of this post!
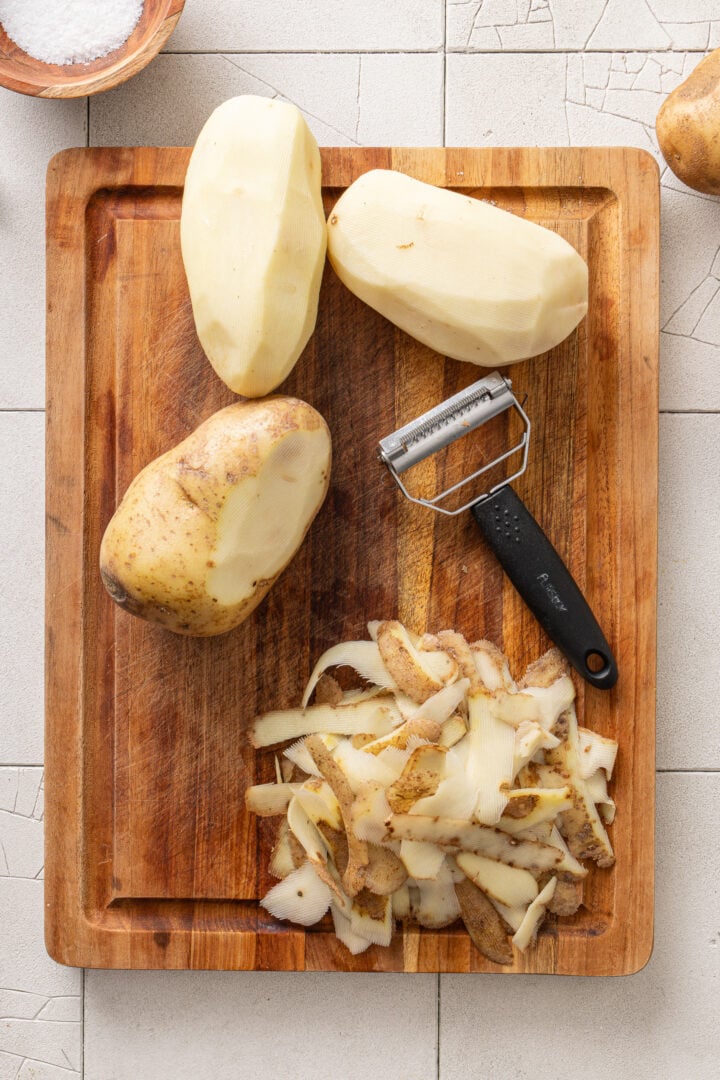
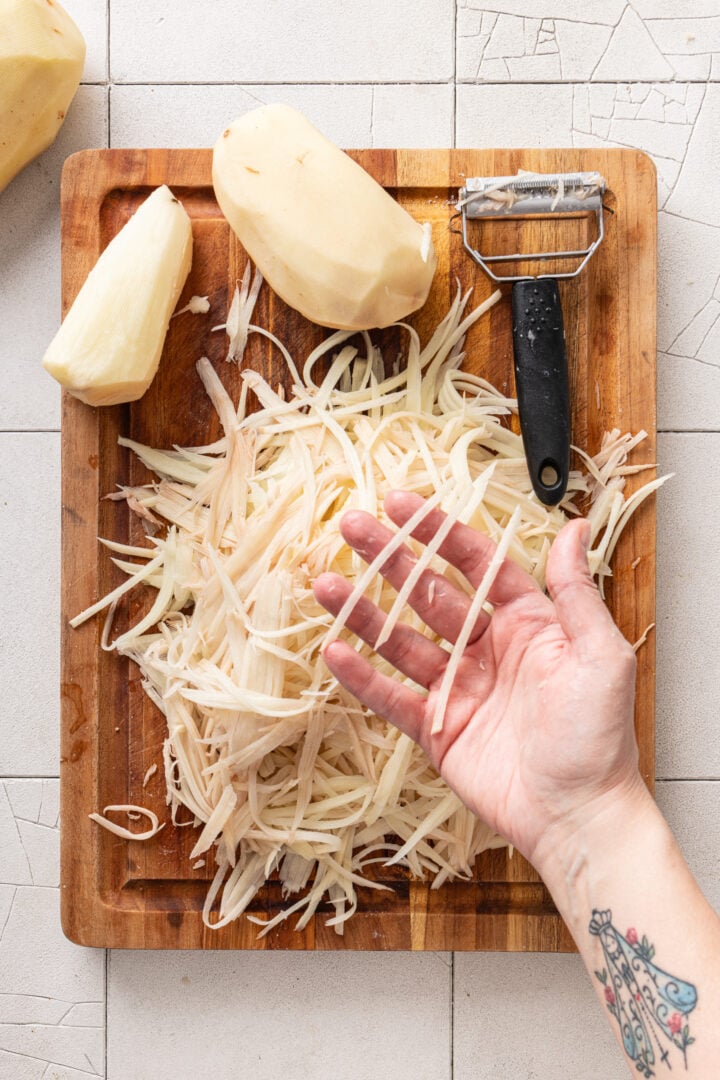
Step 1: Prep the potatoes
- Start by peeling the potatoes, then use a julienne peeler to cut them into thin strips. This is the easiest way to get that classic batata palha shape, and it helps the potatoes cook quickly and evenly. Try to keep the strands as uniform as possible so they fry at the same rate.
If you do not have a julienne peeler, you can use the large holes of a box grater instead. The texture will be a little different, but it still works well.
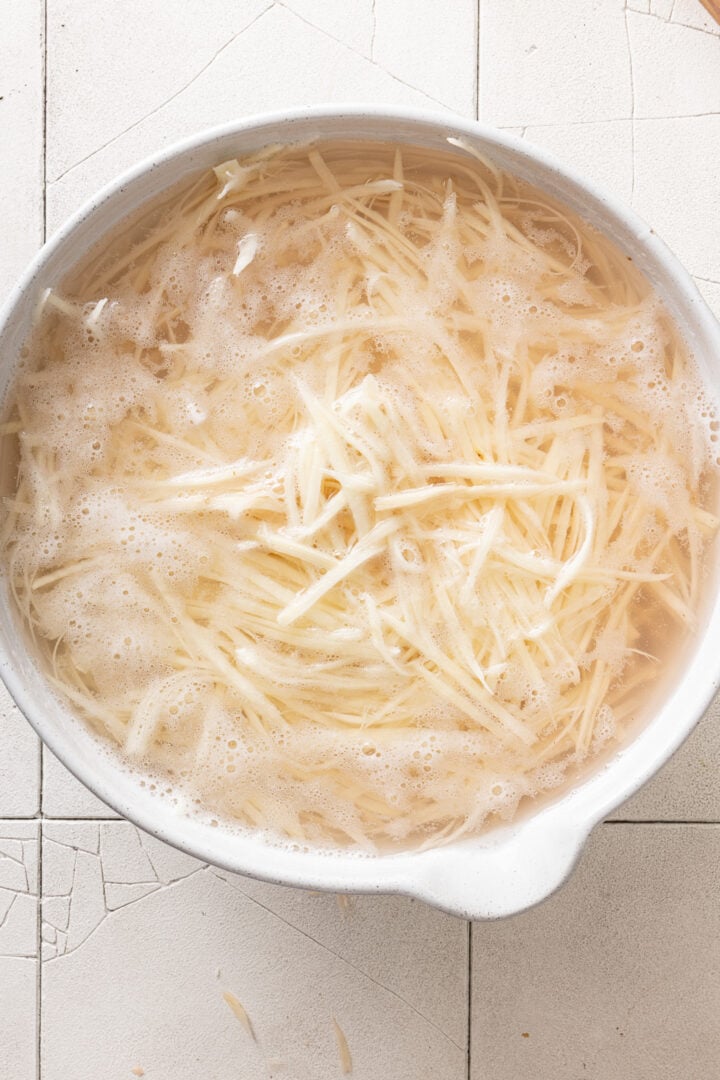
Step 2: Soak the potatoes
- Transfer the julienned potatoes to a large bowl and cover with cold water. Add a splash of vinegar and let them soak for about 10 to 15 minutes. This helps remove excess starch, keeps the potatoes from browning too quickly, and helps them fry up crispier. You will probably notice the water getting cloudy, which is exactly what you want.
You don’t need to soak them forever – 10 to 15 minutes does the trick. Any longer and they can absorb too much water, which means more splattering and less crispiness when frying.
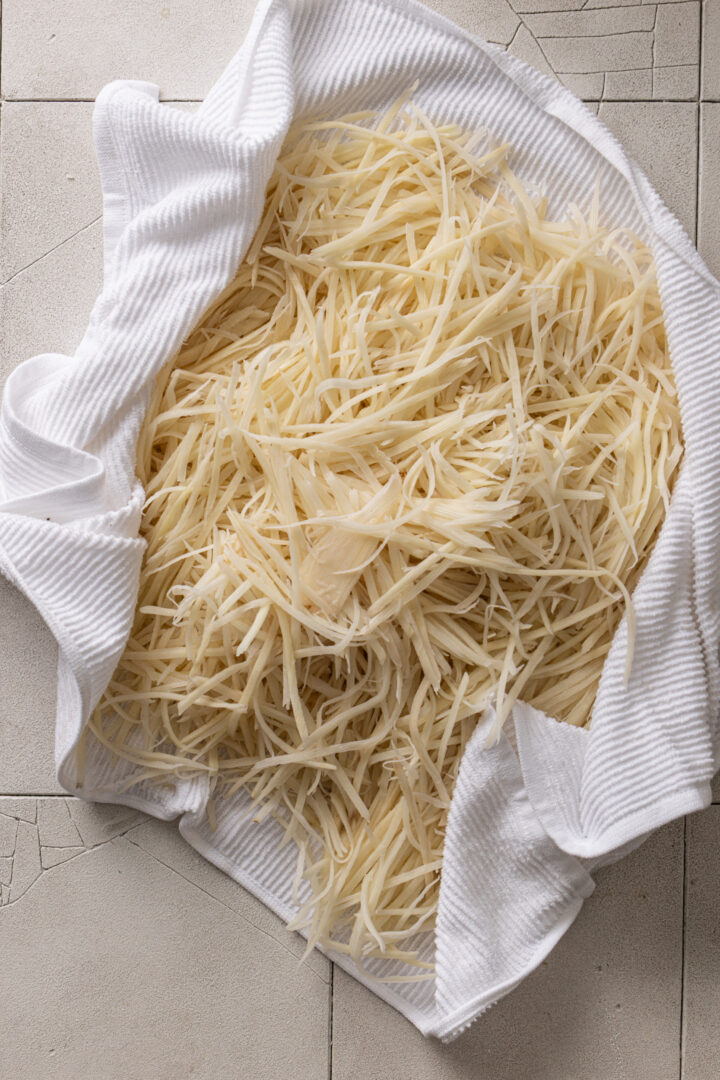
Step 3: Drain and dry very well
- Drain the potatoes and pat them very dry with a clean kitchen towel or paper towels. This step is important, so do not rush it. The drier the potatoes are before they hit the oil, the crispier they will get. Removing as much moisture as possible also helps prevent the oil from splattering.
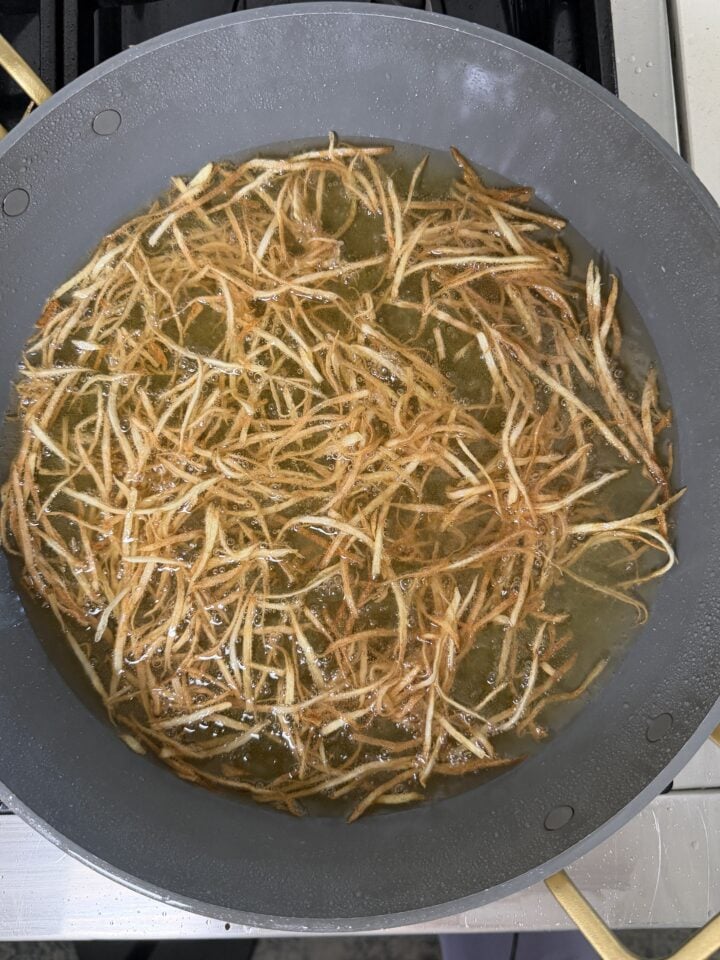
Step 4: Fry in batches
- Pour the oil into a heavy-bottomed pot or Dutch oven (if you have a deep fryer, you can use that instead) and heat it over medium to medium-high heat until it reaches about 350–360°F (175–182°C). This is the sweet spot for getting the potatoes crispy without burning.To test it, drop in a small strand of potato: if it sizzles right away, the oil is ready.
- Now for my grandma’s trick: add a couple of whole garlic cloves to the oil as it heats. Totally optional, but they gently infuse the oil with flavor, giving the batata palha a subtle, delicious aroma. Just keep an eye on them and remove once they turn lightly golden so they don’t burn.
- Add the potatoes in small batches, making sure not to overcrowd the pot. Fry them until they are lightly golden and crisp, stirring occasionally so they cook evenly. Because they are so thin, this happens quickly, so keep a close eye on them.
- Stir gently every now and then to help them separate and break apart any clumps.
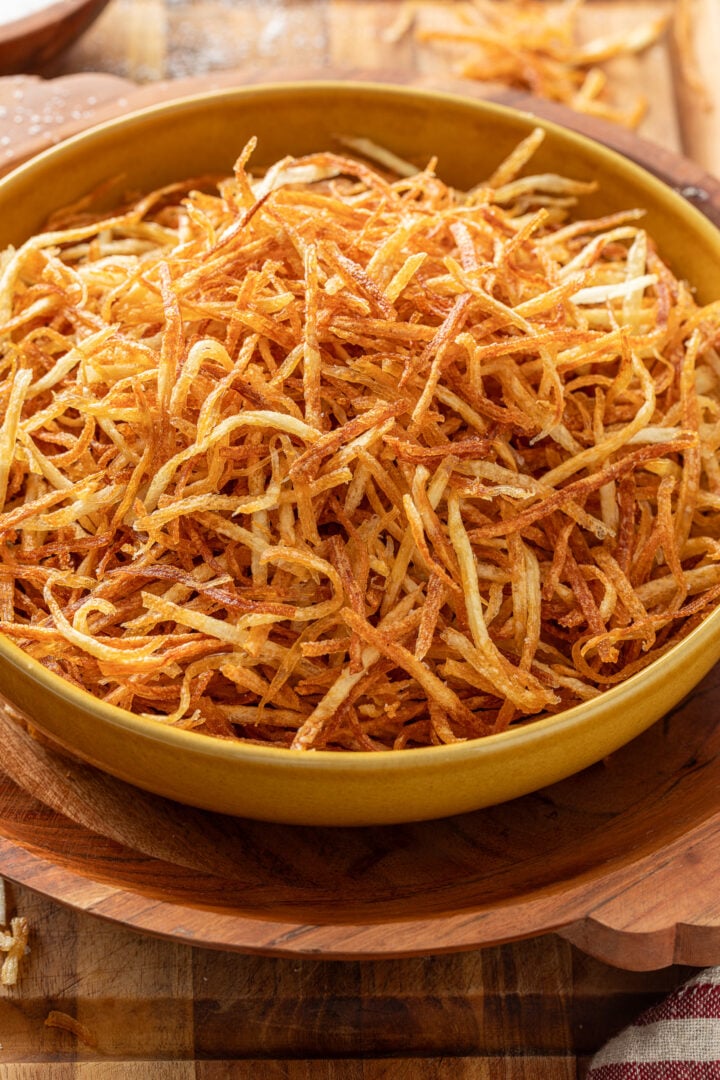
Step 5: Drain and season
- Use a spider strainer or slotted spoon to transfer the fried potatoes to a paper towel-lined plate. Sprinkle with salt right away, while they are still hot, so the seasoning sticks well. They will continue to crisp up a little more as they cool.
Step 6: Serve or store
- Use right away or store for a few days.
Olivia’s Tips
- Do not skip the vinegar soak! – Soaking the potatoes in water with a splash of vinegar helps remove excess starch, keeps them from browning too quickly, and helps them fry up crispier. It is a simple step, but it makes a big difference in the final texture.
- Dry the potatoes really well – This is the #1 tip for crispy batata palha. Any leftover moisture will cause splattering and can make the potatoes steam instead of fry.
- Keep an eye on the color as they go from pale to golden very quickly. Pull them out when they’re lightly golden and they’ll continue to deepen slightly as they cool.
- Stir gently while frying – This helps separate the strands so they don’t clump together and ensures even cooking.
- Salt immediately after frying – Season while they’re still hot so the salt sticks evenly and enhances the flavor.
- Avoid covering while still warm, as trapped steam will soften it. Wait until they are completely cooled to store them for best results!
Serving Suggestions
Batata palha is one of those ingredients that instantly elevates a dish. It’s a must for Brazilian classics like arroz biro-biro, fricassê de frango, and salpicão, where that crispy texture balances out the creamy, savory elements. Just a generous handful on top adds contrast and makes everything feel a little more special.
It’s also perfect as a topping or side. Sprinkle it over Brazilian hot dogs for that signature crunch, or serve it alongside stroganoff. Honestly, it’s just as good piled next to a simple plate of rice and beans.
And don’t be surprised if you find yourself snacking on it straight from the bowl. It’s hard to resist that light, crispy, salty bite! 🤤
Variations
One of the best things about batata palha is how easy it is to customize. Once you’ve got the basic method down, you can play around with flavors depending on how you’re serving it.
- For a little extra flavor, try adding garlic (or onion) powder, smoked paprika, grated parmesan or a pinch of black pepper right after frying.
- If you want to switch things up, you can make it with sweet potatoes instead of russets. The result is slightly sweeter and just as crispy – great for adding contrast to savory dishes. You can also cut the potatoes a bit thicker for a more rustic version, though they won’t be quite as light and delicate.
- And for a lighter option, you can try making batata palha in the air fryer. It won’t be exactly the same as deep-fried, but it still gives you a nice crispy texture with less oil. Just be sure to work in batches and keep the strands as dry as possible.
Storage
Let the batata palha cool completely before storing. This is key to keeping it crispy! Once cooled, transfer to an airtight container and keep it at room temperature for up to 3 days. Avoid refrigerating, as the humidity can make it lose its crunch.
If it softens slightly, you can bring it back to life by popping it in a low oven (around 300°F) for a few minutes until crisp again.
Freezing?
Freezing is not recommended for batata palha. The moisture from freezing and thawing will make the potatoes soft and soggy, and they won’t regain that signature crispy texture. For best results, enjoy fresh or within a few days of making.
Frequently Asked Questions
Yes! Batata palha stores really well. Let it cool completely, then keep it in an airtight container at room temperature for up to 3 days. It will stay nice and crispy as long as it’s kept dry.
This usually comes down to a few things: the potatoes weren’t dried well enough, the oil wasn’t hot enough, or the pot was overcrowded. Make sure to dry thoroughly, fry in small batches, and keep the oil around 350–360°F.
You can, but russet potatoes are best for that light, crispy texture. Other varieties have more moisture and may not crisp up as well.
Yes, you can reuse it a few times. Let it cool completely, strain out any bits, and store it in a sealed container. Just keep in mind the flavor may become more pronounced over time.
You can! The texture won’t be exactly the same as deep frying, but it’s a great lighter option. For the air fryer, make sure the potatoes are very well dried first, then toss them with a small amount of oil (just enough to lightly coat). Spread them in a thin, even layer (this is key!) and cook at 375–400°F, checking and tossing every few minutes so they cook evenly.
Work in batches and avoid overcrowding, or they’ll steam instead of crisp. Depending on your air fryer, they’ll take about 8–12 minutes total. Keep a close eye toward the end, since they can go from golden to overdone quickly. They may not be quite as light and delicate as the fried version, but you’ll still get a nice crispy result!
More Brazilian Recipes
Did you make this recipe? I love hearing from you! Please comment and leave a 5-star rating below. You can also take a photo and tag me on Instagram with #oliviascuisine.
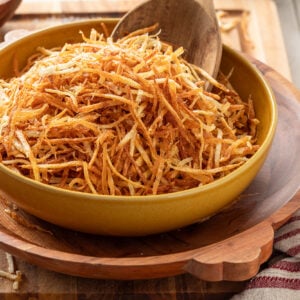
Batata Palha (Brazilian Shoestring Potatoes)
Ingredients
- 5 large russet potatoes, peeled
- Canola oil, for frying
- 1 tablespoon white vinegar
- Salt, to taste
Instructions
- Peel the potatoes and cut them into thin strips using a julienne peeler. A box grater (large holes) works too.
- Place the potatoes in a large bowl and cover with cold water. Add the vinegar and let soak for 10 to 15 minutes.
- Drain the potatoes well, then spread them over a clean kitchen towel or paper towels and dry very well. This step is important for crispiness.
- In a heavy-bottomed pot or Dutch oven, heat a few inches of canola oil to 350–360°F. If desired, add 2 whole garlic cloves to the oil while it heats for extra flavor, then remove them once lightly golden.
- Fry the potatoes in small batches, stirring gently every now and then to break apart any clumps, so the strands separate and cook evenly. Fry until lightly golden and crisp, about 2 to 4 minutes per batch.
- Use a spider strainer or slotted spoon to transfer the batata palha to a paper towel-lined plate. Season with salt right away while still hot.
- Repeat with all the potatoes, letting the oil return to temperature between batches.
- Let cool completely before serving or storing in an airtight container.
Notes
- Do not skip the soak
Soaking the potatoes in water with vinegar for 10–15 minutes helps remove excess starch and results in crispier batata palha. - Dry thoroughly
Make sure the potatoes are very well dried before frying to prevent splattering and ensure maximum crispiness. - Fry in batches
Avoid overcrowding the pot so the oil temperature stays steady and the potatoes fry up light and crispy. - Storage
Let the batata palha cool completely, then store in an airtight container at room temperature for up to 3 days. If needed, re-crisp in a low oven. - Freezing
Freezing is not recommended, as it will make the potatoes soft and soggy. - Air fryer option
For a lighter version, air fry the potatoes at 375–400°F. Arrange them in a thin layer and lightly spray with oil (or toss with a very small amount) so they crisp up properly. Cook for about 8–12 minutes, tossing every few minutes for even browning. Work in batches and make sure the potatoes are very dry for best results.

