Pão Francês (Brazilian Bread Rolls)

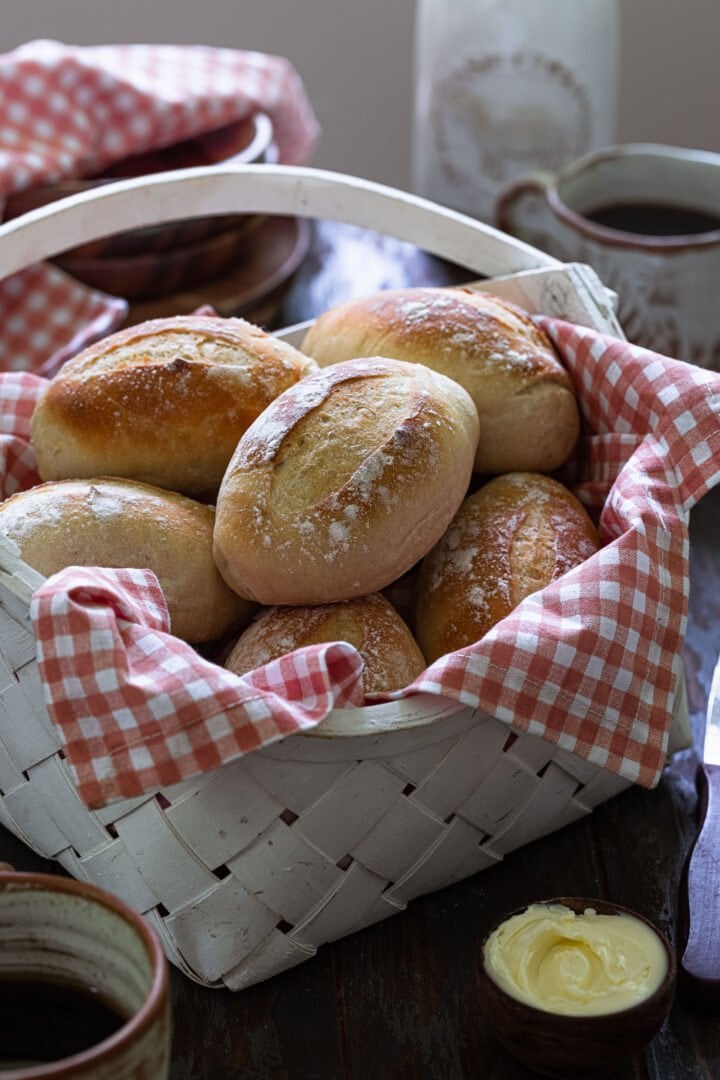
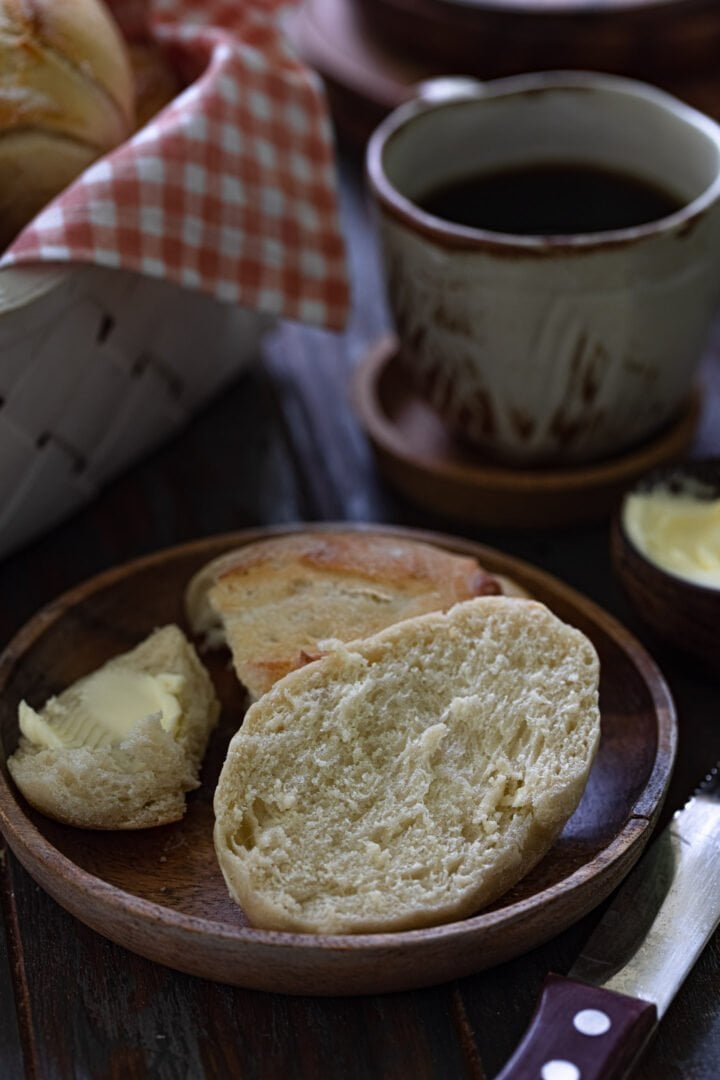
Eating Pão Francês for breakfast is one of Brazil’s most beloved traditions! Eat it warm out of the oven, with butter, or use it to make a delicious sandwich. So easy to make at home that you won’t want to buy store bought ever again!
Homemade bread is one of my passions. After you try these Brazilian rolls, make sure to also check out my Fluffy Brioche Buns, Mediterranean Black Olive Bread, French Baguettes and Honey Oat Bread.
Phew! I can’t tell you what a relief it is to finally post this recipe. I get requests for it daily, and I was eager to get it done for y’all!
I have been working on perfecting it for the past year or so. It was just a few small tweaks, but I just couldn’t publish it until it was absolutely perfect!
I know how Brazilians are obsessed with pão francês, so the recipe had to be bullet proof!
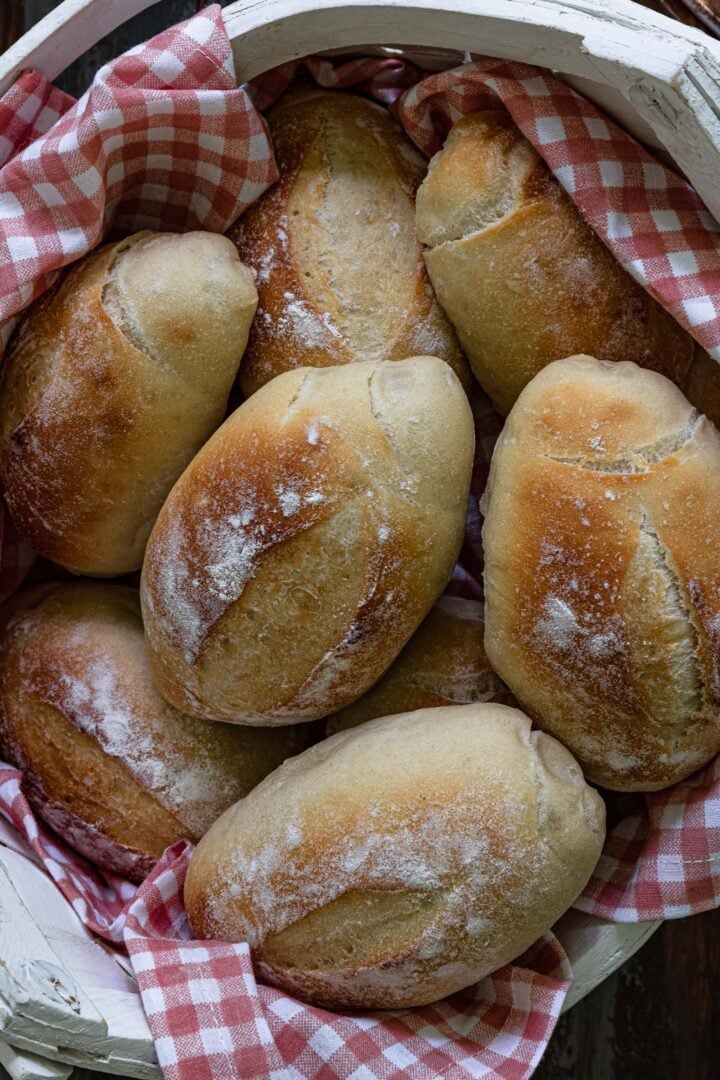
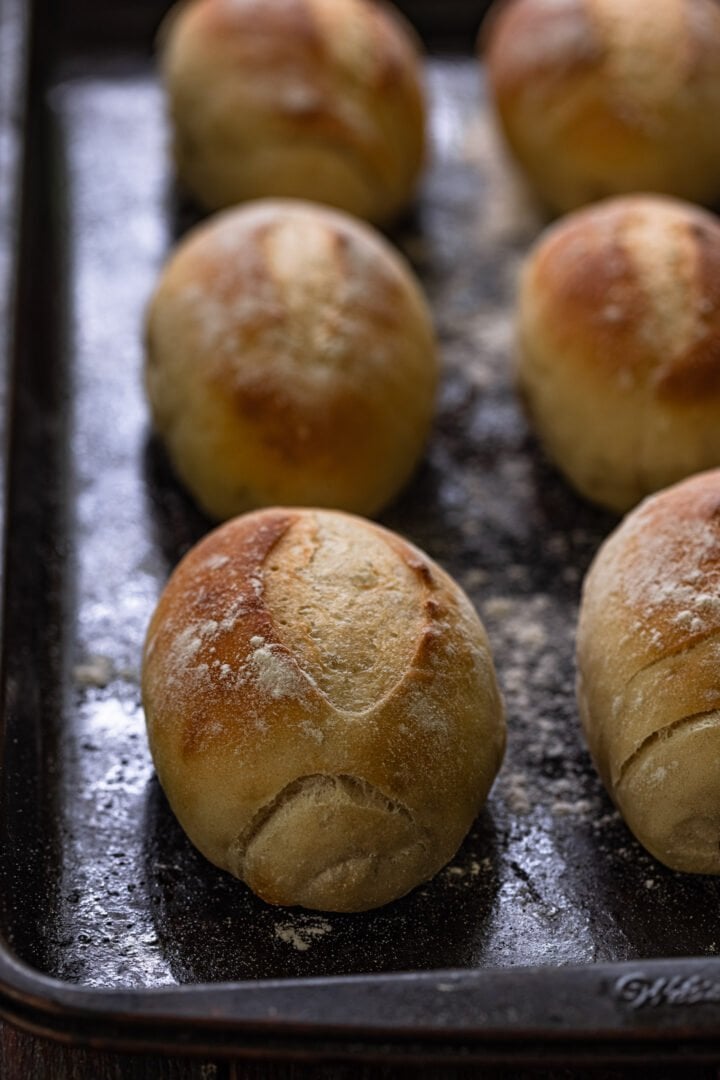
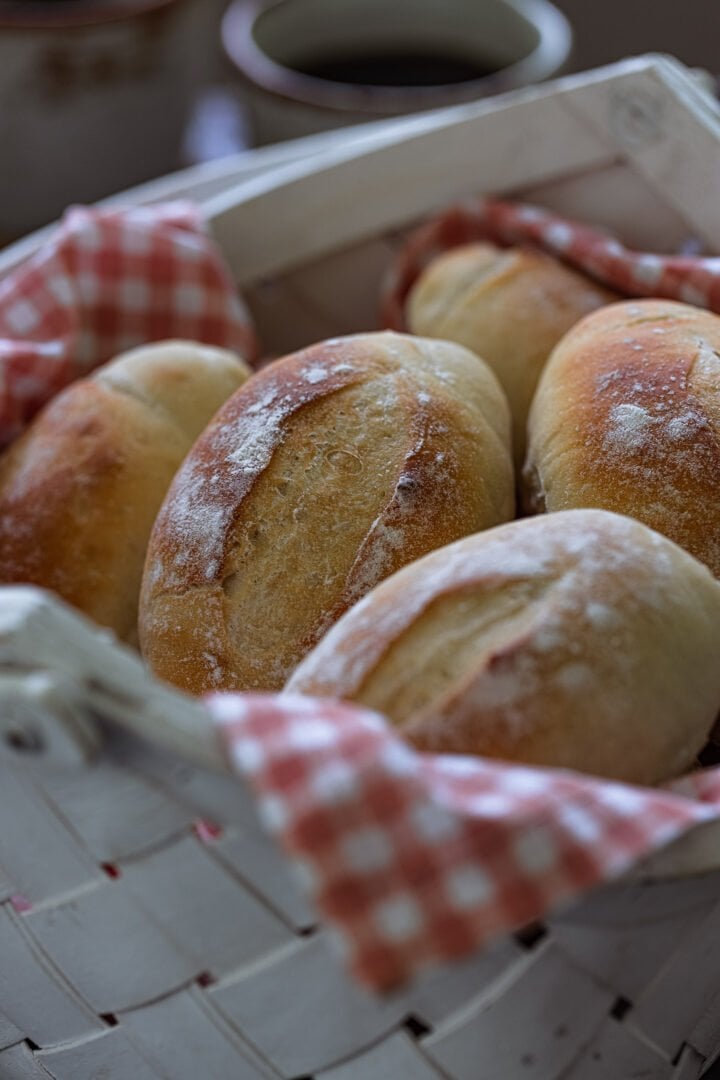
But, it is here! And they are perfect, crispy on the outside and soft on the inside, just like the ones they sell at the padaria.
And they best part? They are homemade! ♥️
What is Pão Francês?
Pão Francês, also known as pão cacetinho, pãozinho or pão de sal in Brazil, is a bread roll made of wheat flour, water, salt and yeast. These rolls are crunchy on the outside and light and pillowy on the inside.
They are popular not only in Brazil, but also in several other South American countries, such as Chile, Bolivia, Peru, Argentina and Uruguay, where they are called marraqueta or pan frances.
According to a research done in 2019 by Puratos, pão francês is consumed by 95,7% of São Paulo’s population. You won’t find a single padaria (bakery) that doesn’t sell them!
Why is it called French Bread?
Back in the 19th century, the most common bread in Brazil was dark, possibly made of rye. It wasn’t until the 20th century that the pão francês was “invented”.
According to my quick research, a little before the start of World War I, the Brazilian elite called their sons and daughters back from Europe. These teenagers/young adults came back and asked their family cooks or local bakeries to recreate the bread they used to eat in France: a cylindrical, white bread with a crispy golden crust – something like a small baguette.
The most accepted hypothesis is that these cooks/bakers then came up with what we now know as pão francês.
NOTE: Both Chile and Bolivia claim to be the inventors of pan frances and have their own theories/stories. I am sharing the Brazilian one because, well, I’m Brazilian! 😉 😉 😉
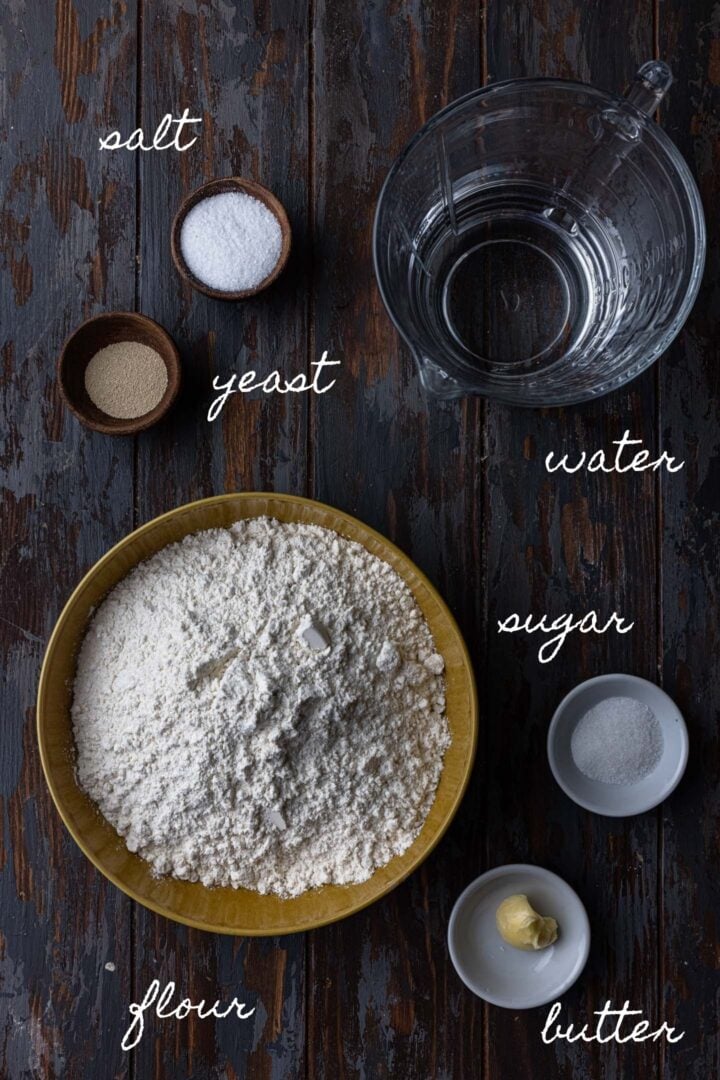
Ingredients
To make pão francês, you will need:
- Flour – The best flour to make pão francês is good quality bread flour, such as King Arthur or Bob’s Red Mill. If you don’t have bread flour on hand, you can use all-purpose, but the rolls won’t be as chewy.
- Water – It needs to be lukewarm (between 100º and 110º F or 36.5º to 40.5º C )to bloom the yeast. If you don’t own a thermometer, you can run water over your wrist. The water should feel warmer than your body temperature but not hot, or it will kill the yeast!
- Yeast – I prefer to use active dry yeast. Blooming gives me the assurance that the yeast is alive. If you prefer to use instant yeast, that is also fine, and you can skip the blooming step.
- Sugar – A little bit of sugar helps create the beautiful golden crust.
- Salt – Don’t forget the salt or your bread rolls will be quite bland!
- Butter – A little bit of fat contributes to a softer crumb and also flavor! Some bakers use lard instead. You can also use olive oil if you prefer.
OPTIONAL
- Sourdough Starter – It acts more as a flavor enhancer than as a leavener, as we won’t proof the dough for as long as it’d take for it to work with just the sourdough starter.
How to make Pão Francês
So I imagine you are anxious to know if making pão francês is hard. No, it is not! But it is not quick by any means as – like many other bread recipes – you will have to proof it twice! It also will get better and better the more you make it.
It took me a long time tweaking the recipe to find the perfect temperature for my oven. As ovens change, it might take you a couple attempts to get it just right for you!
Don’t give up! It is totally worth it and once you have it just right, this is a bread recipe you will want to make over and over again.
Recommended tools and equipment: scale, stand mixer, proofing container, bench scraper, baking sheet, parchment paper, bread lame.
Here’s how I make this pão francês recipe. As always, you will find the printable (and more complete) version of the recipe at the end of this post!
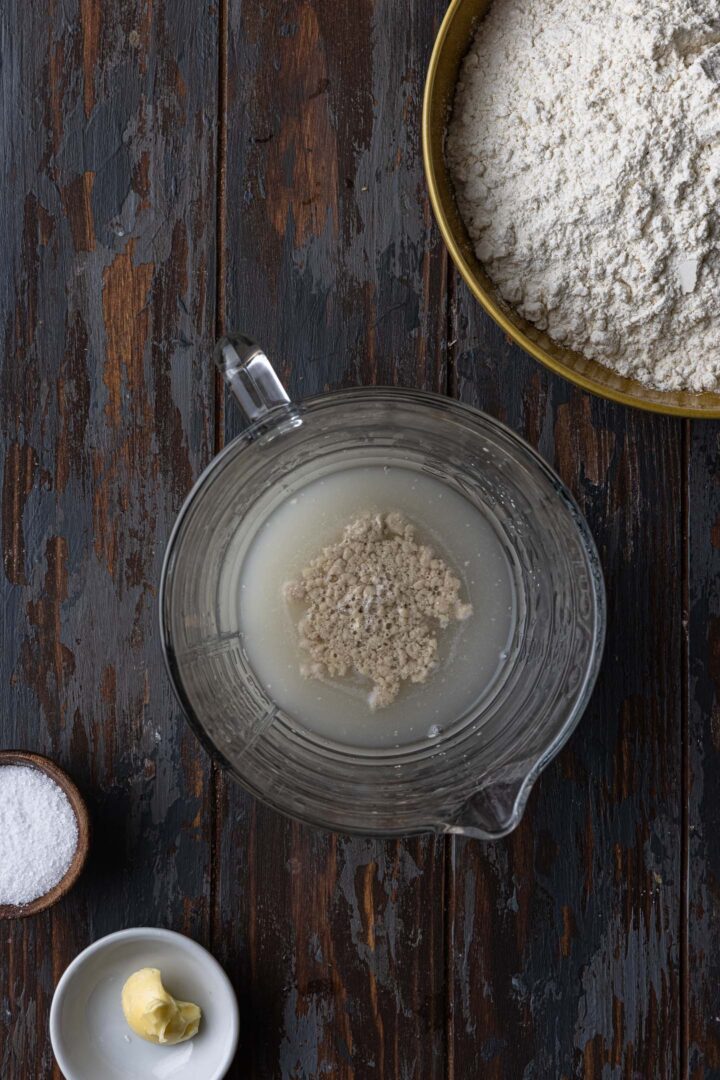
Step 1: Bloom the yeast.
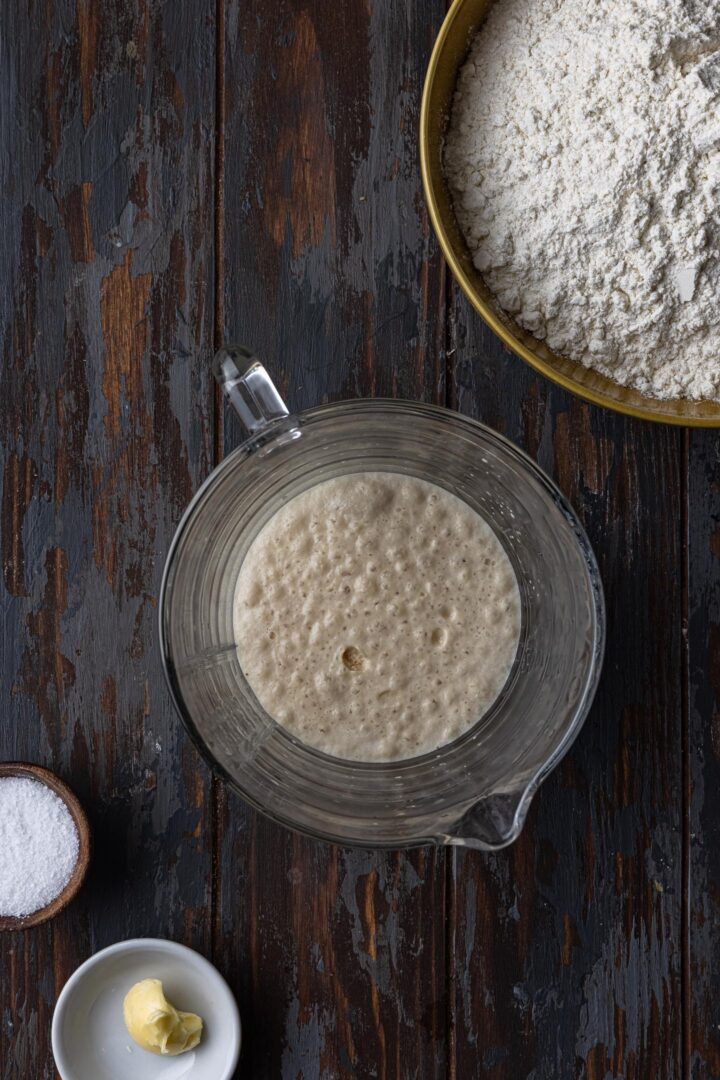
- Combine the lukewarm water, yeast and sugar. Cover and let it proof for 5 to 10 minutes, or until foamy.
- If you prefer to use instant yeast, you can skip this step. But make sure your yeast is fresh!

Step 2: Mix and Proof the Dough.
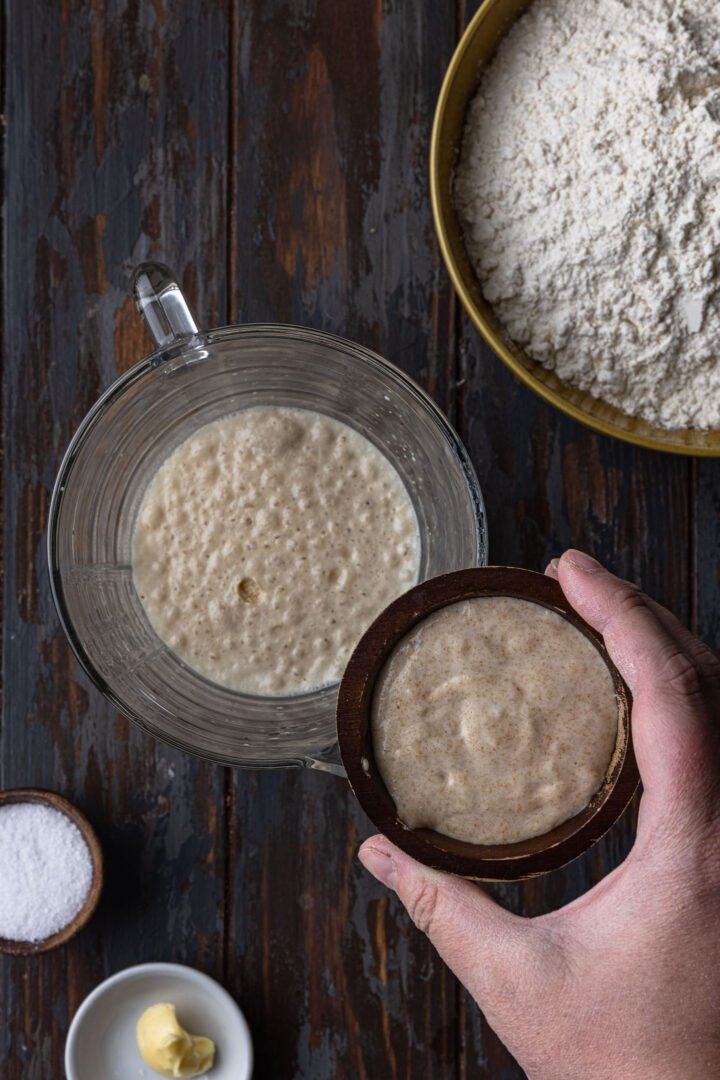
- If using, mix the sourdough starter into the yeast mixture. Reserve.
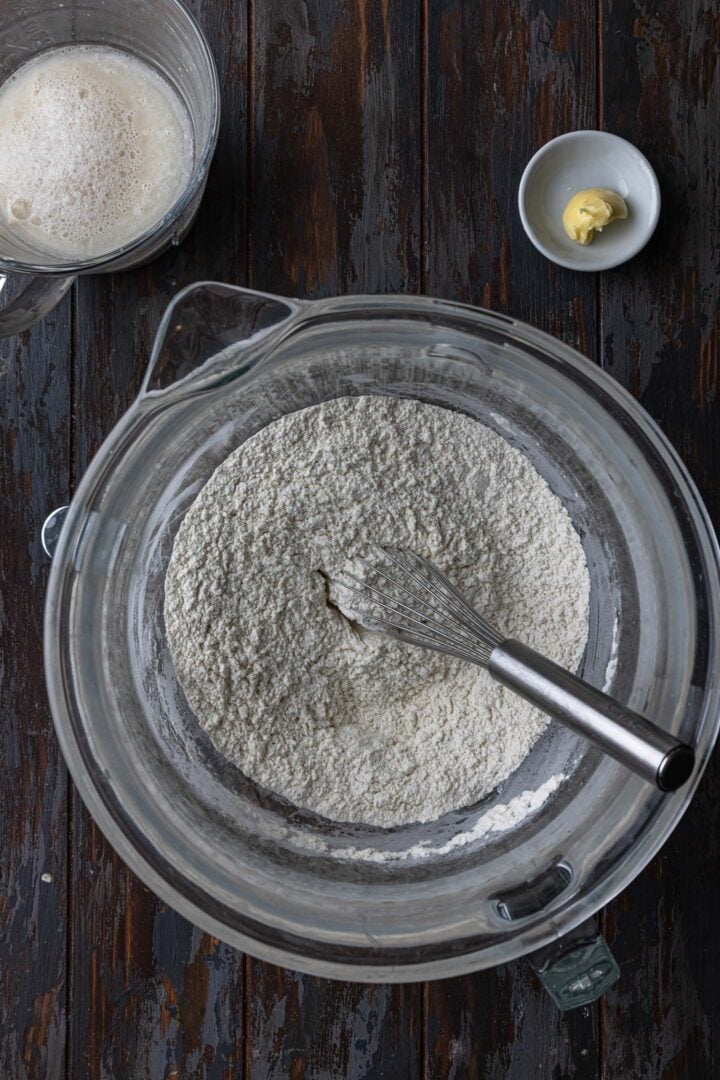
- In the bowl of a stand mixer, whisk together the flour and salt.
- With the mixer running on low, pour the yeast mixture and add the softened butter. Mix until it starts to resemble dough.
- Turn the mixer up to medium-high and knead until the dough is smooth and elastic.
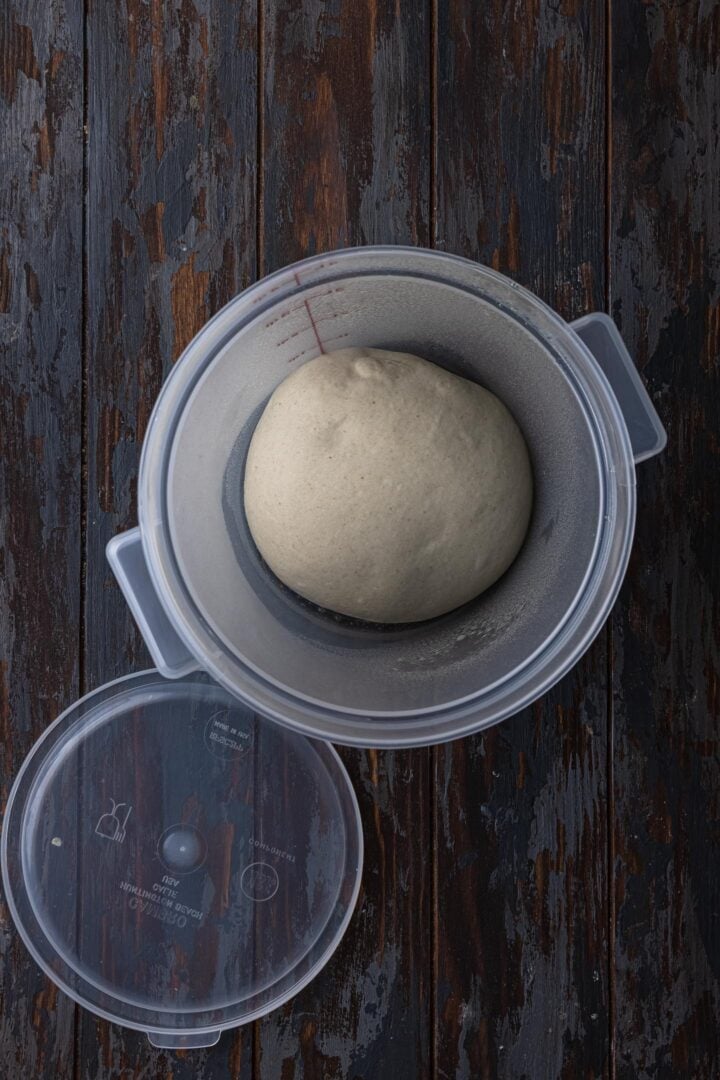
- Shape the dough into a large ball and transfer to a bowl or container greased with neutral oil or sprayed with nonstick spray.
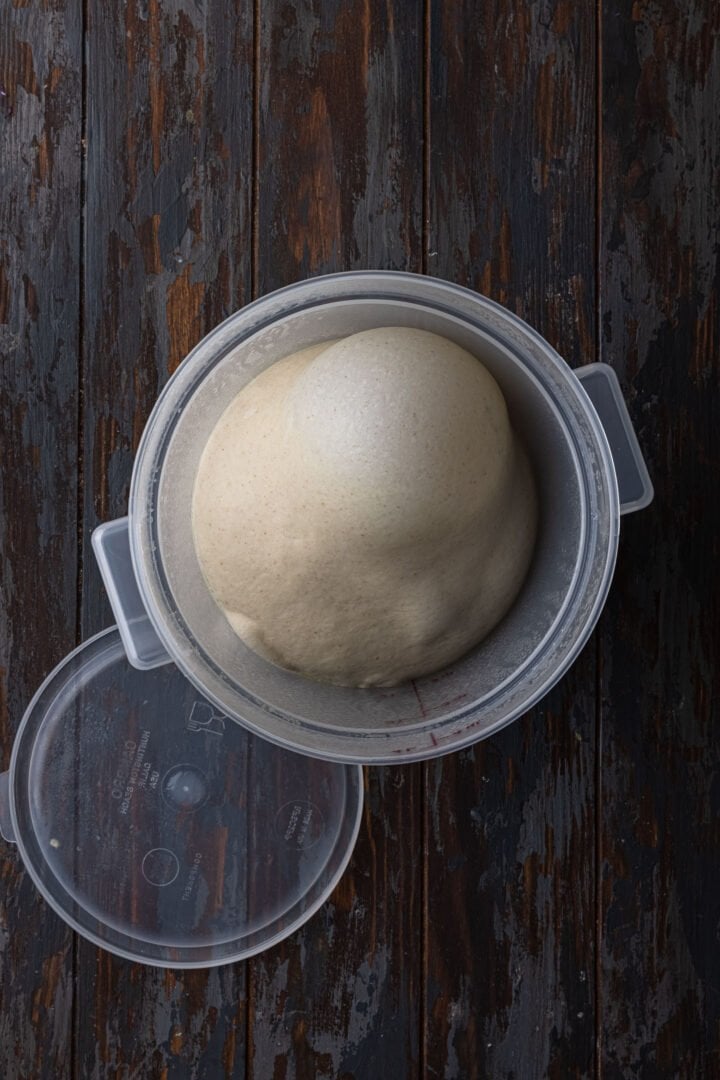
- Proof overnight in the fridge or for 1-2 hours at room temperature, until doubled in size.
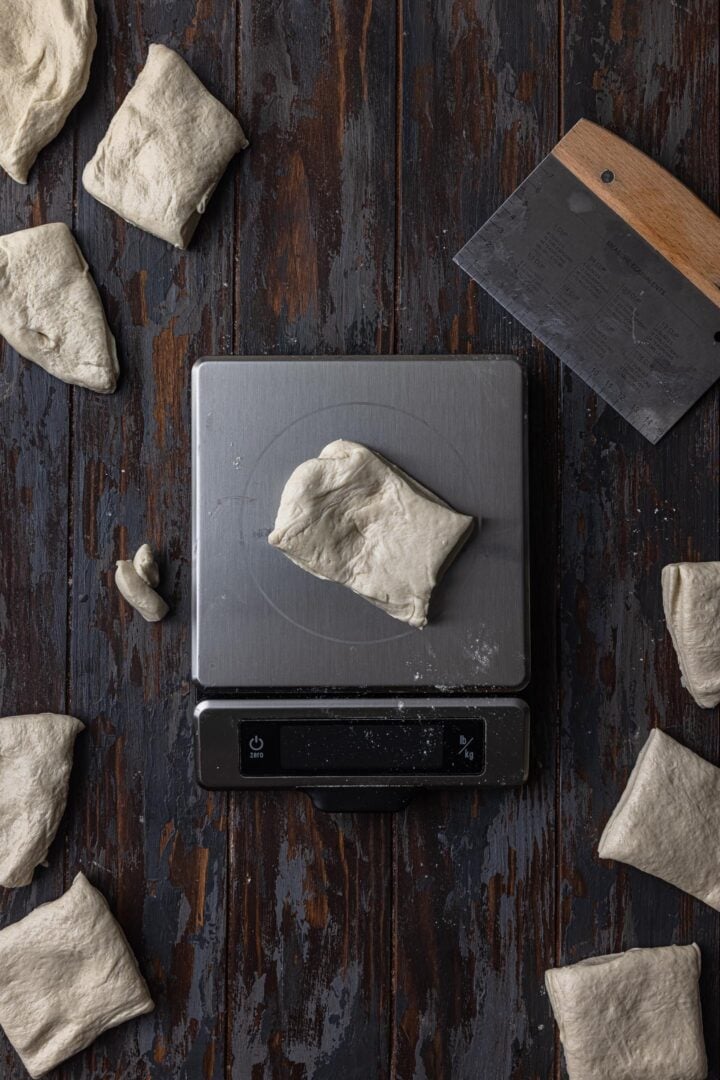
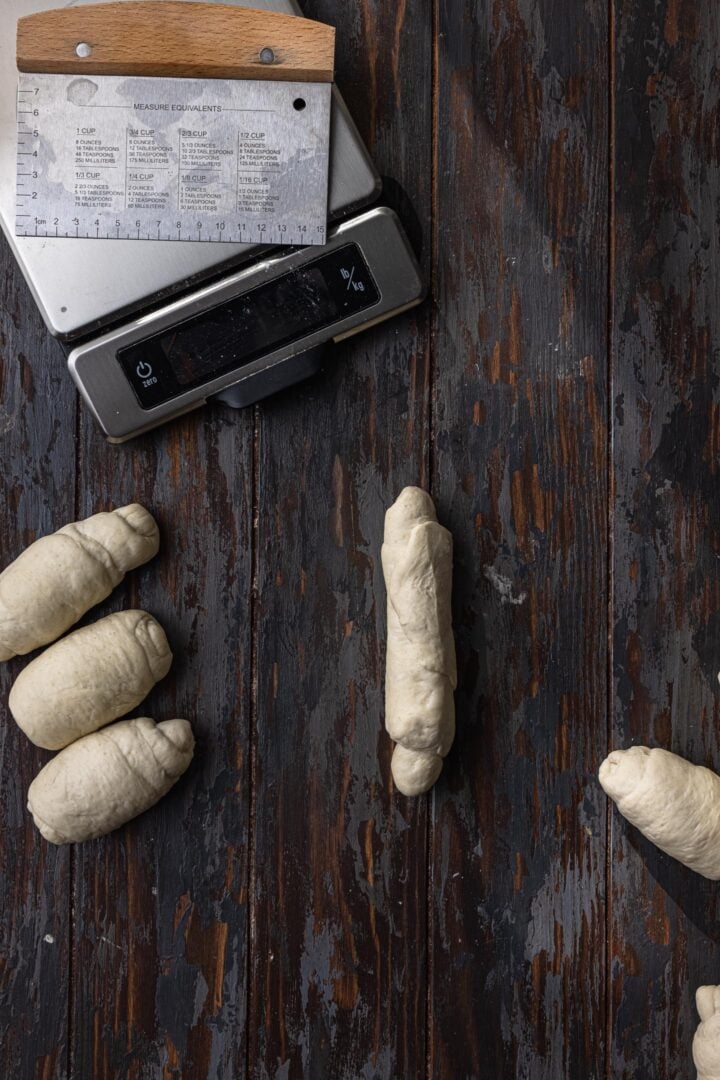
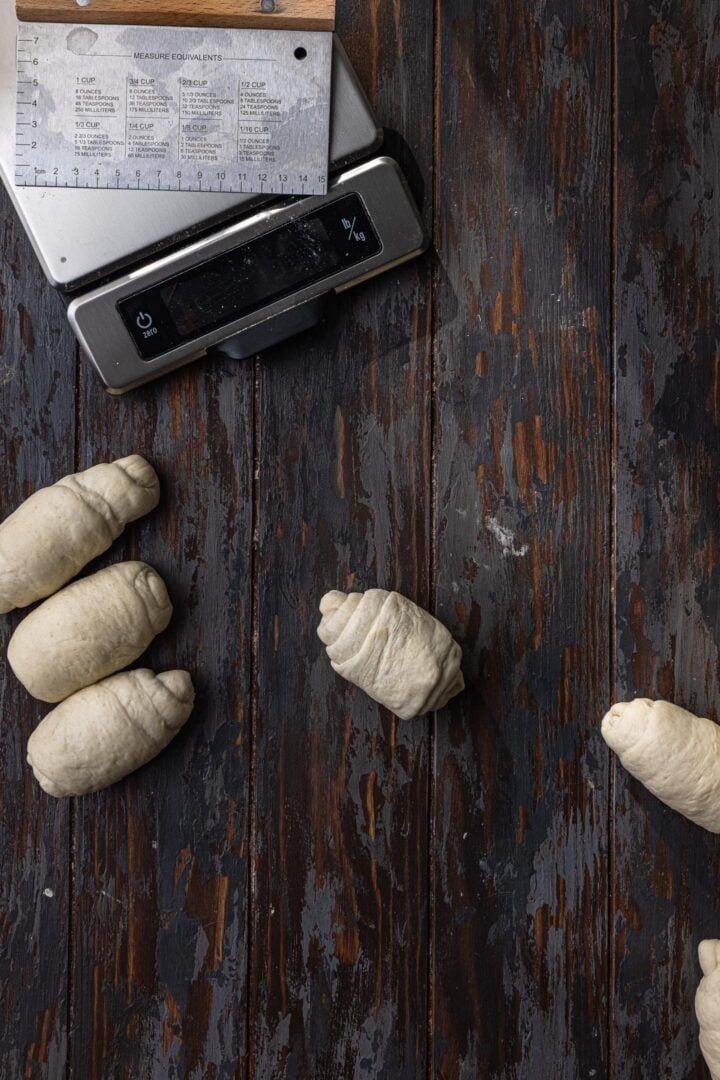
Step 3: First shaping.
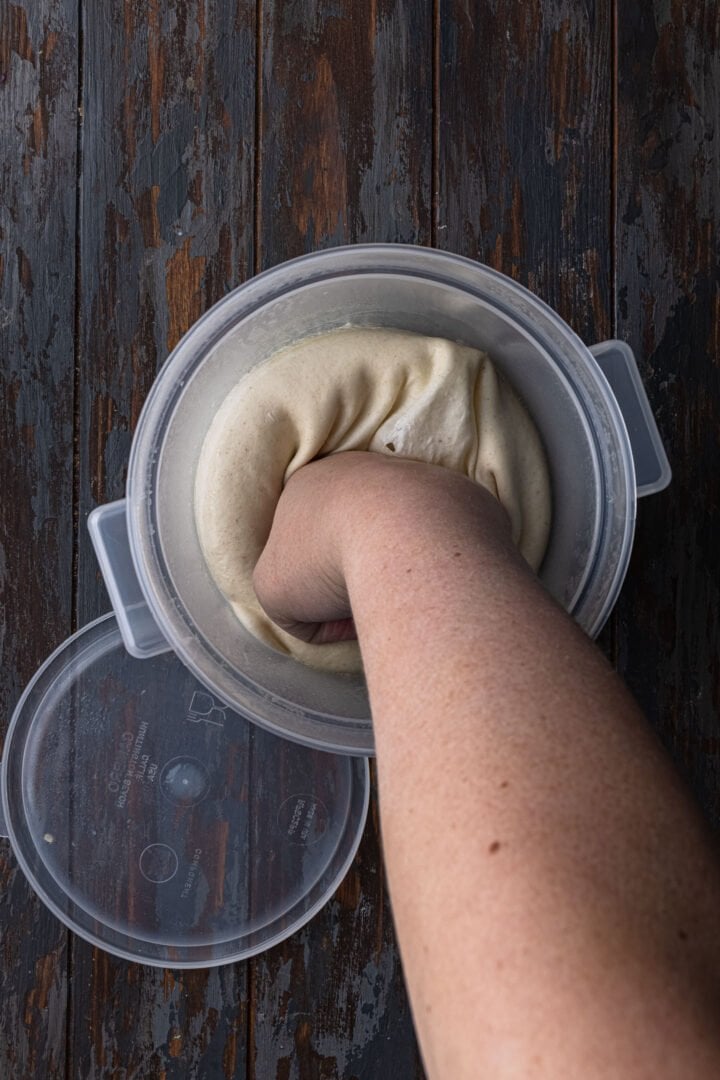
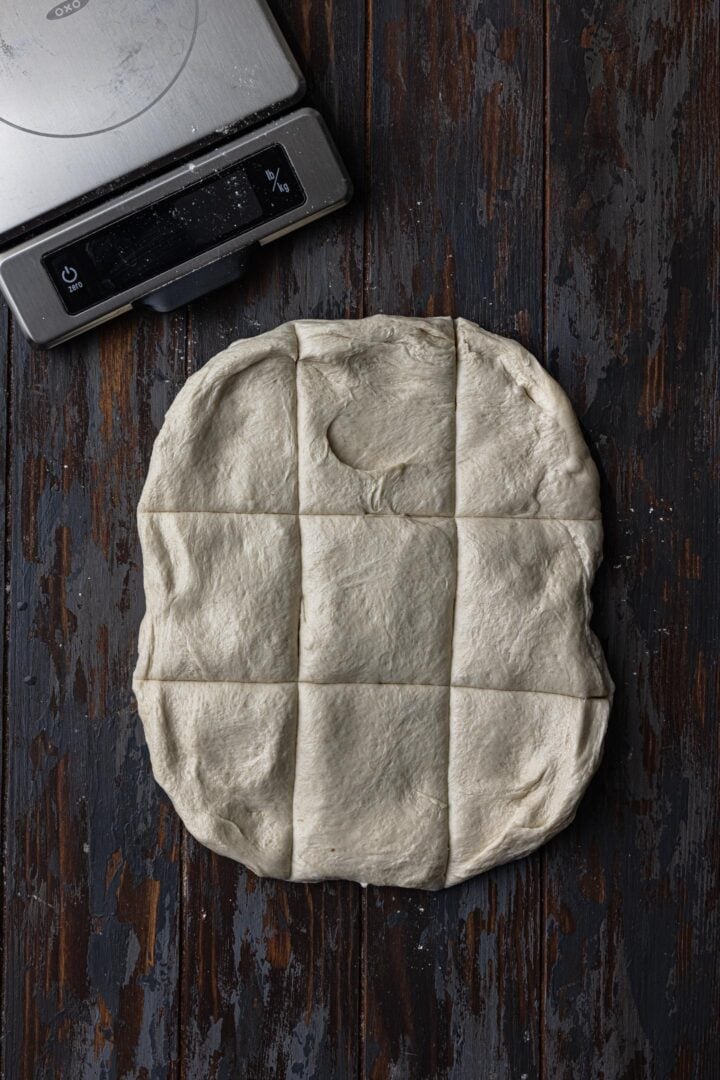
- Deflate the dough and place it on a clean surface. (No need to dust the counter with flour, as this dough shouldn’t stick!) Pat it into a large rectangle.
- Divide the dough in 9 equal pieces. I like to use a scale for accuracy, but you don’t have to! The rolls will vary between 90 to 95g each.
- Work with one piece at a time, covering the others with a towel to prevent them from drying out.
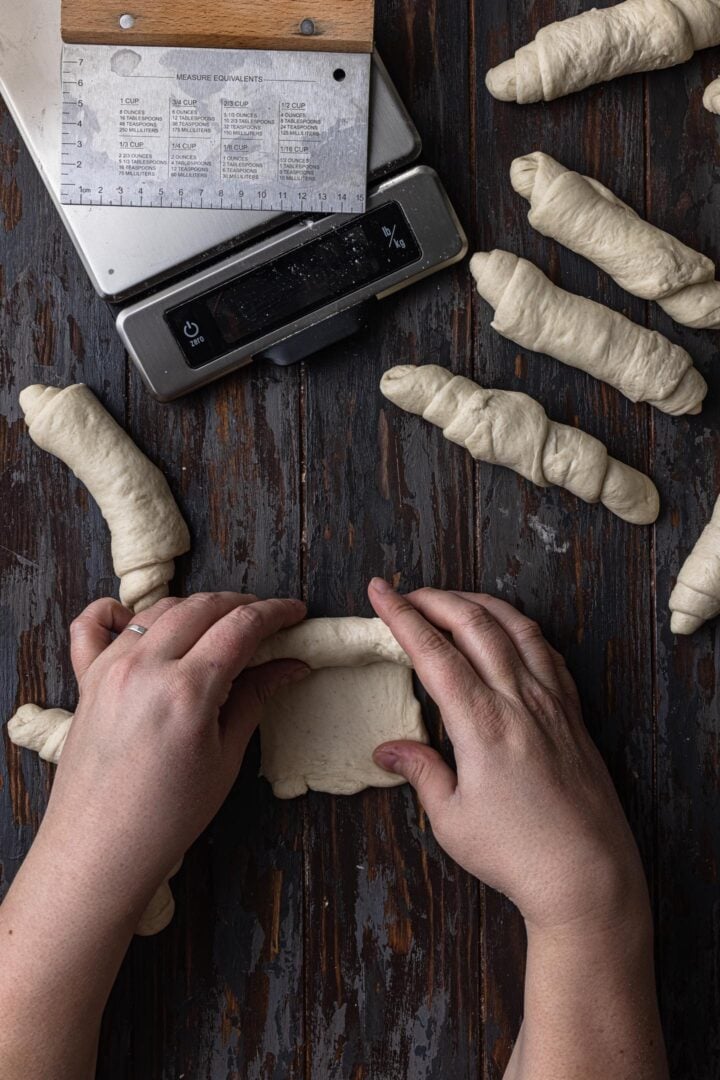
- Shape each piece with your fingers, making a small rectangle.
- Press the top (or bottom) edge to help stick it to your counter. That will create more tension and make rolling them easier!
- Roll up (or down), pulling it towards (or against) you to create more tension. Place it seam side down and cover the pieces while you work on the remaining ones.
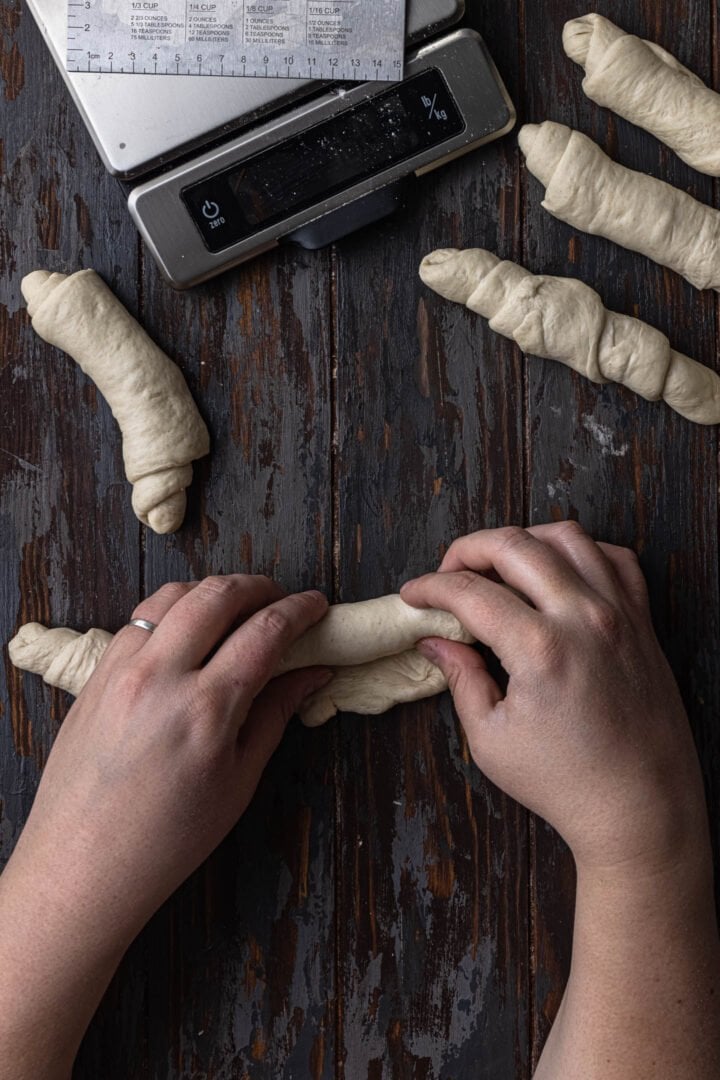
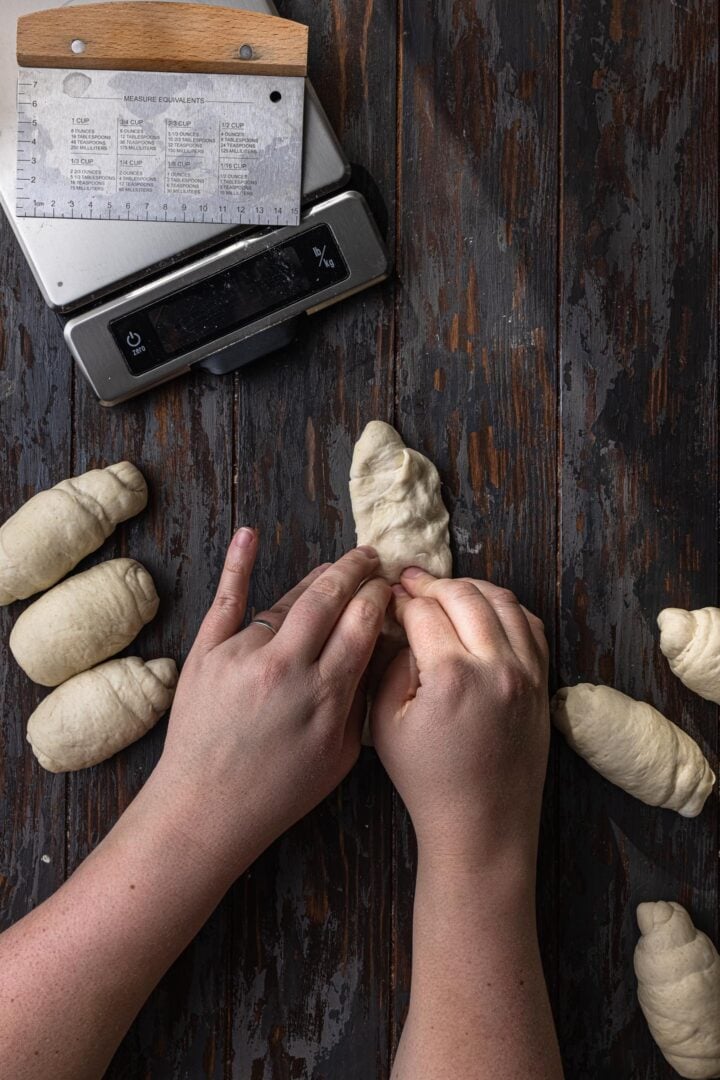
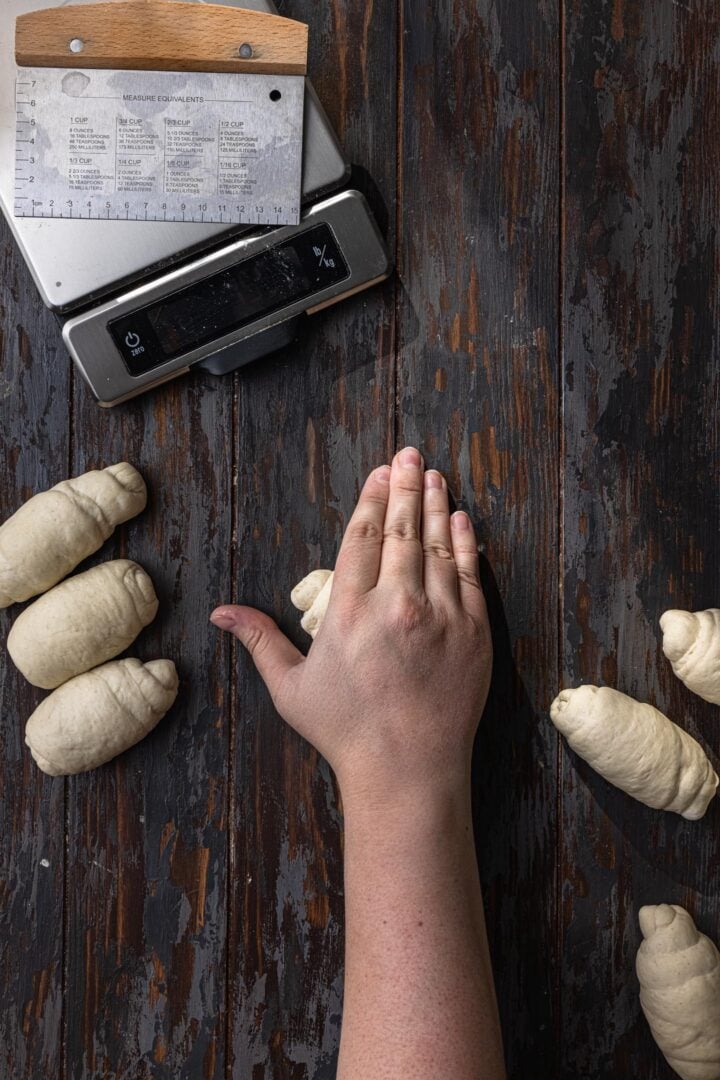
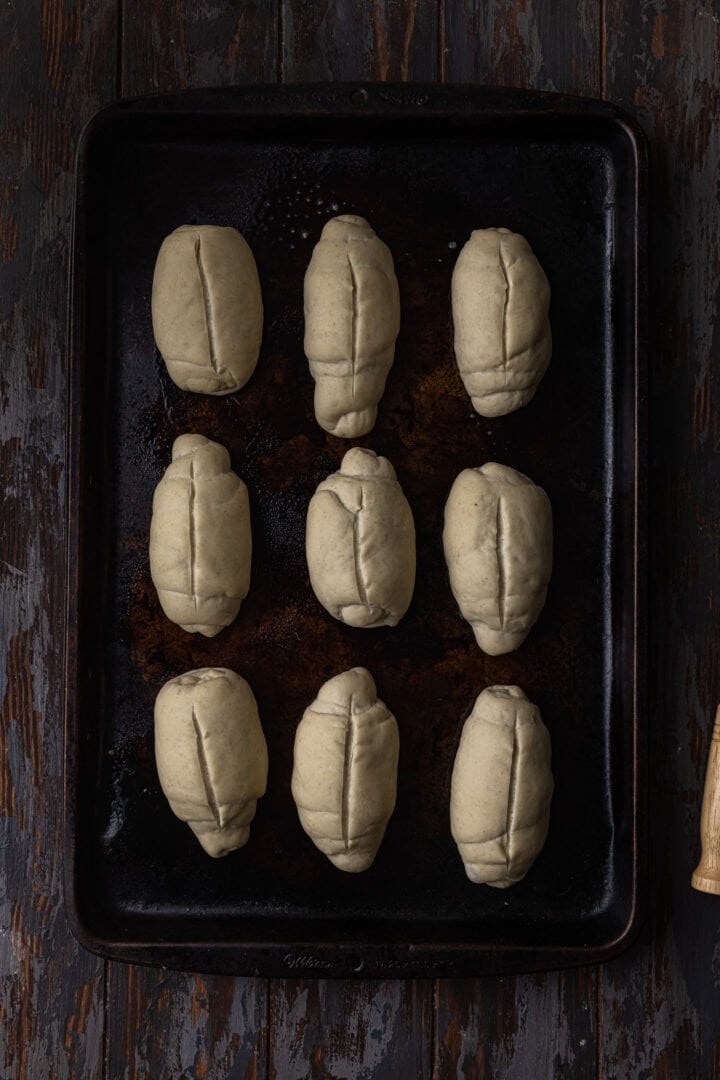
Step 4: Second shaping.
- For the second shaping, again, work with one piece at a time, keeping the others covered while you work.
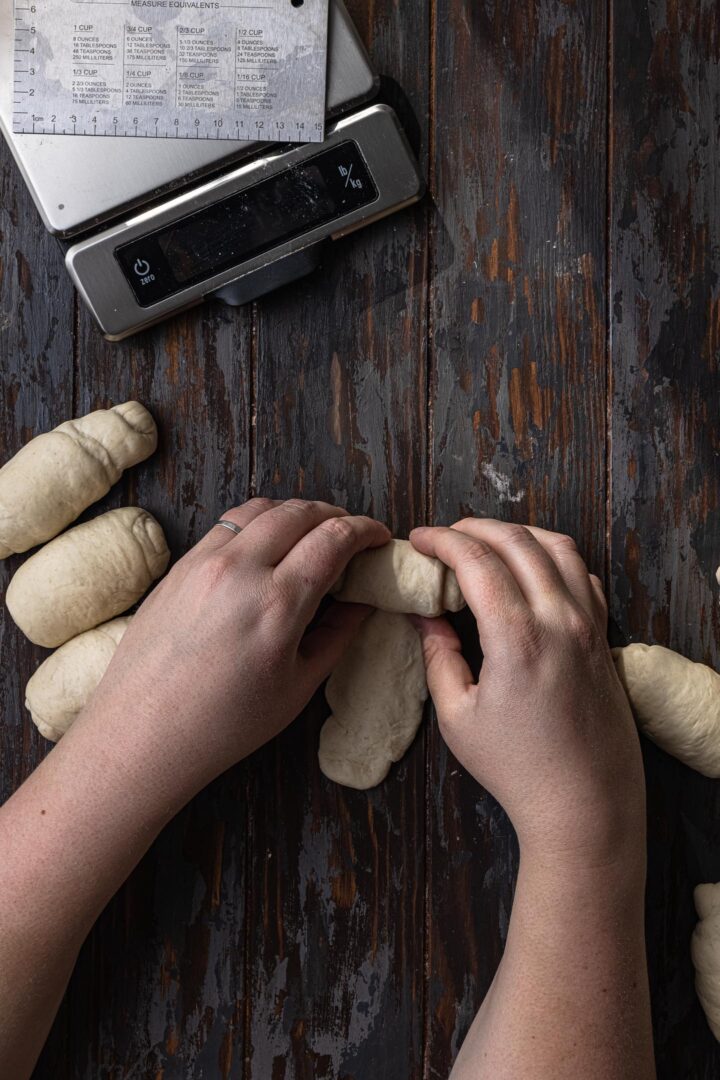
- Place the piece seam side up and, using you fingers, gently massage it to deflate it slightly. Then, roll it up (or down), pulling and tucking gently, being careful not to tear the dough.
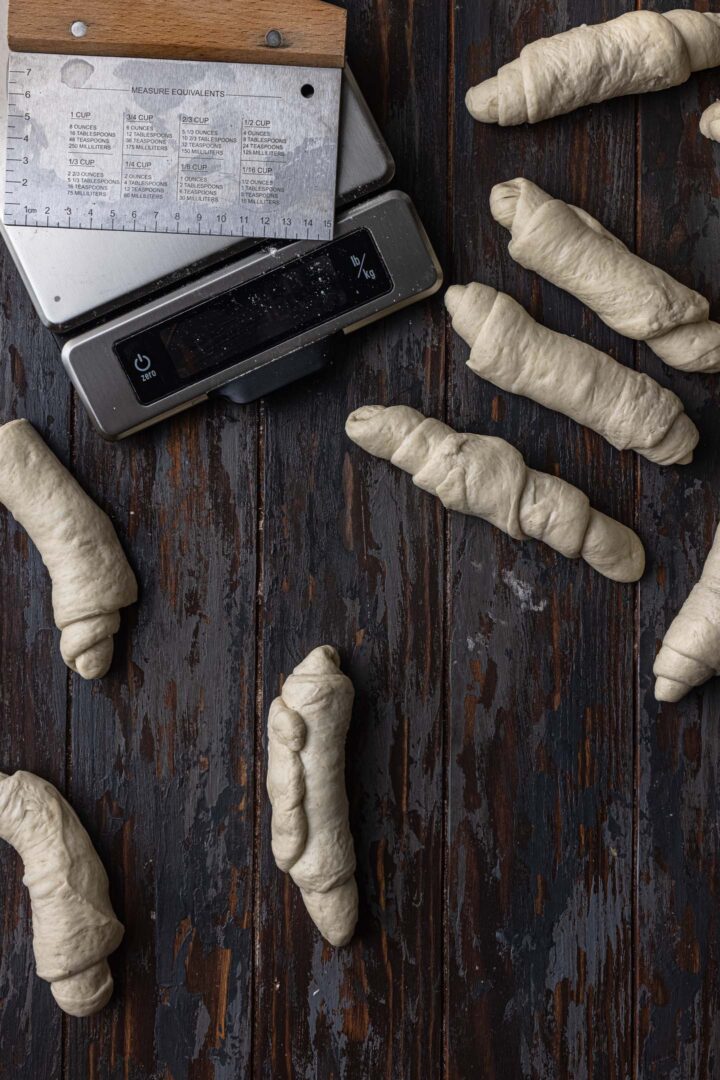
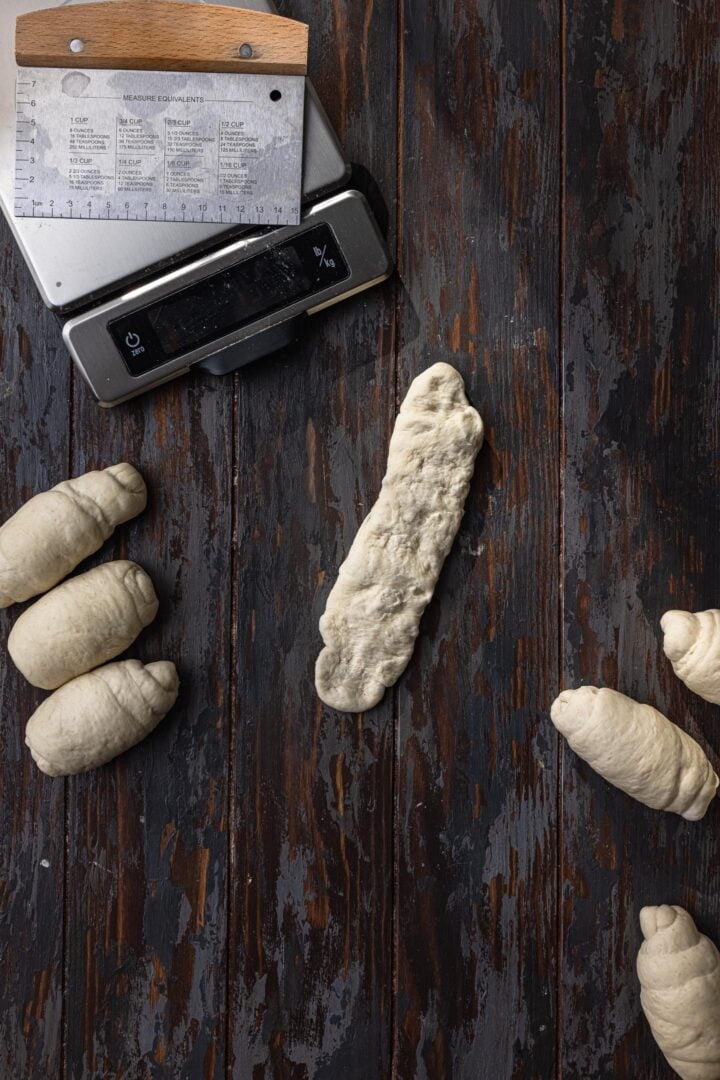
- Cover the rolls and let them rest 15 minutes.
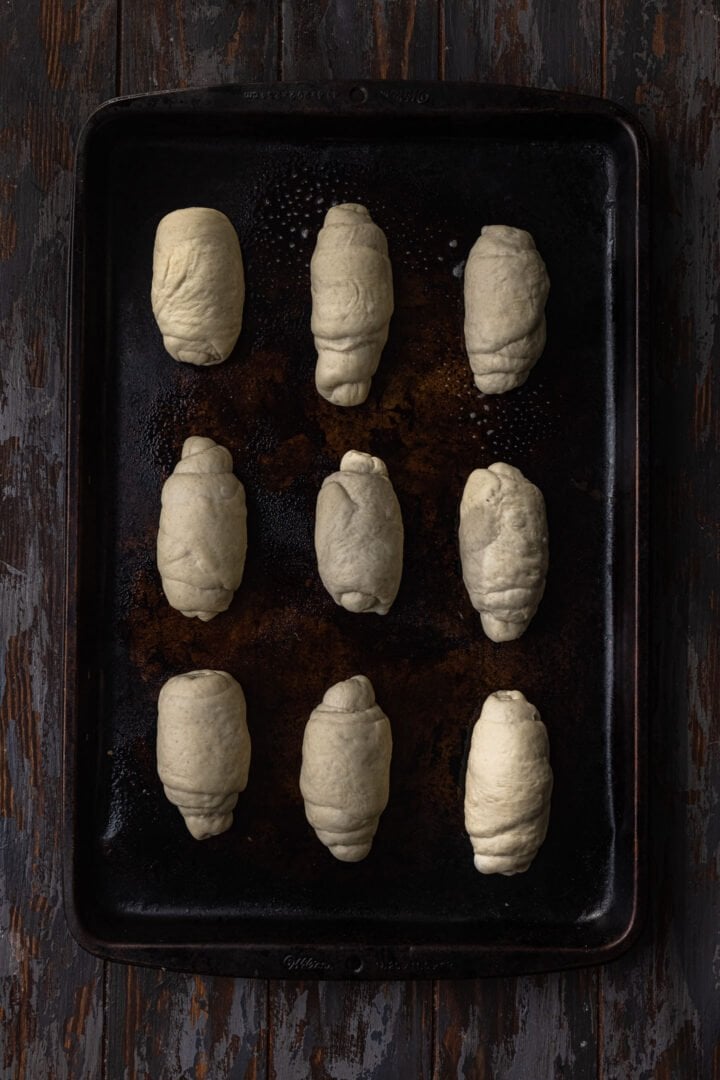
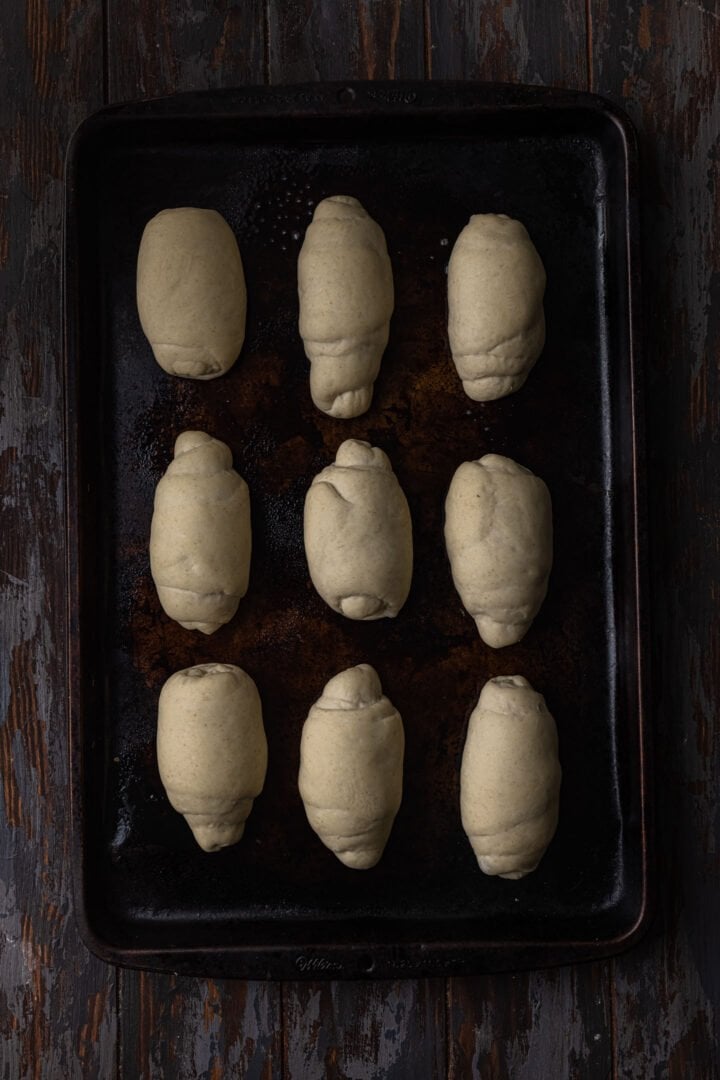
- Gently roll the rolls back and forth to elongate them, then place them on a greased (or parchment paper lined) baking sheet, leaving an inch of space between them.
- Cover and let them proof for 45 min to 1 hour, or until puffed. They don’t necessarily need to double in size.
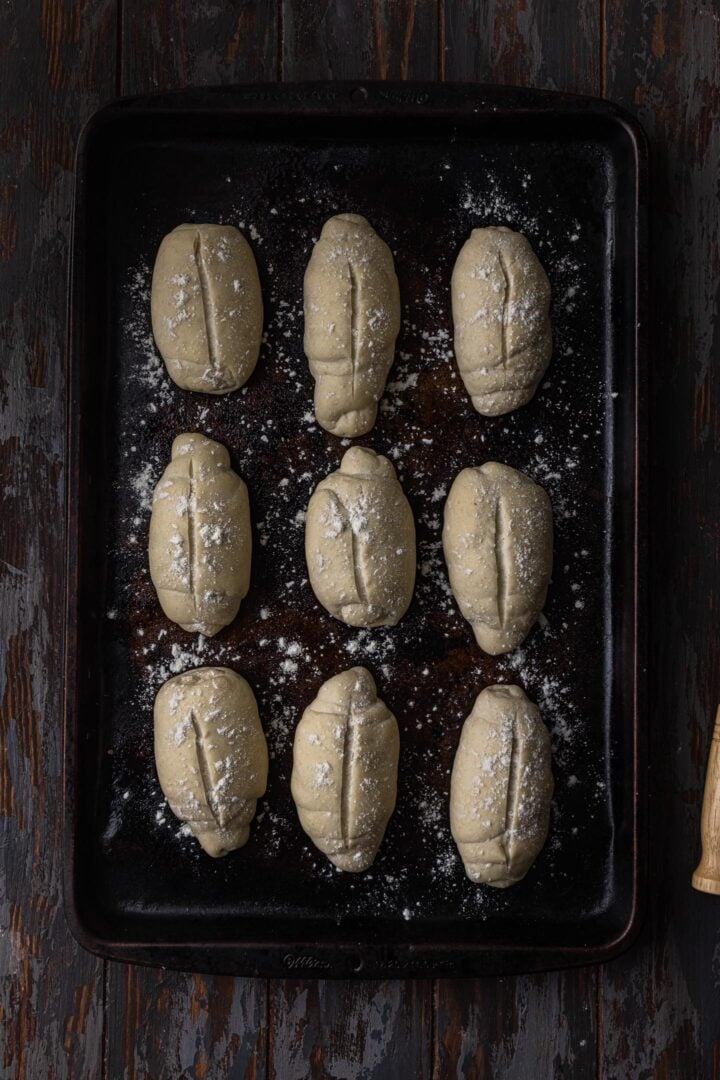
Step 5: Proof and Bake!
- Pre heat your oven to 500ºF (260ºC) for at least 30 minutes.
- Using a bread lame, razor blade or sharp knife, make a slash on top of each roll. If you’d like your rolls to have “ears”, do it at an angle!
- Optional: dust the rolls with a little bit of flour for an artisanal look.
- Cover the baking sheet with foil. I recommend you spray the down side of the foil sheet with nonstick spray to prevent it from sticking to the rolls.
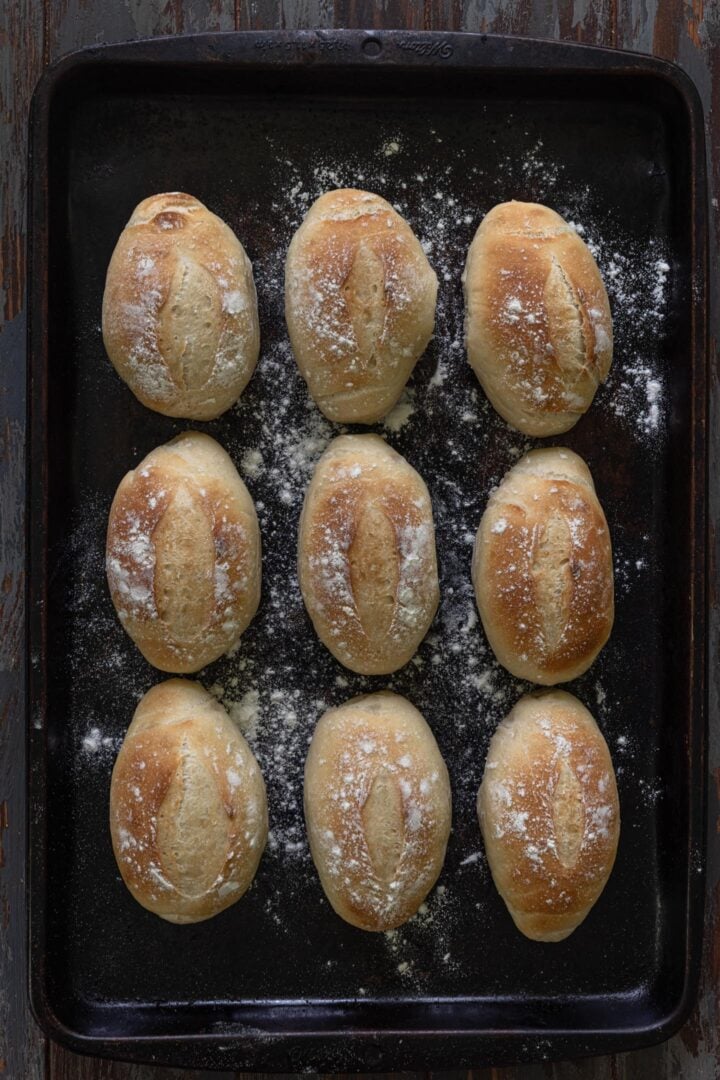
- Transfer the rolls to the oven and immediately lower the temperature to 475ºF (275ºC). Bake for 10 minutes.
- Remove the foil and lower the temperature to 450ºF (230ºC). Continue baking for another 10 – 15 minutes, or until golden brown.
Olivia’s Tips
- Please use metric measurements if possible, for accuracy. I will provide volume measurements, but using a scale is recommended.
- While I prefer using a stand mixer, you can definitely mix and knead everything by hand.
- If you can, I highly recommend proofing the dough overnight in the fridge for even better flavor!
- Bakeries bake pão francês in professional steam ovens. To recreate that without the need for spraying water or ice cubes, we cover the baking sheet with foil. As the bread rolls bake, they will release steam that will be trapped in the “chamber” created by the foil.
- Make sure that whatever tool you use to score the rolls is very sharp. You don’t want to risk deflating the dough!
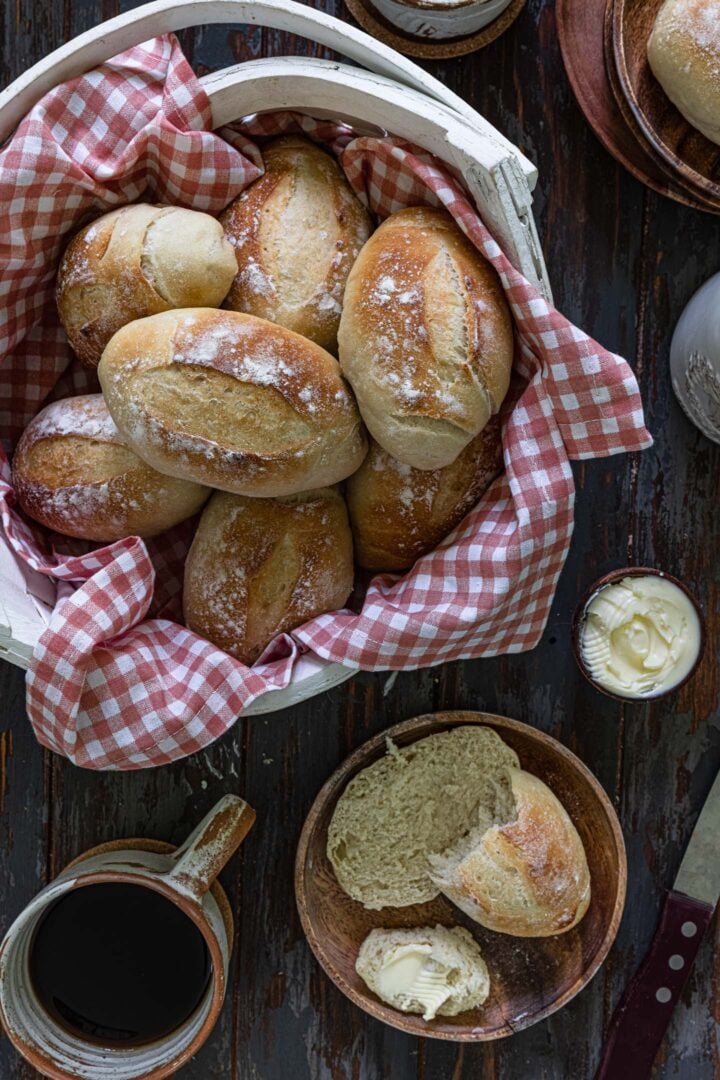
What do you eat with Brazilian rolls?
In Brazil, pão francês is eaten for breakfast – with butter or requeijão – or used for sandwiches. They are best eaten fresh, meaning the day they were baked or, at the latest, the morning after!
When not so fresh (day after, for example), they can be used to make pão na chapa. Just slice the roll each half, slather with butter and pan fry until golden! It is heaven!
And when they are getting stale, we use them to make rabanada (Brazilian French Toast), pudim de pão (bread flan) or process to make farinha de pão (breadcrumbs).
Frequently Asked Questions
These rolls keep for 3-4 days at room temperature, stored in a sealed bag or container. But they are best eaten the day they were baked!
There are a few ways to freeze Brazilian rolls. You can freeze the dough after the second shaping, before rising (up to 2 months), or after baked (up to 4-5 months).
If frozen raw, thaw overnight in the fridge. Then let it rise at room temperature before baking.
If freezing the baked bread, I would bake it until done but not quite golden yet. That way you can reheat it in the oven and get that beautiful color without risking burning it.
More Brazilian Recipes
- Pão de Queijo
- Empadinhas (Hearts of Palm Hand Pies)
- Coxinhas (Chicken Croquettes)
- Brigadeiro
- Lime Caipirinha
Pão Francês
Ingredients
- 6 grams (1 ½ teaspoons) active dry yeast
- 5 grams (1 ½ teaspoons) sugar
- 300 ml (1 ¼ cups) lukewarm water
- 50 grams (¼ cup) sourdough starter, (optional)
- 500 grams (3 ¾ cups) bread flour
- 12 grams (2 teaspoons) Kosher salt
- 6 grams (1 teaspoon) unsalted butter, softened
Equipment
- Bench Scraper
- Bread Lame
Instructions
Make the Dough
- Combine the water, yeast and sugar in a bowl. Cover with a towel and let it bloom for 5 to 10 minutes, or until foamy. Once the yeast has bloomed, stir in the sourdough starter, if using.
- Whisk the flour and salt in the bowl of a stand mixer. Place the bowl in your stand mixer, fitted with the hook attachment. With the mixer running on low, slowly pour the yeast mixture and add the butter, letting the machine combine the ingredients until a dough starts forming. Note: If you don't own a stand mixer, you can mix and knead the dough by hand.
- Increase the mixer speed to medium-high and knead for 10 to 15 minutes. The dough should be soft, smooth and elastic.
- Spray a bowl or proofing container with nonstick spray or brush lightly with a neutral oil. Roughly shape the dough into a ball and place in the bowl. Cover with plastic (or a lid) and refrigerate overnight (8 hours). Alternatively, you can proof at room temperature for 1 – 2 hours, or until doubled in size.
First Shaping
- Once the dough has doubled in size, punch it down to deflate it and place it on a clean surface.
- Use your hands to roughly pat the dough into a rectangular shape. Using a sharp bench scraper (or a knife), cut it into 9 equal parts (around 90 to 95g each). Cover all the dough pieces with a kitchen towel so they don't dry out while you work with the individual pieces.
- With your fingers, pat each piece into a rectangle, then press the top edge so it sticks to the counter. Roll from the bottom up, slightly pulling towards you so you can create some tension. Place the rolls seam side down and cover with a towel, always keeping them covered when you are working on the others.
Second Shaping
- Place a roll in front of you, seam side up, with one of the short ends facing you. Lightly pat it down, roughly creating another rectangle. Then, using your fingers, roll it up, pulling and tucking. Lightly squeeze the two ends of dough together in the center to secure them. Repeat with all the dough pieces. Let them rest for 15 minutes.
- Line a 13×18-inch rimmed baking sheets with parchment paper and lightly spray it with nonstick spray.
- Using the palm of your hands, gently roll the rolls back and forth to elongate them. Place them on the prepared baking sheet, leaving 1-inch in between so they can rise.
- Cover with a towel and let them proof for 45 minutes to 1 hour. They might not double in size, but should look puffed.
Score and Bake
- Preheat oven to 500º F (260ºC) degrees for 30 minutes.
- Once the rolls have proofed for the second time, use a bread lame (or sharp knife) to score a line lengthwise on the top. Optional: Dust the rolls with some flour for a more rustic look.
- Spray the bottom side of a sheet of foil with nonstick spray. Cover the baking sheet with the foil, sprayed side down.
- Place the baking sheet with the rolls inside the oven and turn the temperature down to 475ºF (245ºC). Bake for 10 minutes.
- Remove the foil and lower the temperature to 450ºF (230ºC). Bake for another 10 – 15 minutes, or until golden brown.
- Let the rolls cool to room temperature before serving!
Notes
- Unbaked – Freeze after the second shaping, before they rise, for up to 2 months. Then, thaw overnight in the fridge and then let them proof at room temperature until puffy. It might take a little longer than one hour because they will be cold!
- Baked – Bake the rolls as directed but remove from the oven before they get golden. Let them cool completely and then freeze in freezer bags or airtight containers for up to 4-5 months. When ready to eat, place them in the oven (350ºF) from frozen and reheat until they are beautifully golden!


