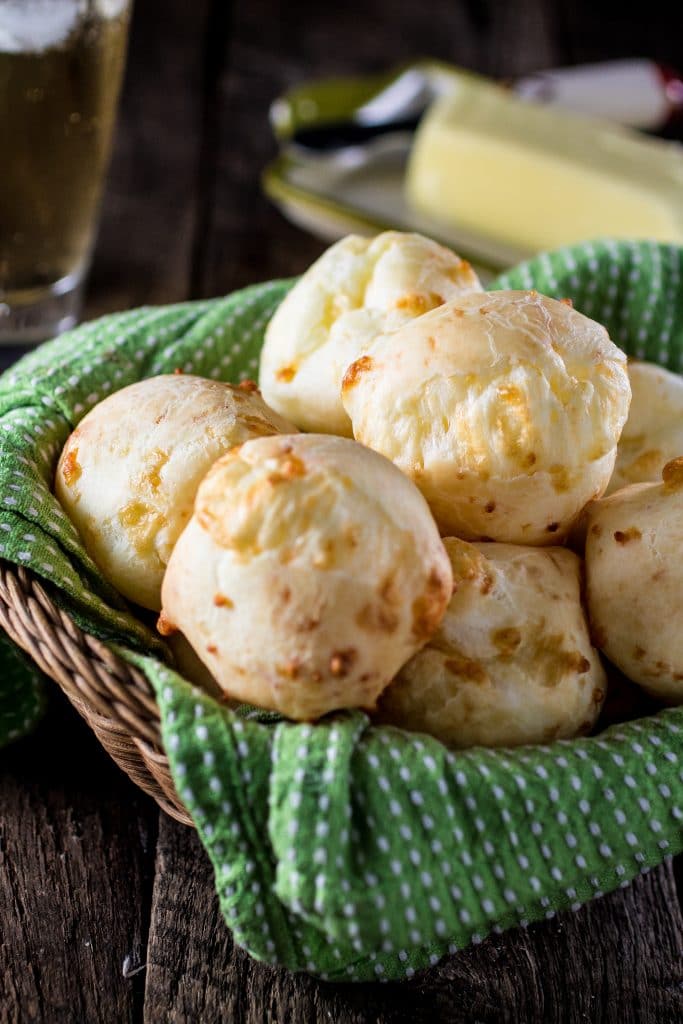
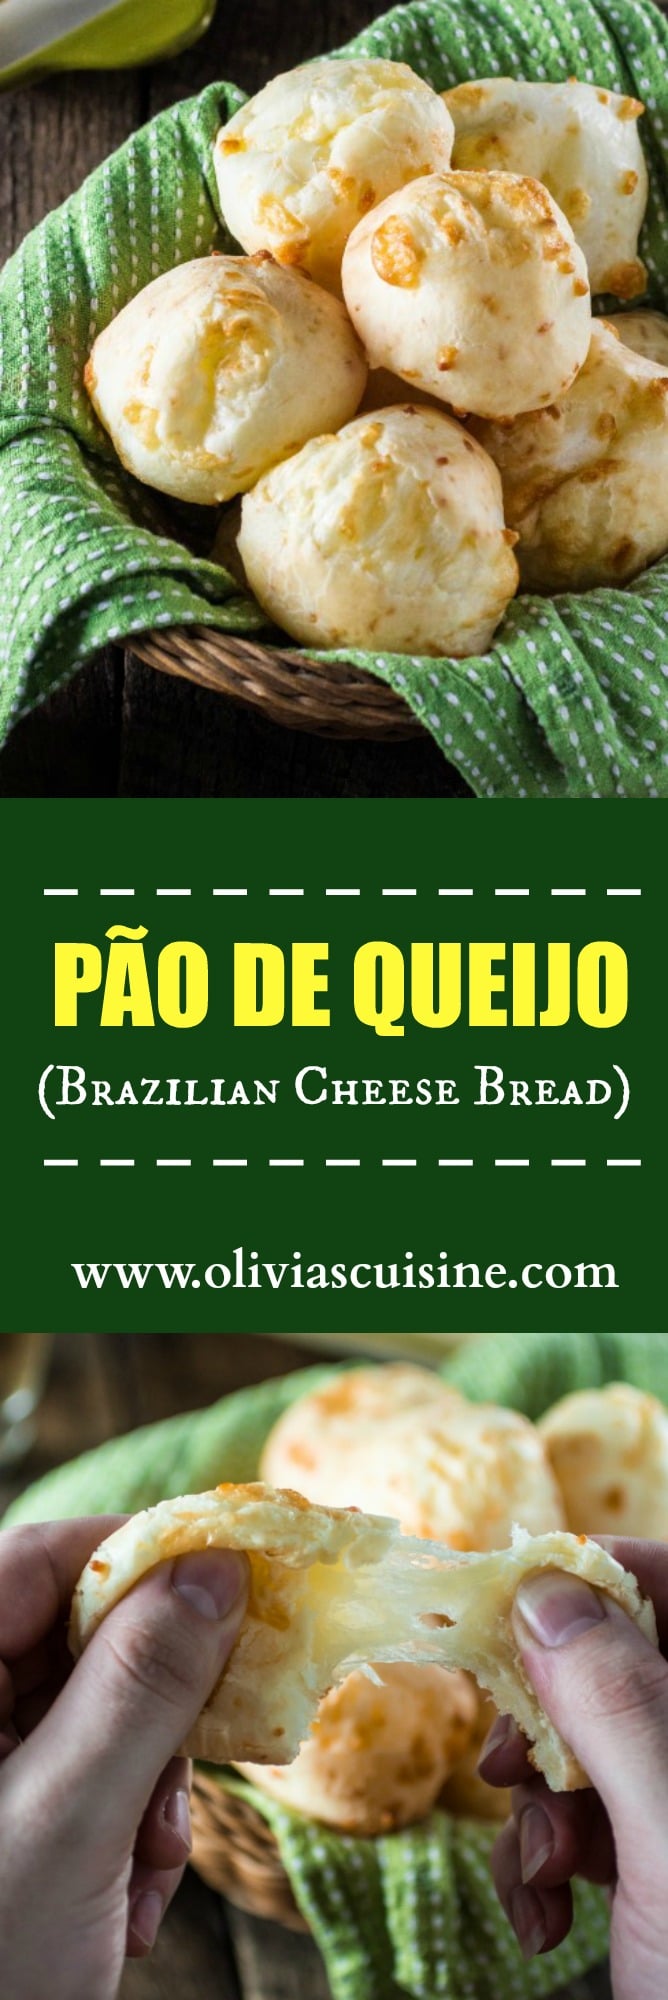
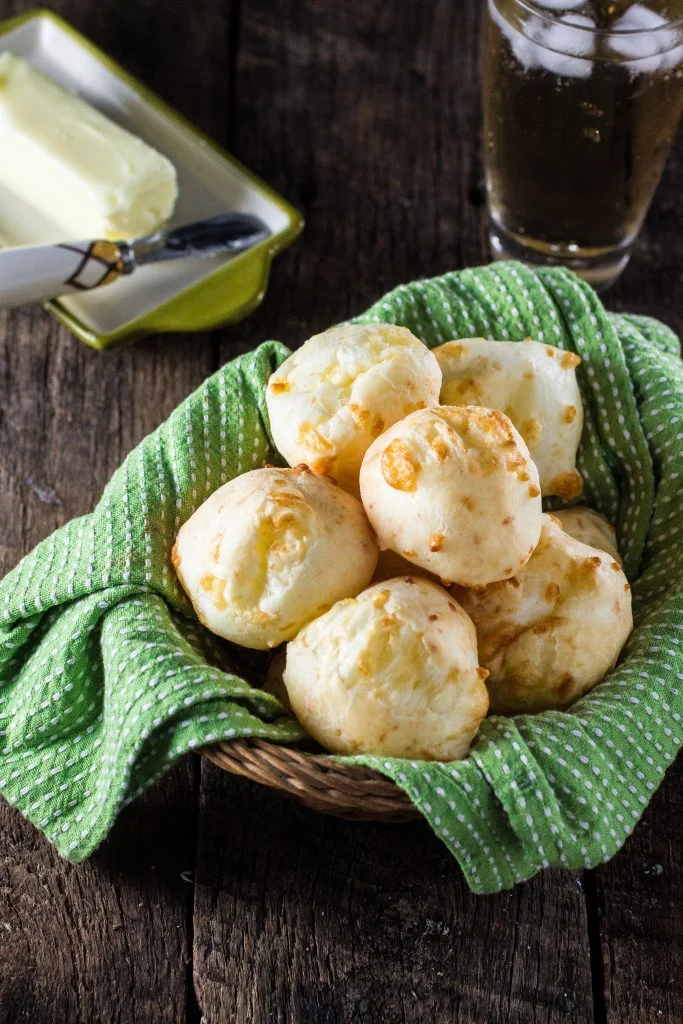
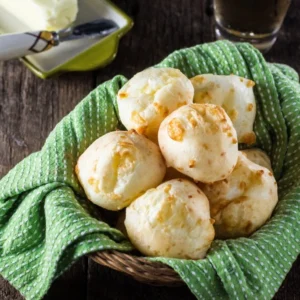
Pão de Queijo (Authentic Brazilian Cheese Bread)
If you’ve never had Pão de Queijo before, prepare to fall in love. 💛 These Brazilian cheese breads are crispy on the outside, perfectly chewy on the inside, and packed with cheesy goodness in every bite. They’re a staple in Brazil (we grow up eating them!), and once you try them fresh out of the oven, you’ll understand why. The best part? You don’t need anything fancy to make them at home.
As a Brazilian, sharing these recipes is incredibly special to me. If you’re new to Brazilian cuisine, I have tons of recipes for you to explore – from comforting classics like feijoada to sweet treats like brigadeiros and everyday favorites like arroz soltinho. It’s all the kind of food I grew up eating, made simple enough for you to recreate at home.

At a Glance
- Flavor: Cheesy, savory, with a subtle tang from the Parmesan
- Texture: Crisp and golden outside, soft, stretchy, and perfectly chewy inside
- Difficulty: Easy (just follow the steps – no kneading required!)
- Time: About 30 minutes, start to finish
- Diet: Naturally gluten-free (made with tapioca flour)
- Yield: About 20–30 cheese breads (depending on size)
- Method: Stovetop + stand mixer (to hydrate the tapioca flour properly)
- Perfect for: Breakfast, afternoon coffee, or anytime snacking ☕
What is Pão de Queijo?
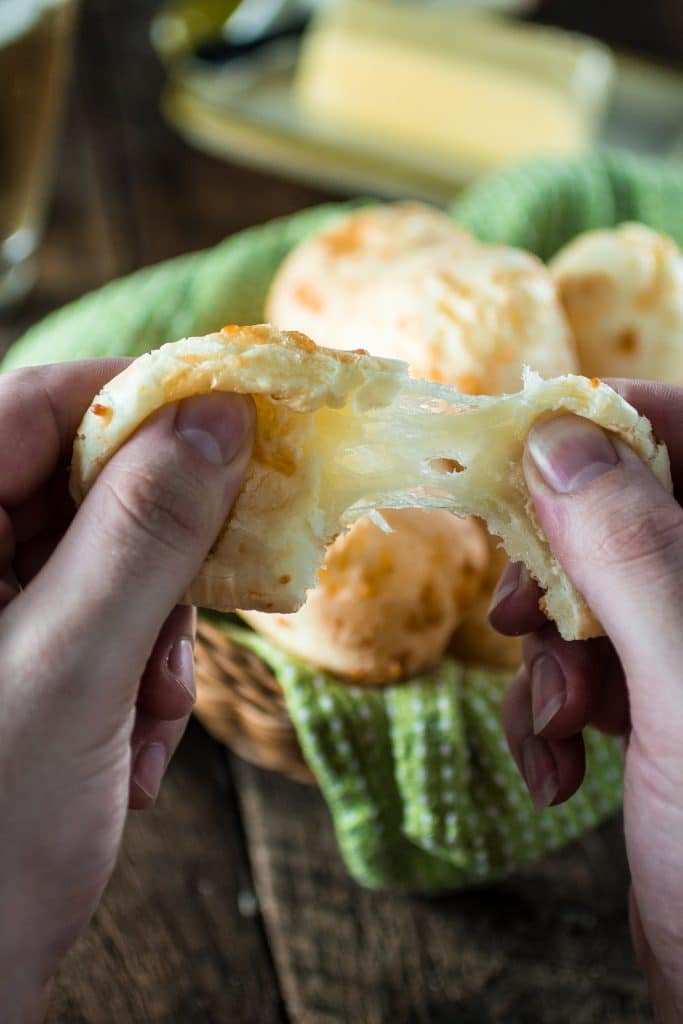
If Brazil had a signature snack, pão de queijo would be it. These little cheese breads are made with tapioca flour, which gives them that unique chewy texture you won’t find in regular bread. They puff up in the oven, forming a golden, slightly crisp exterior with a soft, stretchy center packed with cheesy flavor.
Pão de queijo originated in the state of Minas Gerais, where cooks began using cassava (the root used to make tapioca flour) centuries ago, during colonial times. Wheat flour wasn’t widely available, so they got creative – and pão de queijo was born. The addition of cheese came later, once dairy production became more common in the region, turning it into the version we know and love today.
In Brazil, pão de queijo is everywhere. You’ll find it at bakeries, cafés, grocery stores, and just about every home kitchen. It’s a staple for breakfast or café da tarde (afternoon coffee), always served warm – and usually eaten faster than you can make the next batch.
Ingredients
To make authentic Pão de Queijo, you will need:
- Tapioca flour – Also known as tapioca starch, this is what gives pão de queijo its signature chewy texture. It’s naturally gluten-free and not interchangeable with other flours – this is the star of the recipe!
- Milk – Helps hydrate the tapioca flour and creates that soft, stretchy dough.
- Oil – Adds richness and keeps the cheese breads tender. I usually use a neutral oil like vegetable or canola.
- Salt – Enhances all the flavors – especially important since the dough itself is very simple.
- Eggs – Give structure and help bind everything together. Don’t skip or substitute here!
- Parmesan cheese – Adds that classic savory, slightly tangy flavor. Use freshly grated if you can for the best taste.
- Mozzarella cheese – Brings the gooey, melty factor and helps create that irresistible stretchy center.
How to Make Pao de Queijo
Pão de queijo is one of those recipes that feels fancy, but is actually very simple once you understand the method. In Brazil, it’s traditionally made with polvilho doce (sweet tapioca starch) and polvilho azedo (sour tapioca starch), plus queijo meia cura for that classic flavor. Since those ingredients aren’t always easy to find here in the U.S., I’ve adapted this version using tapioca flour and a mix of Parmesan and mozzarella – so you still get that chewy, cheesy goodness without having to hunt down specialty ingredients.
The dough might surprise you at first – it’s soft, sticky, and nothing like traditional bread dough. That’s completely normal! The magic happens when the hot milk mixture is poured over the flour, transforming it into that signature pão de queijo texture. Trust the process, and you’ll be rewarded with perfectly golden, chewy cheese breads.
Recommended tools and equipment: stand mixer (or you can do it by hand), saucepan, baking sheet, parchment paper
Here’s how I make this Brazilian cheese bread recipe. As always, you will find the printable (and more complete) version of the recipe at the end of this post!
Step 1: Heat the liquid ingredients
- In a saucepan, combine the milk, water, oil, and salt. Bring to a boil over medium-high heat.
Tip: Make sure it actually comes to a full boil – this is key for properly hydrating the tapioca flour and getting that signature chewy texture.
Step 2: Pour over the tapioca flour
- Place the tapioca flour in the bowl of a stand mixer. Pour the hot liquid over the flour.
- Mix until combined. The mixture will look white, sticky, and a bit like fondant – this is exactly what you want!
Tip: Don’t panic if it looks unusual at this stage. Pão de queijo dough is very different from traditional bread dough.
Step 3: Add the eggs
- With the mixer running, add the eggs one at a time, mixing well after each addition. At first, it might look like the eggs won’t incorporate – but keep mixing and the dough will come together.
Step 4: Mix in the cheese
- Add the Parmesan and mozzarella a little at a time, mixing until fully incorporated. The dough should be soft and sticky. If it feels too loose, you can add a bit more tapioca flour – but go slowly, as too much can make the cheese breads dense instead of chewy.
Step 5: Shape the dough
- Preheat your oven to 400°F/200°C and line a baking sheet with parchment paper.
- Lightly wet your hands with cold water. Using a spoon or small scoop, portion the dough and roll it into balls slightly smaller than golf balls.
- Place them on the prepared baking sheet, leaving a little space between each one.
Step 6: Bake
- Bake for 15–20 minutes, or until the pão de queijo are puffed and golden.
Step 7: Serve warm
Remove from the oven and serve immediately while warm – this is when they’re at their best, with a crisp exterior and that irresistible chewy, cheesy center.
Olivia’s Tips
- Make sure the milk mixture is boiling hot: If the liquid isn’t hot enough, the tapioca flour won’t hydrate properly and the texture will be off.
- Don’t be alarmed by the dough: Pão de queijo dough is supposed to be soft, sticky, and a little unusual. It won’t look like traditional bread dough, and that’s exactly right.
- Wet your hands when shaping: This makes a huge difference. A little cold water keeps the dough from sticking and helps you roll smooth, even balls without frustration.
- If the dough is too sticky to shape, chill it briefly: If your dough feels too soft or hard to handle, you can refrigerate it for 10–15 minutes to firm up slightly. This makes shaping much easier. Just don’t leave it in the fridge too long, or it can become too stiff and harder to work with.
- Use freshly grated cheese if you can: Pre-shredded cheese contains anti-caking agents that can affect how smoothly it melts. Freshly grated will give you better flavor and that irresistible stretchy center.
- Don’t overdo the flour: If your dough feels a bit loose, you can add a little more tapioca flour – but go slowly. Too much will make the pão de queijo dense instead of soft and chewy
- Eat them warm (this is key!): Pão de queijo is at its absolute best fresh out of the oven, when the outside is crisp and the inside is soft and stretchy. If they sit too long, they’ll lose that magic – but don’t worry, they reheat beautifully!

Serving Suggestions
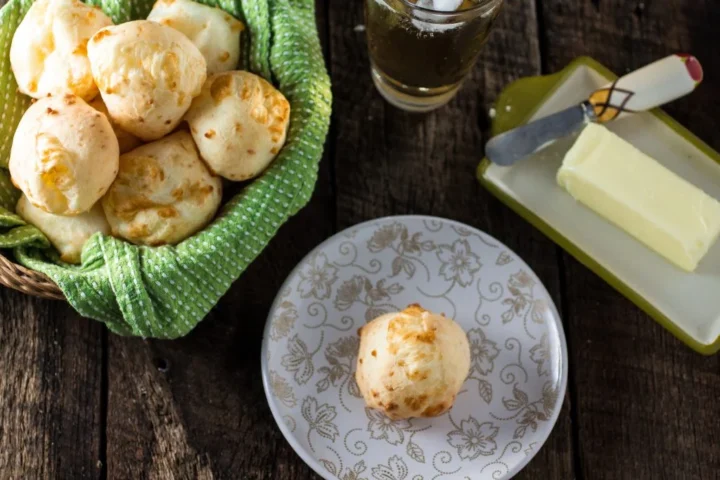
Pão de queijo is best served warm, straight from the oven, when the outside is crisp and the inside is soft and chewy. In Brazil, it’s most commonly enjoyed with a cup of coffee for breakfast or café da tarde – simple, cozy, and perfect.
For a truly Brazilian experience, try serving it with an ice-cold guaraná. The slightly sweet, fizzy soda pairs surprisingly well with the savory, cheesy bread and is a nostalgic favorite for many of us.
You can also turn pão de queijo into mini sandwiches. Slice them open and fill with cheese, ham, or your favorite spreads. One of my favorite ways to enjoy them is as Romeo and Juliet bites – little pão de queijo sandwiches filled with cheese and guava paste. It’s that perfect sweet-and-savory combination that Brazil is known for!
And if you’re feeling a little adventurous, try serving pão de queijo with dulce de leche. It might sound unusual, but that salty, cheesy bread with sweet, creamy dulce de leche? Absolutely irresistible.
Variations
One of the best things about pão de queijo is how versatile it is. While the classic version is simple and perfect as-is, there are plenty of ways to tweak it depending on what you have on hand or how you want to serve it. Here are a few ideas to get you started:
- Try different cheeses – While this recipe uses Parmesan and mozzarella for the best balance of flavor and stretch, you can experiment with other cheeses. Sharp cheddar adds a stronger flavor, while a bit of Gruyère or fontina can bring extra richness. Just keep a good balance between a flavorful cheese and a melty one.
- Make it with traditional Brazilian ingredients – If you can find them, try making pão de queijo with a mix of polvilho doce and polvilho azedo, plus queijo meia cura. This will give you a more traditional flavor and that slightly tangy note that’s classic in Brazil.
- Blender version (easier method) – If you’re looking for a quicker, more hands-off approach, I also have a blender pão de queijo recipe that uses muffin tins. You simply blend all the ingredients into a smooth batter and bake – no mixing or shaping required. The texture is slightly different (a bit more airy and less chewy), but it’s a great option when you want something easy and still delicious.
- Mini or larger pão de queijo – You can make them smaller for bite-sized snacks or slightly larger for sandwiches (or even as burger buns). Just adjust the baking time as needed – smaller ones will bake faster, while larger ones may need a few extra minutes.
- Add-ins for extra flavor – Mix in finely chopped herbs, garlic powder, or even a little cooked bacon for a fun twist.
Storage & Reheating
- Storage (short term) – Store any leftovers in an airtight container at room temperature for up to 2 days. They’re best fresh, but still delicious reheated.
- Refrigeration (if needed) – You can refrigerate them for up to 5 days, though they may lose some of their soft, chewy texture. Reheating will help bring them back!
- How to reheat – For best results, reheat in a 350°F (175°C) oven for 5–10 minutes, or until warmed through. This helps restore that crisp exterior and soft center. You can also microwave them for about 20–30 seconds, but they’ll be softer and less crisp.
Freezing (highly recommended!)
- Freeze before baking (best option)
Shape the dough into balls and place them on a baking sheet. Freeze until solid, then transfer to a freezer-safe bag or container.
When ready to bake, place them straight from the freezer into a 400°F (200°C) oven—no need to thaw! Just add a few extra minutes to the baking time. - Freeze after baking
Let the pão de queijo cool completely, then freeze in an airtight container for up to 2 months. - Reheating from frozen
Bake in a 350°F (175°C) oven until heated through and crisp again.
Frequently Asked Questions
Yes! The best way is to shape the dough into balls and freeze them unbaked. When ready to bake, place them straight from the freezer into the oven – no need to thaw. Fresh pão de queijo anytime!
That’s completely normal. Pão de queijo dough is naturally soft and sticky because of the tapioca flour. Wetting your hands with a little water makes it much easier to shape.
Yes! You can mix everything by hand using a sturdy wooden spoon. It takes a bit more effort, especially at the beginning, but it works just fine.
This usually happens if the liquid wasn’t hot enough when poured over the tapioca flour, or if too much flour was added to the dough. Make sure the milk mixture comes to a full boil and avoid over-measuring the flour.
Yes! That’s actually the traditional way to make pão de queijo. Using a mix of both gives a slightly tangier flavor and an even chewier texture.
Did you make this recipe? I love hearing from you! Please comment and leave a 5-star rating below. You can also take a photo and tag me on Instagram with #oliviascuisine.
Pão de Queijo (Authentic Brazilian Cheese Bread)
Ingredients
- 1 1/4 cups (300ml) whole milk
- 1/2 cup (120ml) water
- 1/3 cup (80 ml) neutral oil (such as vegetable or canola)
- 2 teaspoons (10g) salt
- 4 cups (500g) tapioca flour (tapioca starch)
- 2 large eggs
- 1 1/2 cups (150g) Parmesan cheese, finely grated
- 1 cup (100g) mozzarella cheese, shredded
Instructions
- Preheat oven to 400°F (200°C) with a rack in the middle. Line a baking sheet with parchment paper.
- In a saucepan, combine the milk, water, oil, and salt. Bring to a boil over medium-high heat.
- Place the tapioca flour in the bowl of a stand mixer. Once the liquid mixture reaches a full boil, pour it over the flour. Mix until combined – the texture will be sticky and slightly stretchy.
- With the mixer running, add the eggs one at a time, mixing well after each addition. The dough may look like it won’t come together at first – keep mixing until smooth.
- Add the Parmesan and mozzarella a little at a time, mixing until fully incorporated. The dough should be soft and sticky.
- The dough is supposed to be soft and sticky. However, if you're worried it's too liquidy, add some more tapioca flour. Just don't over do it or your cheese bread will be tough and not too gooey.
- Lightly wet your hands. Using a spoon or small scoop, portion the dough and roll into balls slightly smaller than golf balls. Place on the prepared baking sheet.
- Place the balls on a baking sheet covered with parchment paper and bring it to the preheat oven.
- Bake for 15–20 minutes, or until puffed and golden.
- Serve warm for the best texture – crispy outside, soft and chewy inside.
Notes
- If the dough feels too sticky to shape, refrigerate for 10–15 minutes to firm up slightly.
- Avoid adding too much extra tapioca flour, or the cheese breads may turn dense.
- For best results, use freshly grated cheese.
- Freezing instructions: For best results, freeze the dough before baking. Shape into balls, place on a baking sheet, and freeze until solid. Transfer to a freezer-safe bag and freeze for up to 2 months. Bake straight from frozen at 400°F (200°C), adding a few extra minutes to the baking time.
Nutrition